I still can't bake, my oven is still cold so I'll try to make a violin without using a mould! A self-raising violin?
Building a violin without a mould
9th of July
A Trumpet Fanfare for a new post
My latest e-bay purchase, a trumpet. Luckily you can't hear my playing - I think I need a different mouthpiece as I am more used to my cornets!
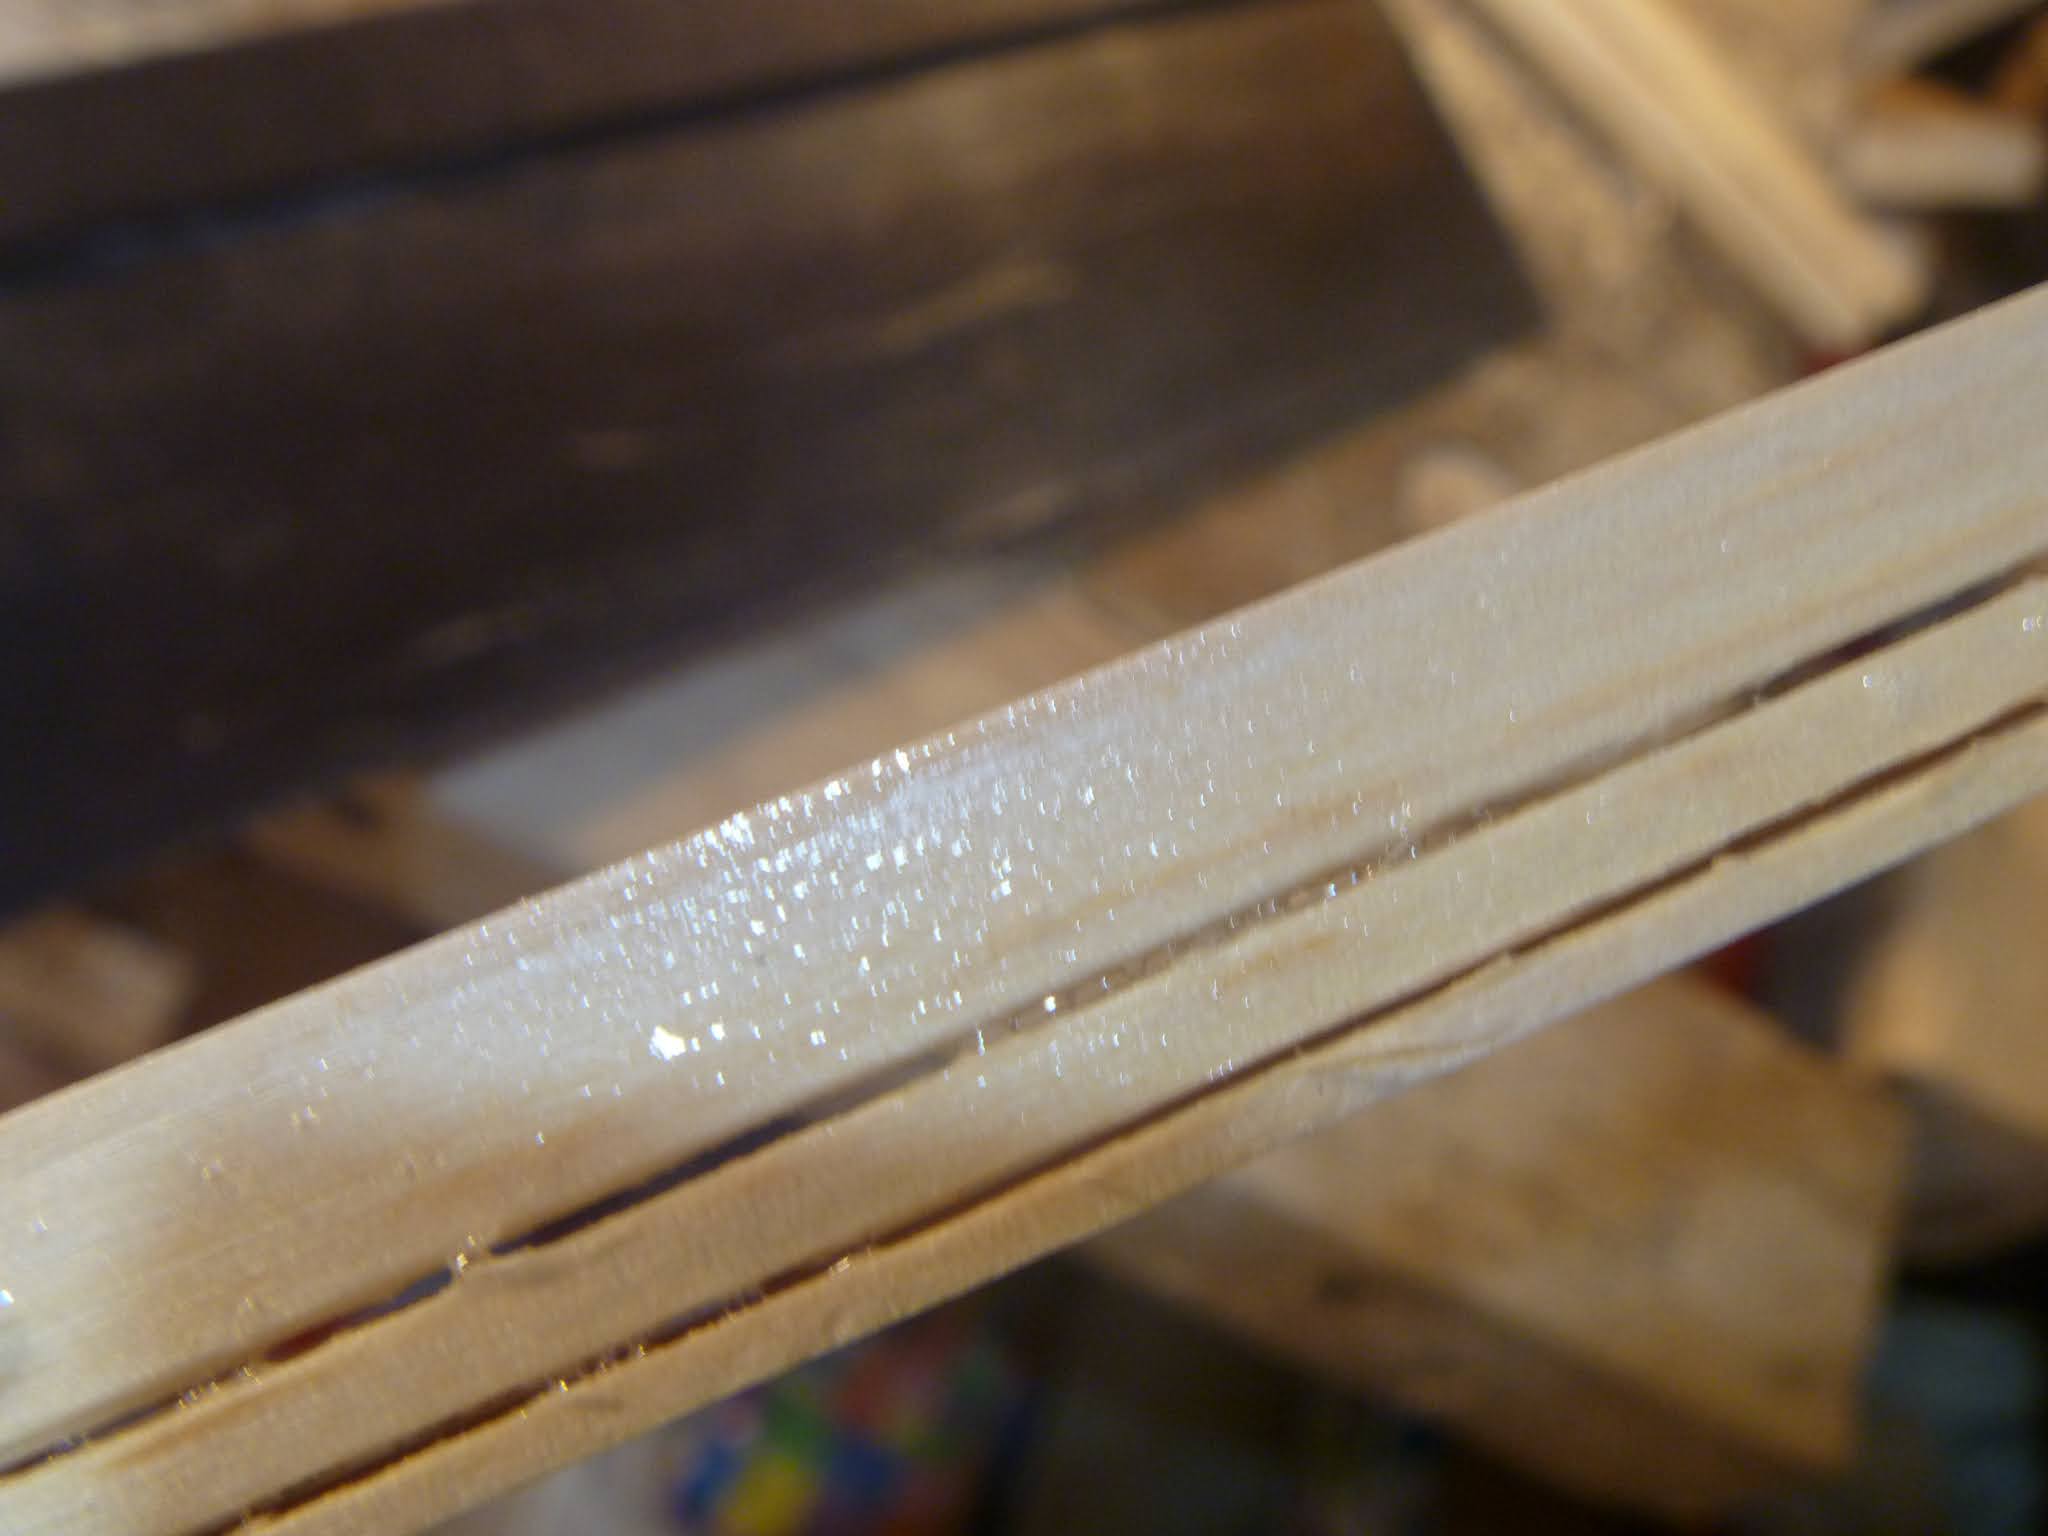
A day after the elation of getting stings on my first violin, I felt a bit deflated, I still had a lot of work to do, to clean the violin up and varnish it but my woodworking/violin cobbling routine had come to an end. I soon realised that the best cure for my melancholy was to start another violin or two!
Making without a mould
Guitars are often made without a mould, I believe it is the traditional Spanish way to build the guitar on a workboard on its soundboard. The neck has a slipper foot/integral neckblock and the sides/ribs are housed in grooves in the neckblock. Here is a photo of the ukulele I made using this construction method. It is all sitting on a small workboard and the neck and bottom block have been glued on the soundboard ready to take the sides. I have cut large slots in the neck to accept the sides and fitted wedges when they are glued (usually in this method, guitar ribs are glued without wedges into narrow well fitting slots) I am hoping to make my next violins using a constuction method similar to this except violins are built on their backs

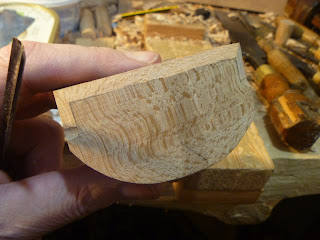
I believe this method of making is the traditional way english viols are/were made. My small violin has no rear linings or corner blocks, the rib joints are long to present larger gluing surfaces and cloth/linen tape is glued in the corners and between the back and sides to reinforce the joints

On this small violin, the neck is relatively long as it is meant to be a 'violino piccolo' copied from an illustration in Michael Praetorius' Syntagma Musicum . I stopped making it as I wanted to make some f-hole drills, I should be able to finish it soon as I have recently made three different sizes (If you are interested see my other post "I can't bake so I am going to try to make a violin") and at least one of them is suitable for one end of these very small f holes

9th of July (After midnight)
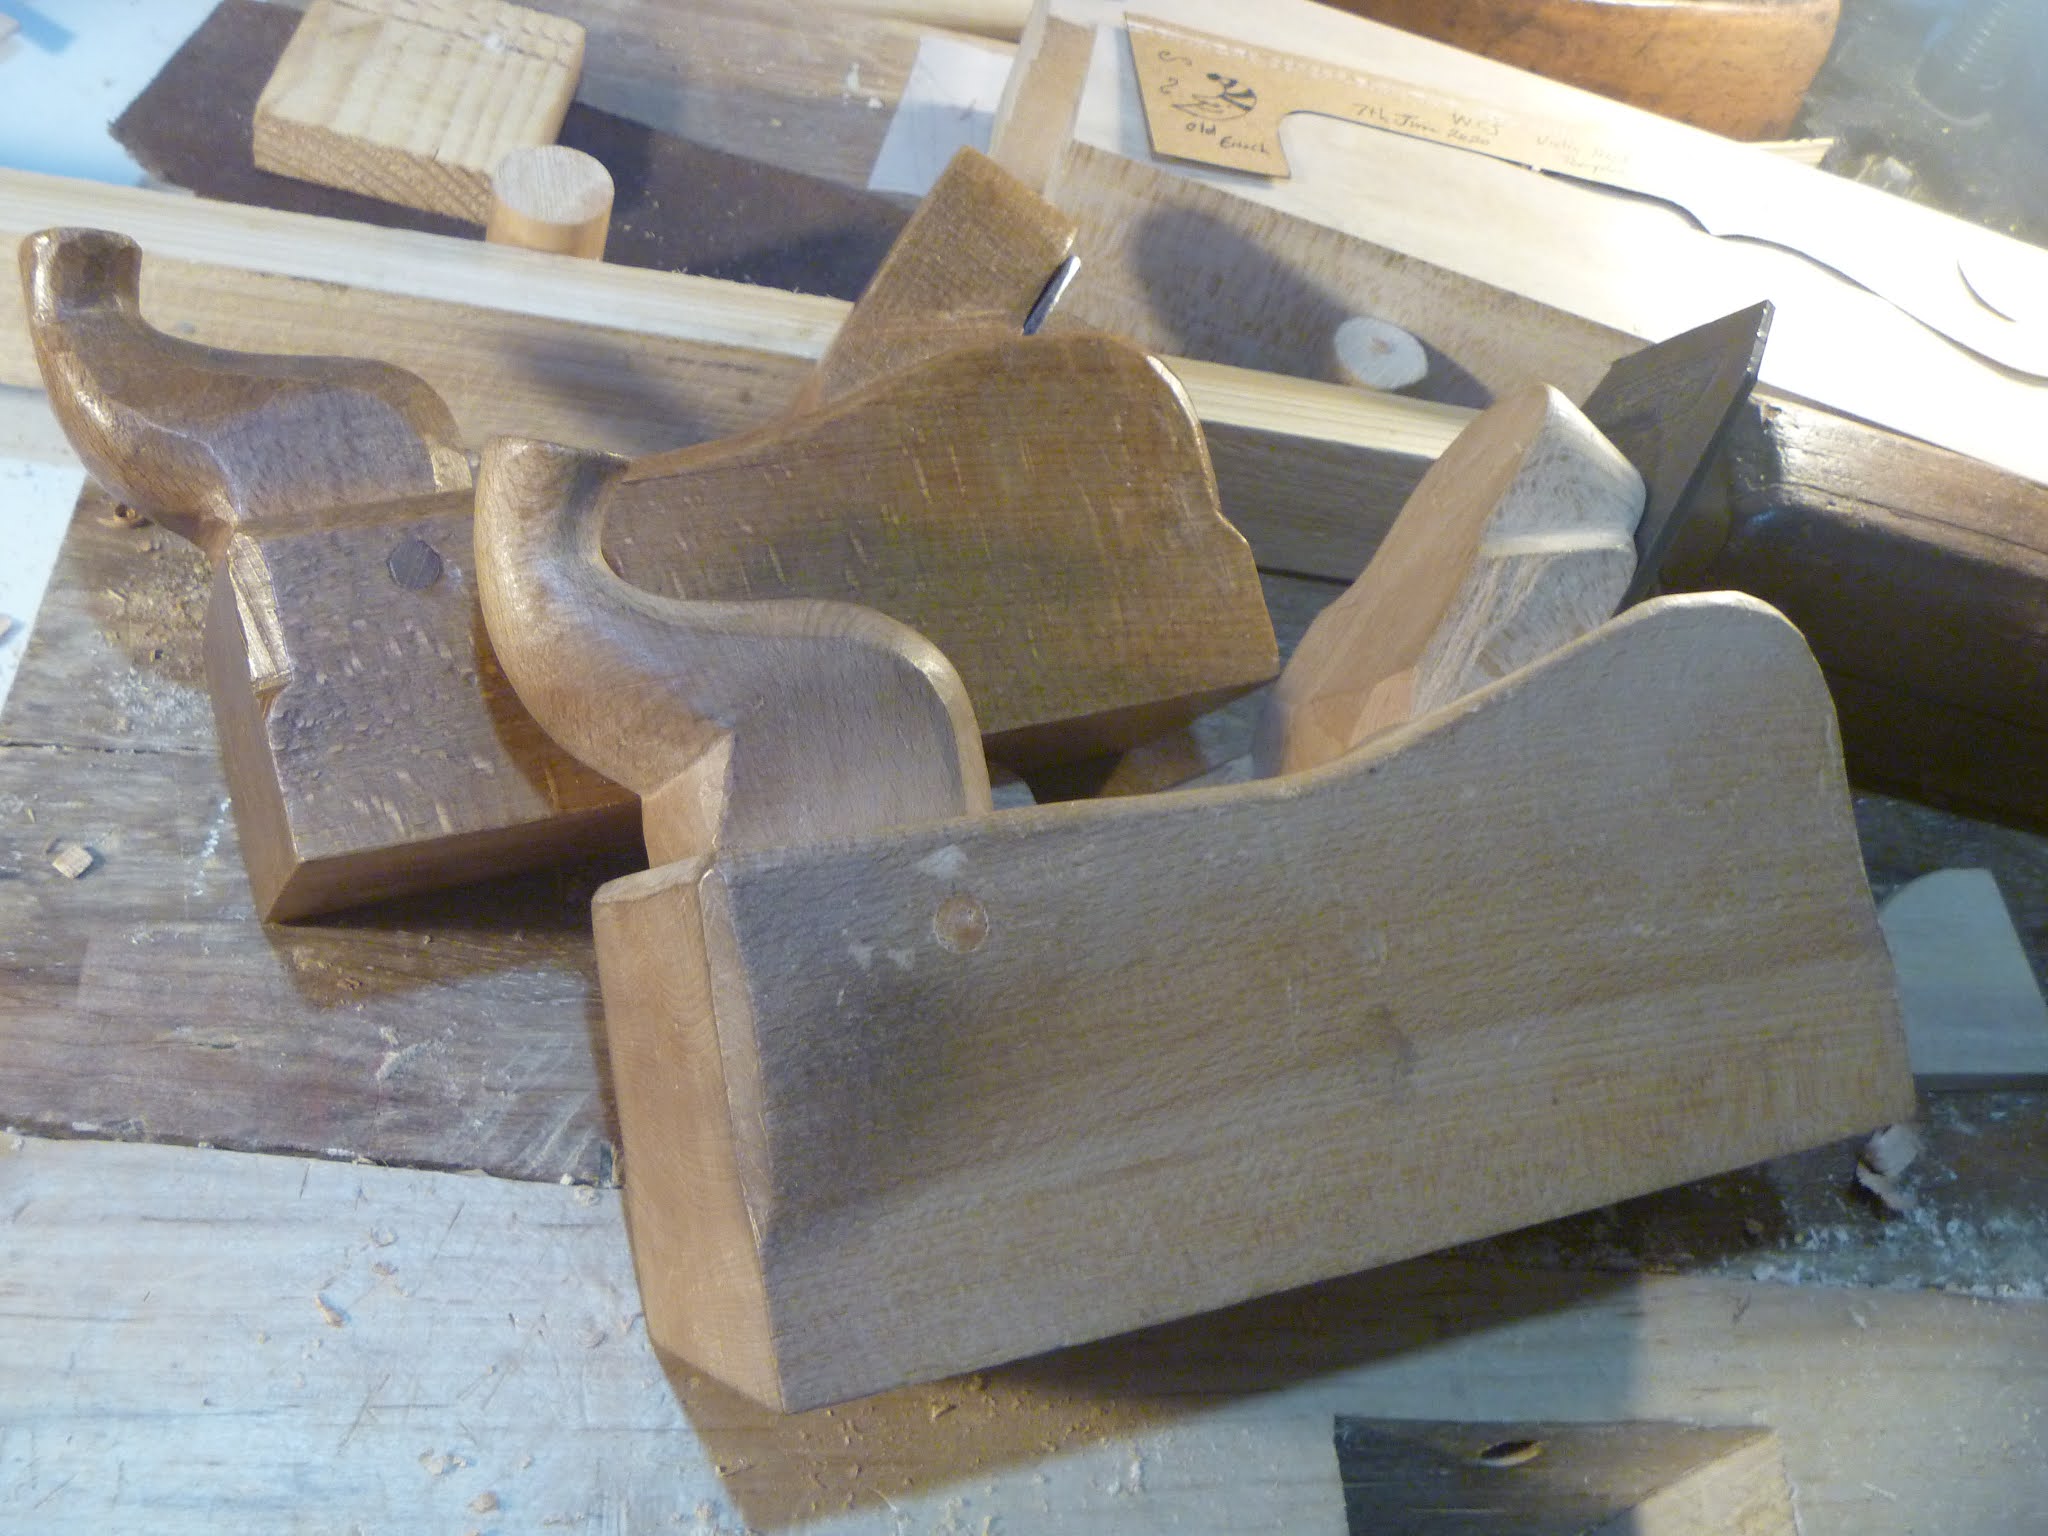
Old Enoch and Uncle Toby
I have decided to make two violins and base their outlines on the descriptions and pictures of two old English instruments found in the book "The British Violin" published by the British Violin Making Association in 2003. One violin is from 1661 by Christopher Wise and I have decided to call this violin 'Old Enoch' after the amiable old carpenter from Walter Rose's book "The Village Carpenter". The other is from 1676 and made by Robert Cuthbert and I have decided suitable name for this is 'Uncle Toby' after the character from "The Life and Opinions of Tristram Shandy, Gentleman" by Laurence Sterne.'Cobbling' the outlines by eye
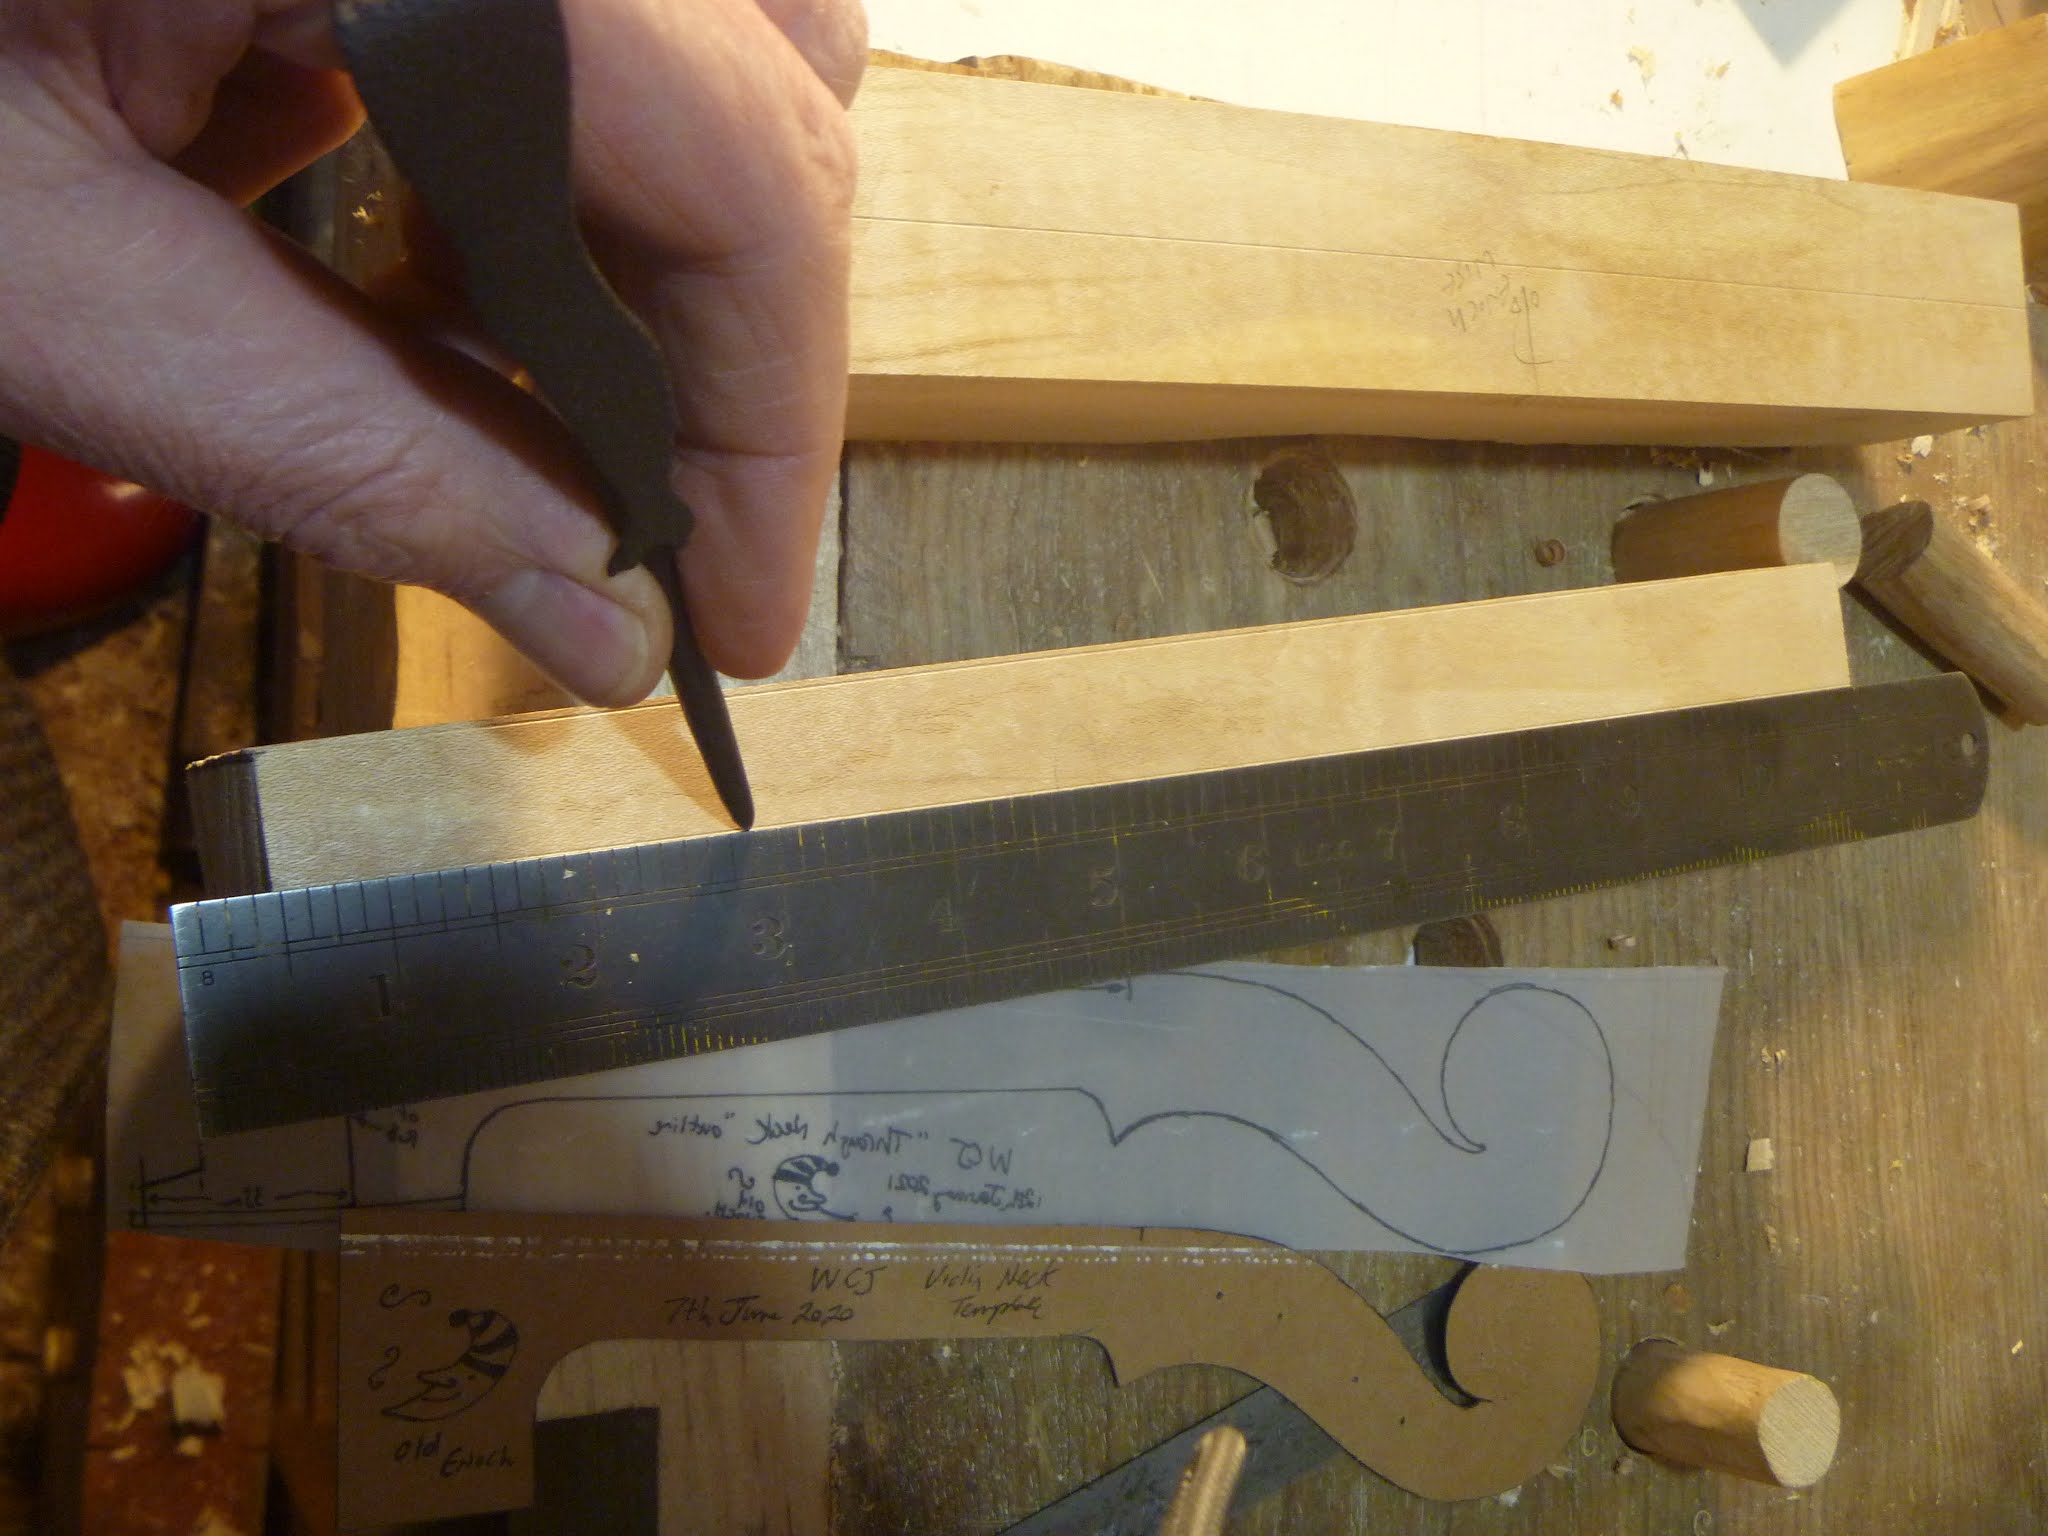
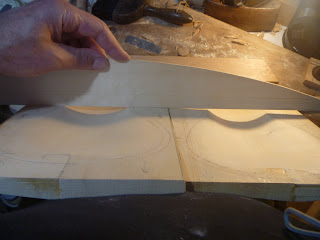
Here I am working on the outline for the Robert Cuthbert/Uncle Toby violin. I started by drawing around my template I had already made of an Amati vioilin to create a good starting point. I then rubbed out and re-drew lines many times, refering to the measurements and photos of the Cuthbert violin in the book until I arrived at something which seemed to me quite like the images in the book and looked nice in itself.
Here I am doing the same to get the outline of my Wise/Old Enoch violin

9th of July (Daytime)
I then traced the finished half outlines on the two violins
I transferred the tracings to card and cut them out to get my half templates

When out walking I looked up and saw the evening sky looked nice with lots of clumps of clouds evenly spread

A little bit later, in my street

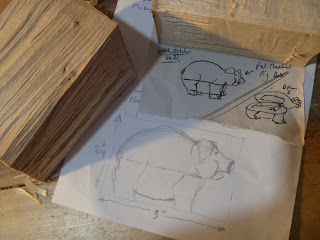
I found two pieces of sycamore, just big enough for one piece backs. I cut these - written on in pencil 'September 2007' - from a piece of the big log I got from the local churchyard. One of the bits is a bit thin in parts but hopefully I should be able to use it

Another view of the two potential backs, showing how the piece was cut in two, back in 2007! I knew I would use it someday!

10th of July (After midnight)
I have planed one of the pieces flat ready to mark the outline
10th of July (Daytime)
Planing the other piece
11th of July (After midnight)
Both backs are ready to be marked out. I thought carefully about the position of the template to try to get the best appearance but more important on the Wise/Old Enoch violin was to try to draw the outline over the thickest parts of the wood as this piece was thin in the centre due to a 'mistake' when sawing the unseasoned wood back in 2007. Time for bed now.
Sleepy Camera needs rest too?
I woke up and noticed the sky looked really impressive so went downstairs for my little camera. Unfortunately my camera doesn't do well in low light or maybe it was annoyed at being woken up at about 4 am?
11th of July (Daytime)
I consulted my book to try to get some details about the integral neck block/through neck construction and noted down as much as I could find. Here an open violin can be seen showing the bottom of the neck foot
12th of July
Here I am drawing a line inside the outline to show what will be untouched when hollowing the backs. I used dividers to make marks (7mm inside) around the outline to guide help guide me
Both backs marked up. I decided on the sizes of the neck platfroms from the information I got from the book (see above) and decided to make it sort of tapered square the length being the width of the neck where it meets the body. the sqare is tapered as I have followed the taper of the neck and continued that inside the body

13th of July (After midnight)
Here I am measuring the depths of a back arch from a plan and writing these on my back in the positions where these depths occur. I have the plan lined up with my back to allow me to transfer the measurements over readily.
Longer gouge handles needed!
Here I am starting to gouge the internal arching. My depth measuring 'thing' is on the left of the gouge.

Making longer handles for gouges
I found that I kept hitting my hand on the sharp edge of the wood near the end of my 'stroke' so thought it would be nice to have a longer handle d gouge for this purpose. Also, a longer handle can allow the use of the body in providing force and speed things up and tire the hands less.If any one may be interested I have put details of making my new long handles in my "The Island of Tools" post, under the rather silly title of "The Messiah of Handles?".
Do you Suffer Ferrules Gladly?
I like handles without ferrules because their, often sharp, edges can dig into your work and into your hand if they slip when you are working a bit vigorously. Also acquiring ferrules can be a problem and they are more suited and more easily fitted to turned handles. I have some very old chisels - see below - which have no ferrules and are still intact. (There is a small crack in the wide chisel handle but it is still quite sound)
I like this variation on the octagonal handle

Old Enoch would never have used his claw hammer on his chisels, as has probably been done on these poor old boxwood handles - at least would have never admitted doing so!

The blades of some of these are around 200 years old and I reckon some of the handles are of a similar age or if not are still over 100? There is something nice about making your own handles!
17th of July
New long handle number one, made from Elder, next to the two old gouges I copied the distinctive octagon pattern from.
The other handle made from some Sycamore. I'm not sure if gouges these are the ideal profile for this, they are blades I had which had no handles, but I'll give them a try. I hope the handle lengths are ok and the Sycamore handle ended up a bit thinner at the gouge end than would have ideally liked !

18th of July
The newly long handles gouges resting after some work
Planing the gouge marks away and smoothing the arching/hollowing

Here the flat platform left for the neck foot can be seen

21st of July (After midnight)
The inside of the back has been scraped and I am ready to cut out the back
Sawing out the back, using pegs and a wedge to hold the back on my small experimental bench top

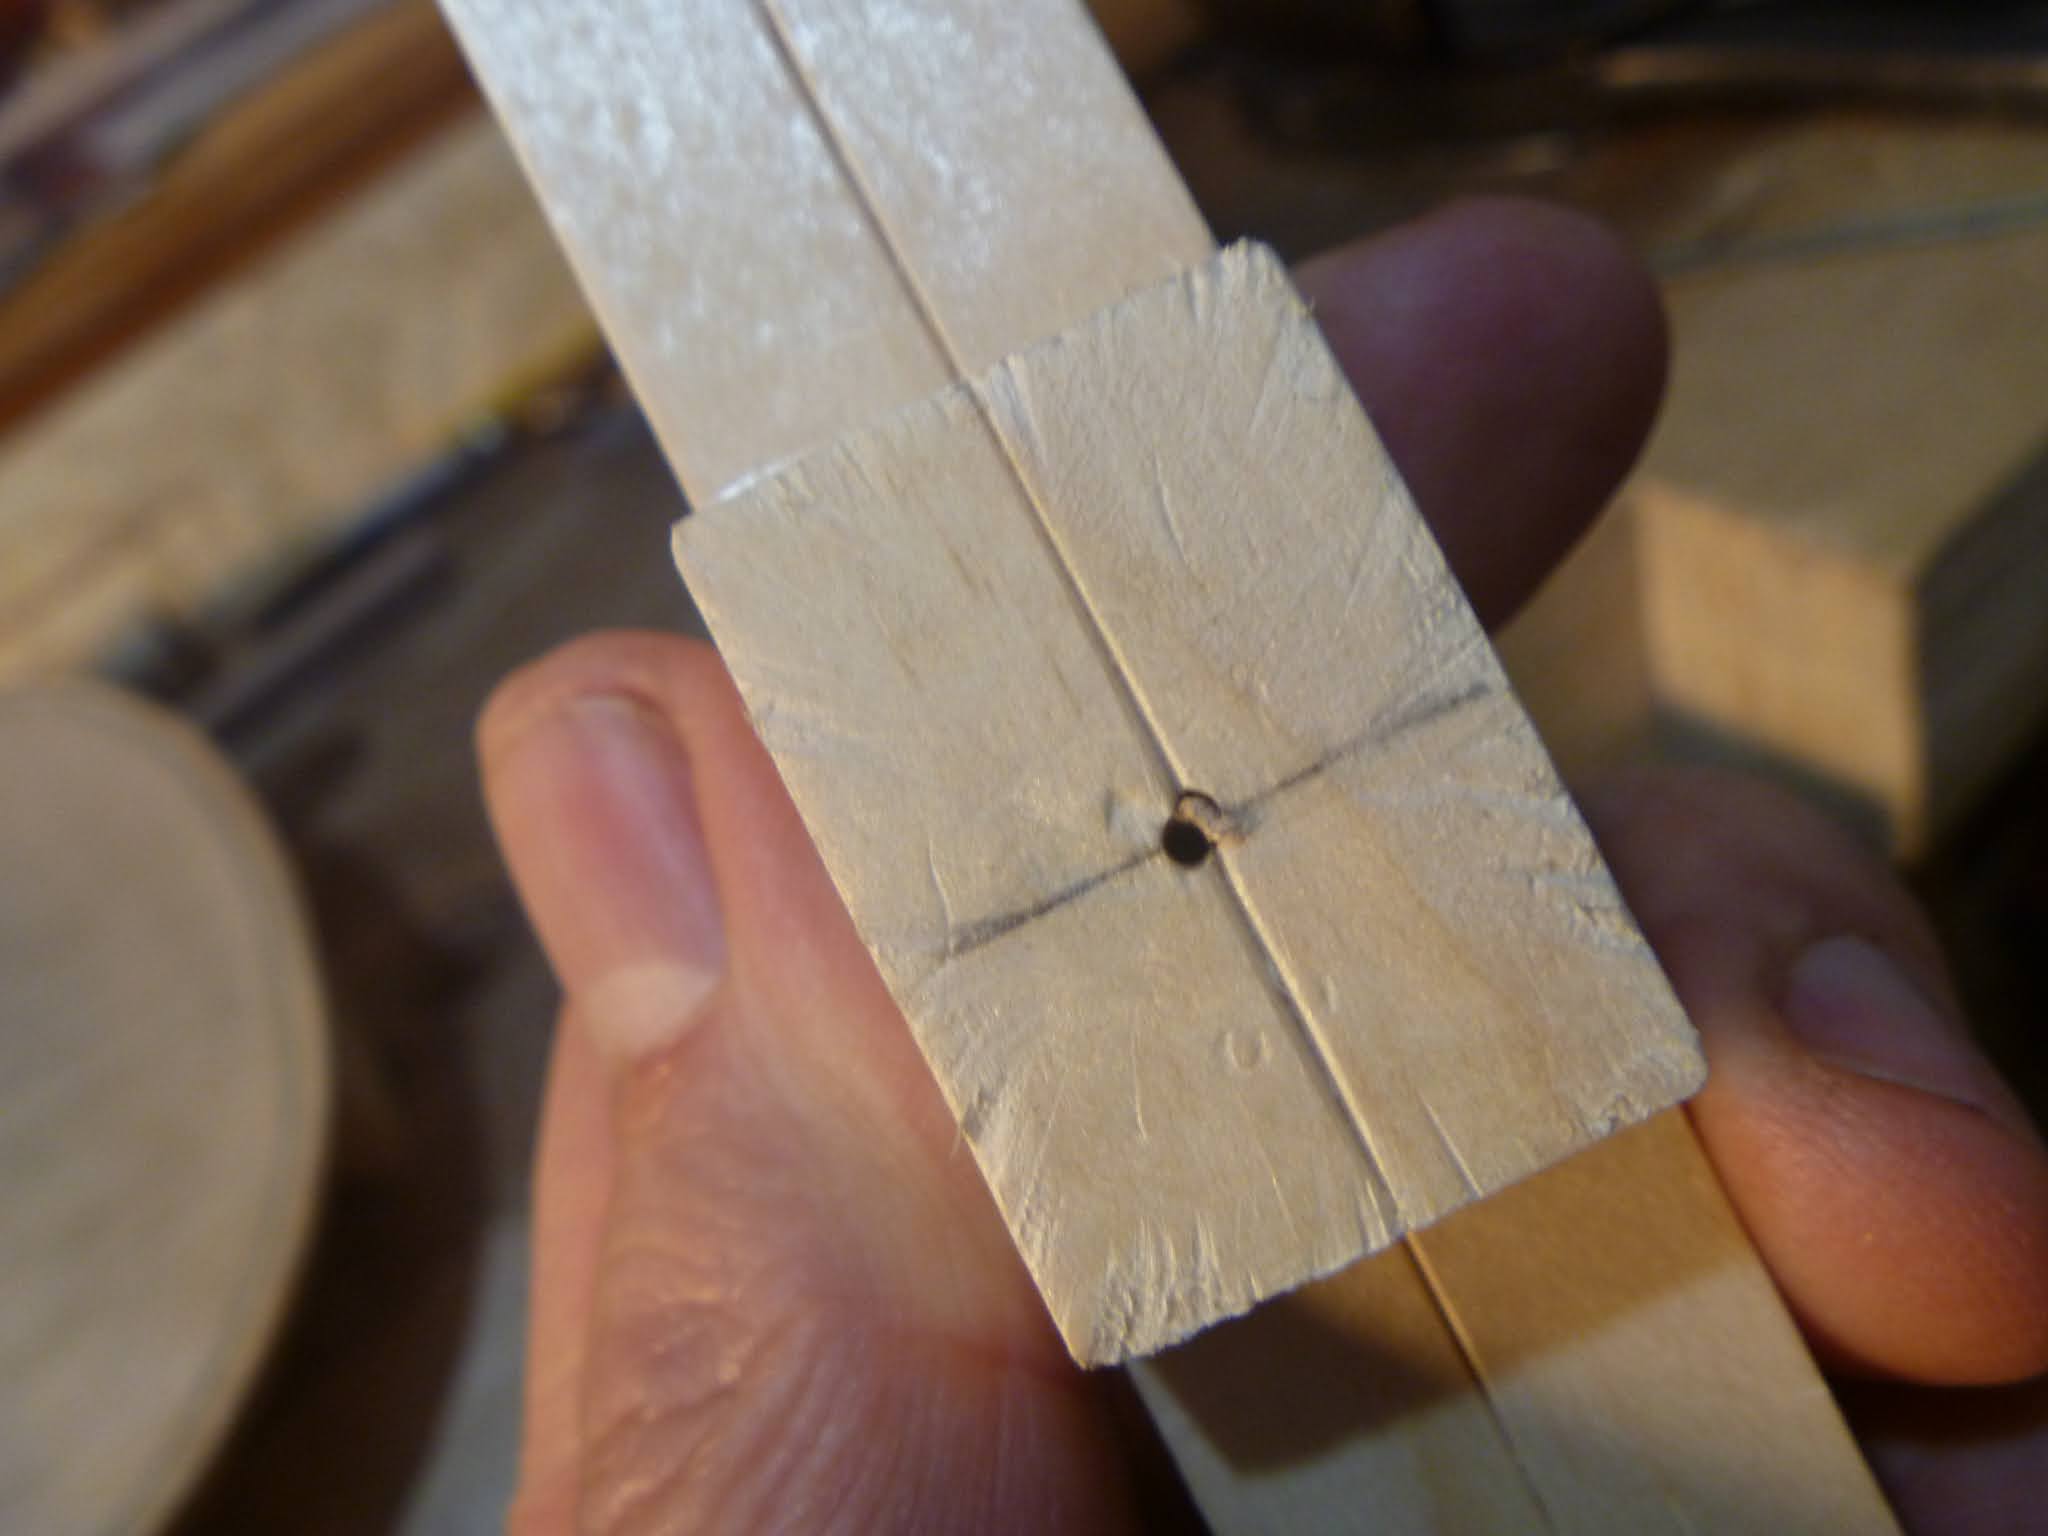
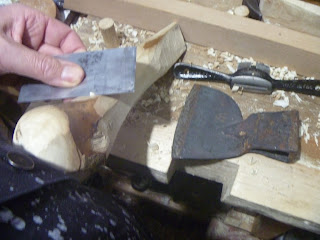
Button Nose?
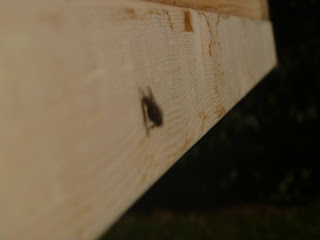
Sawing around the button/nose area.I have recently dsicovered that some people refer to what I was told was called the 'button' as the 'nose'! I quite like the idea of a violin having a nose to go with its head, neck, waist, belly, back, chin eye (of scroll) feet (of bridge) etc. Some violins also have a hens tail instead of a chin a bit like the famous genetically modified mouse which had an ear structure on its back?

The first back sawn out

23rd of July (After midnight)
Trying the newly handled gouge carving the internal arching of the Cuthbert type violin. The handle worked well apart from the broad end being a little sharp and causing some bruising on my lower chest as I pushed with my body against the handle a few times, Next time I'll make the end broader and with no angles but the long handle allows a lot of force to be used and the carving can be done quickly
Here I have started carving the back by forming several small trenches, to the depths I pencilled on the wood next to each mark

Removing the wood between the trenches

The central area of the internal hollow roughly finished

Another view of the roughly hollowed back

Nice thick curly gouge chippings

24th July (After midnight)
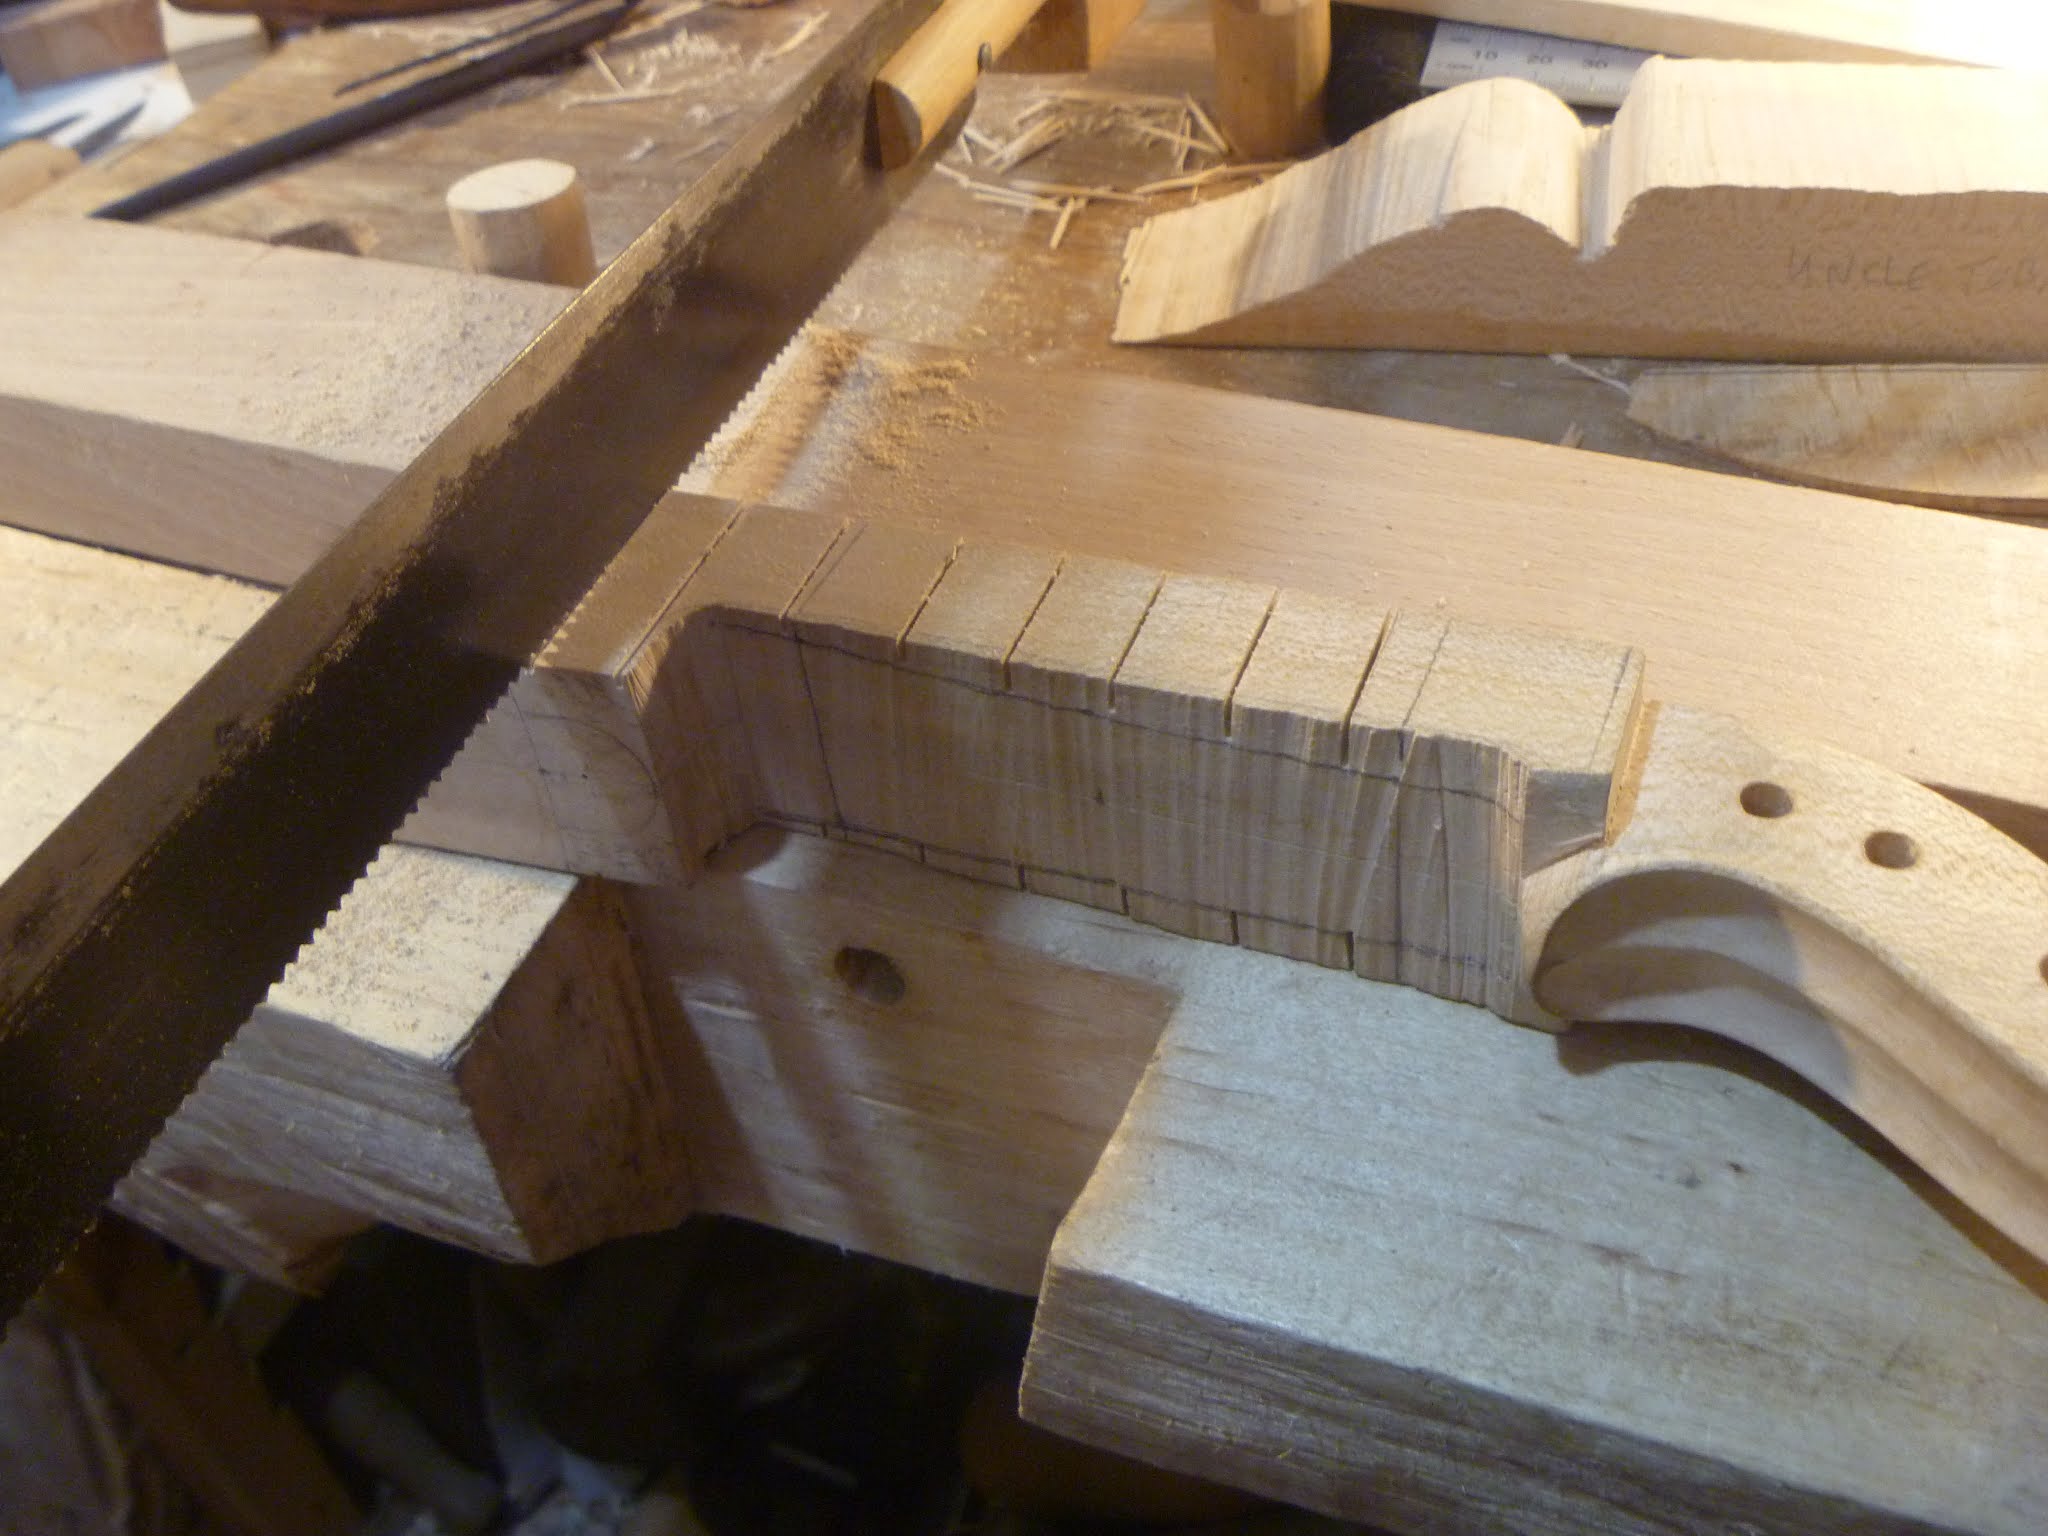
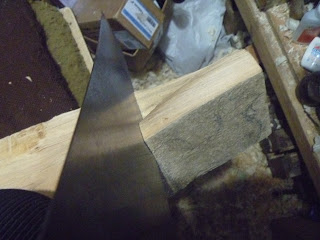
Sawing around the outline of the back
The back sawn out

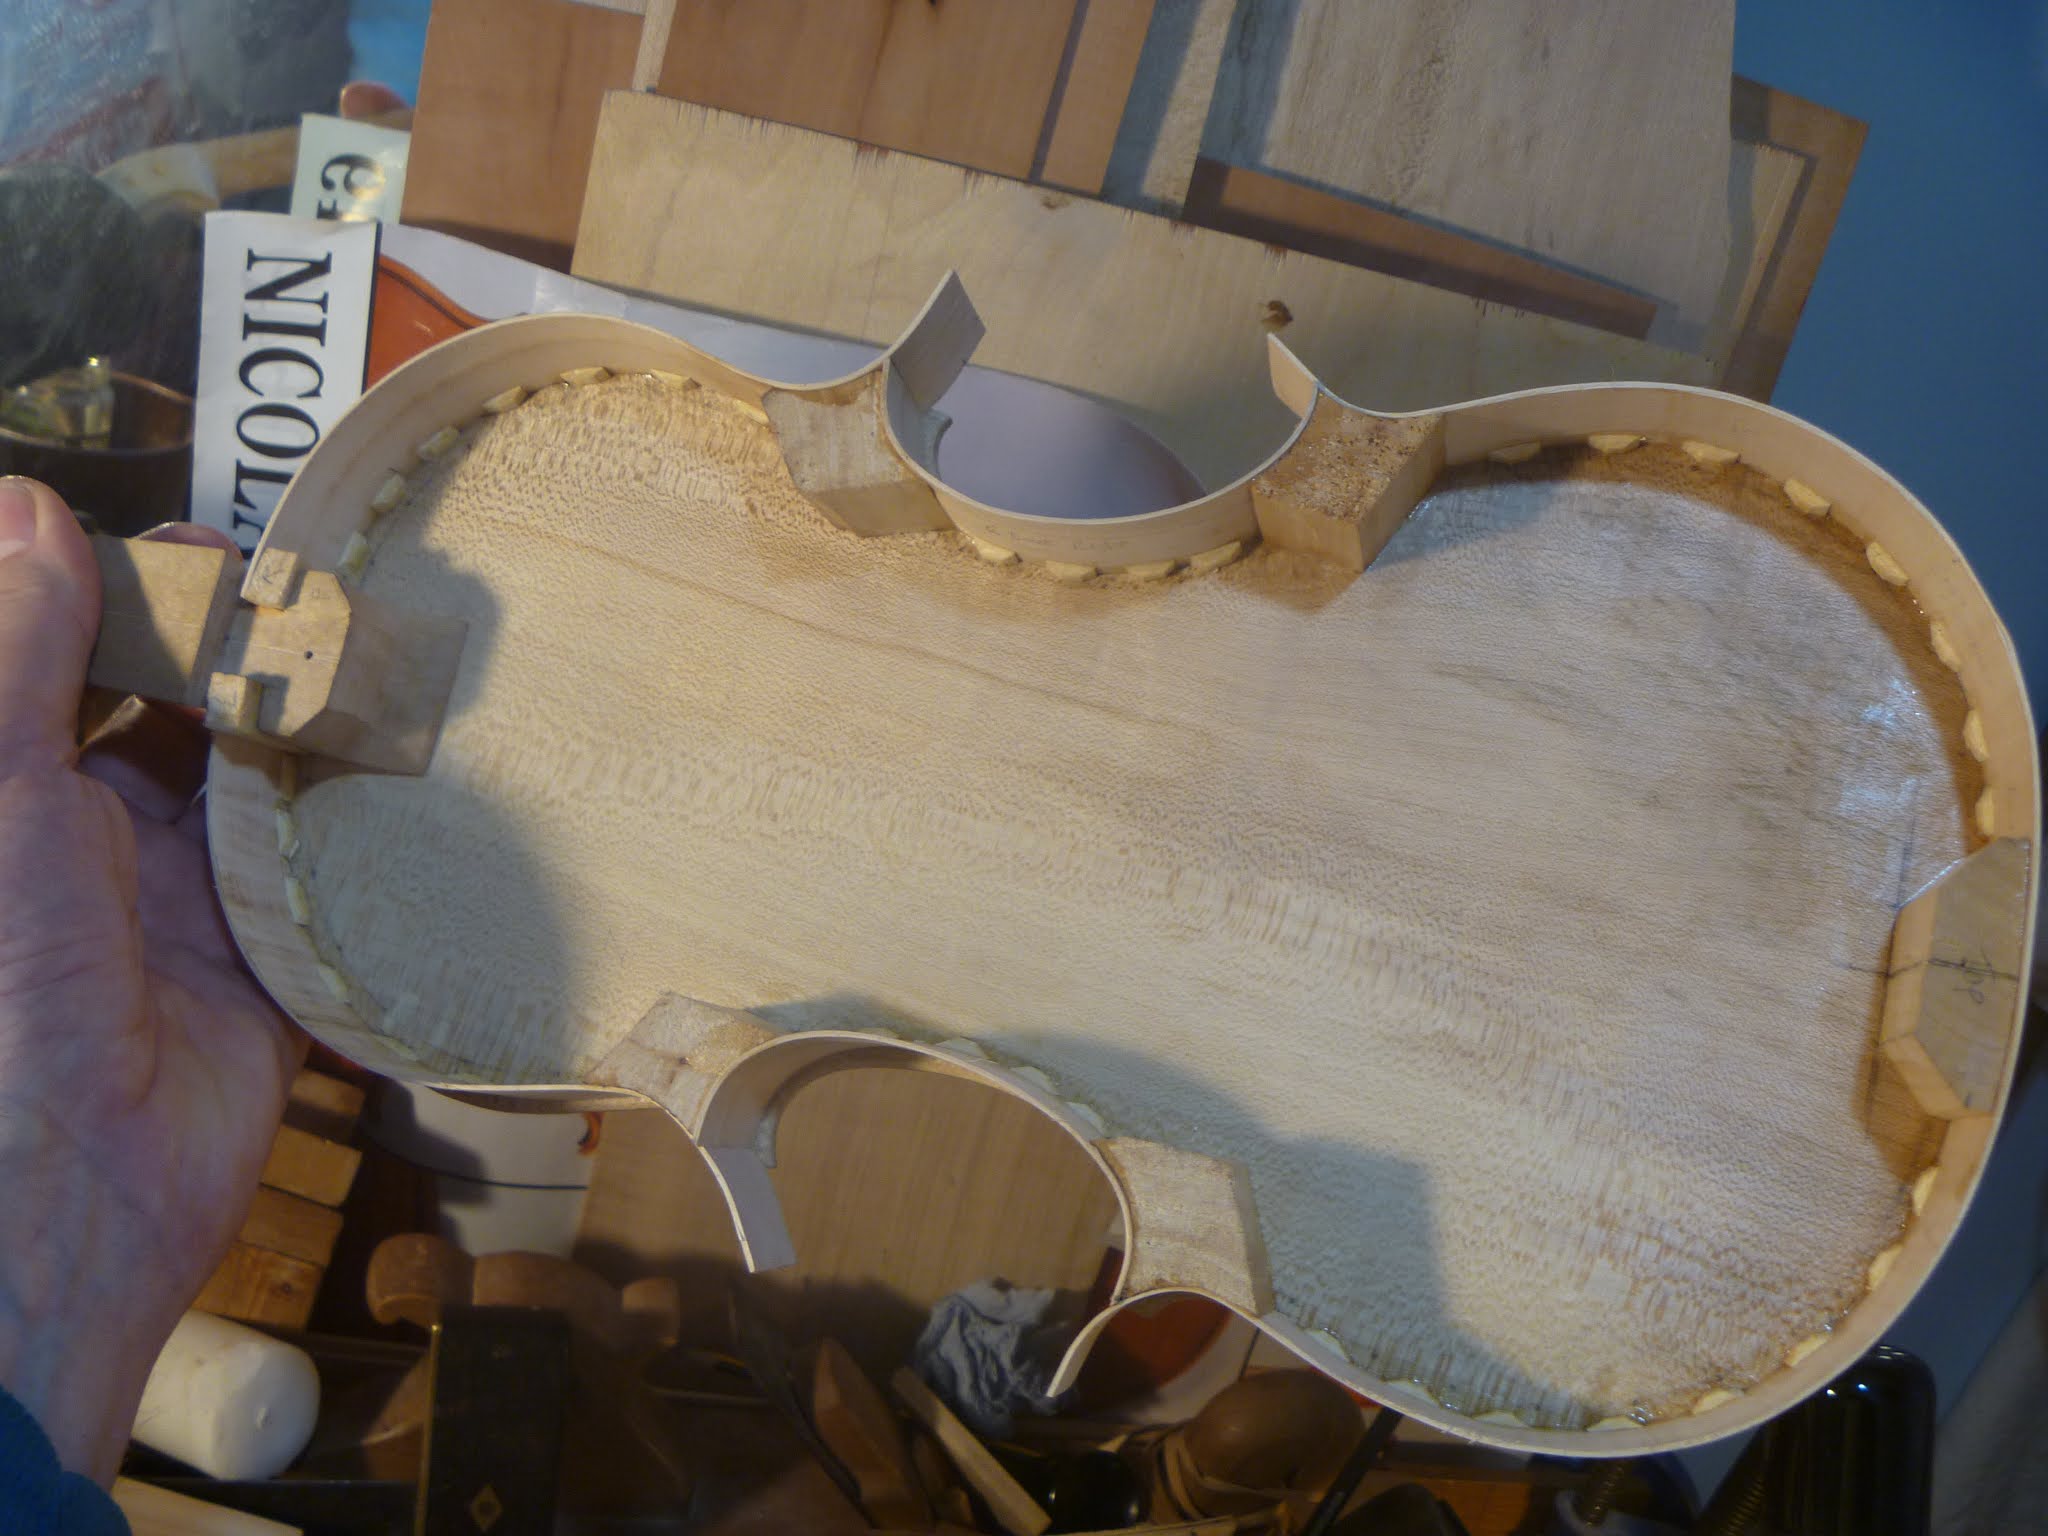
The two violin backs inside view

Outside view

The backs held up to show the internal arching

26th of July

The back roughly carved to bring the edge down to around 6mm or 1/4"

28th of July (After Midnight)
When starting the carving the outside of the backs I first used a coarsely set plane to remove as much wood as I could. Here the plane I used can be seen along with the plastic bag full of the shavings and gouge chippings created
I then used a large gouge to remove more wood and bring the edge thickness down to around 1/4"
Note! I bought this old socketed gouge very recently and used it with the newish handle it arrived with. It doesn't fit very well and is not very comfortable in use. This type of handle is fine for heavy mallet use but I will make a new one more comfortable for hand/ body pressure use

The two roughly arched backs side by side with the old socket gouge lying between. The old gouge worked quite well after a bit of re-profiling and sharpening and will be even better when I make a new handle - don't worry I'll not throw the old handle away I can use it for another old gouge!

29th of July (After Midnight)

I used my cardboard templates to re-draw the pencil outines. I carefully positioned the pattern and then used a spring clip to keep the cardboard from slipping while I was drawing around it

The outlines re-drawn and ready to trim with knife and file

29th July (Daytime)

Using a knife to trim down to the outline

The outlines finalised with knife and file. Outside view

Inside view

Acorns forming on the oak tree in the pot next to my front door.

29th of July(Evening)
The edge thickness marked on the backs.
30th of July (Evening)
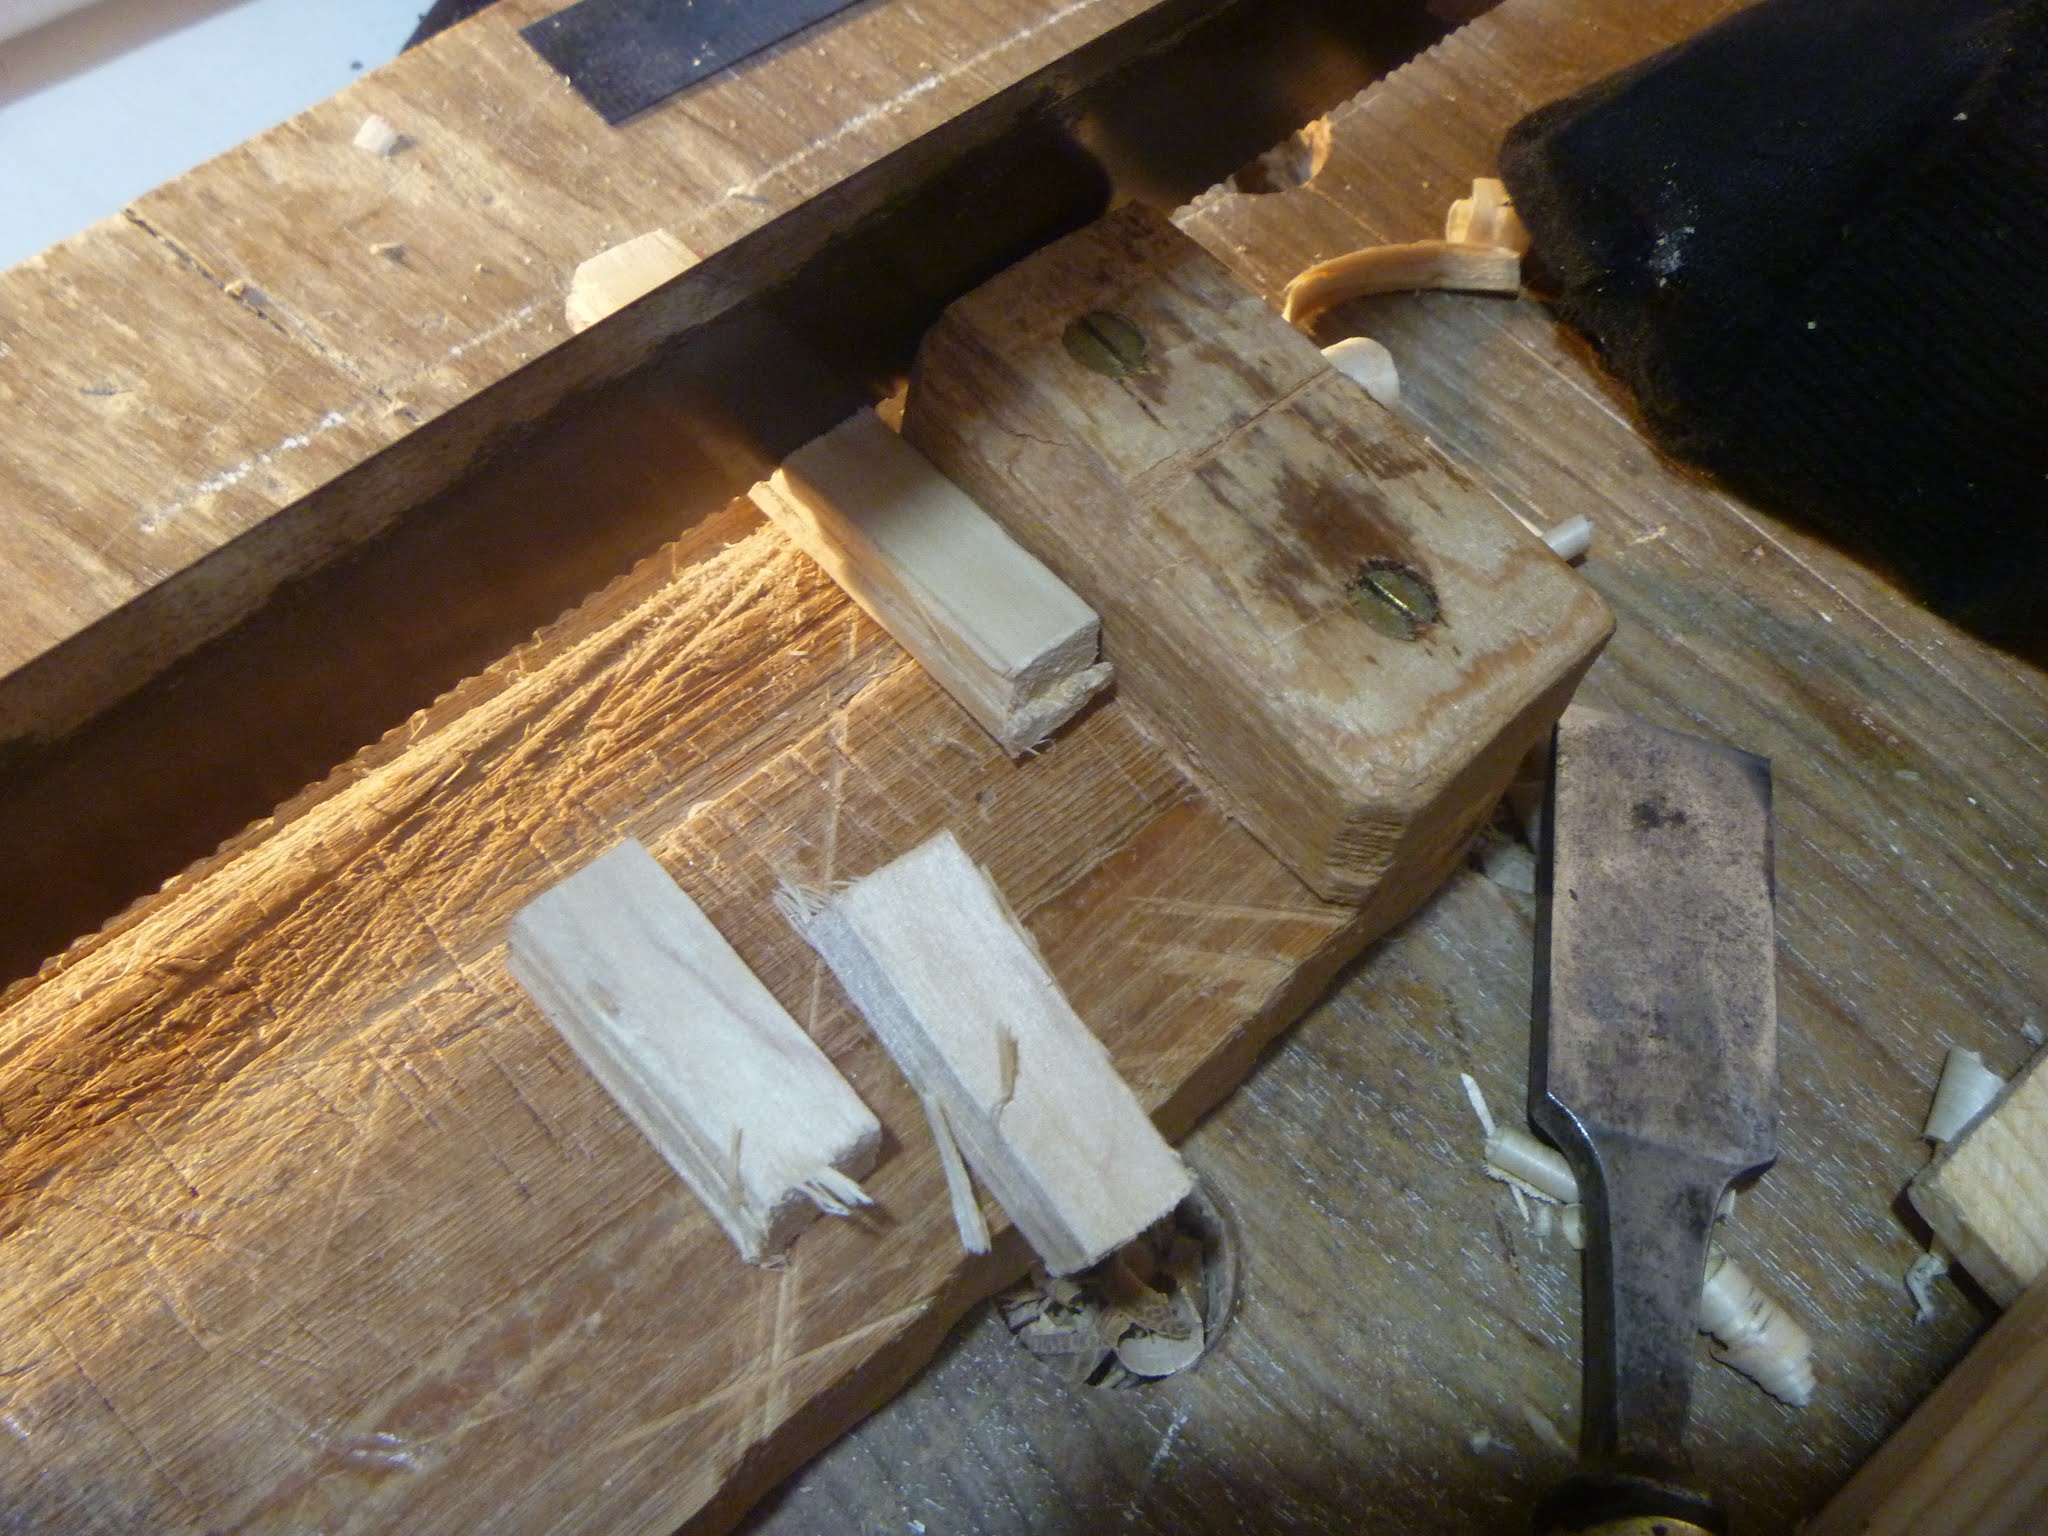
Unfortunately a corner on one of the backs (The Cuthbert/ 'Uncle Toby' violin) was too thin by a very small amount, I had hoped I had avoided this when I marked the outline, the photos of the marking out (9th to12 July) show how the 'Uncle Toby' violin pattern is very close to the edge of the wood and the irregular unpredictable split 'outside' surface. Here I chiselled the split wood surface of the corner to form a flat face ready to glue a small piece of wood on to build the thickness up
I need to use wood that will match to avoid the repair being too obvious so thought a piece of the offcut sawn out right next to the corner would be the best choice. Here the c-bout offcut is shown in postion

Here I have cut the piece nearest the corner and marked it so I can keep it alligned to try to achieve a near match

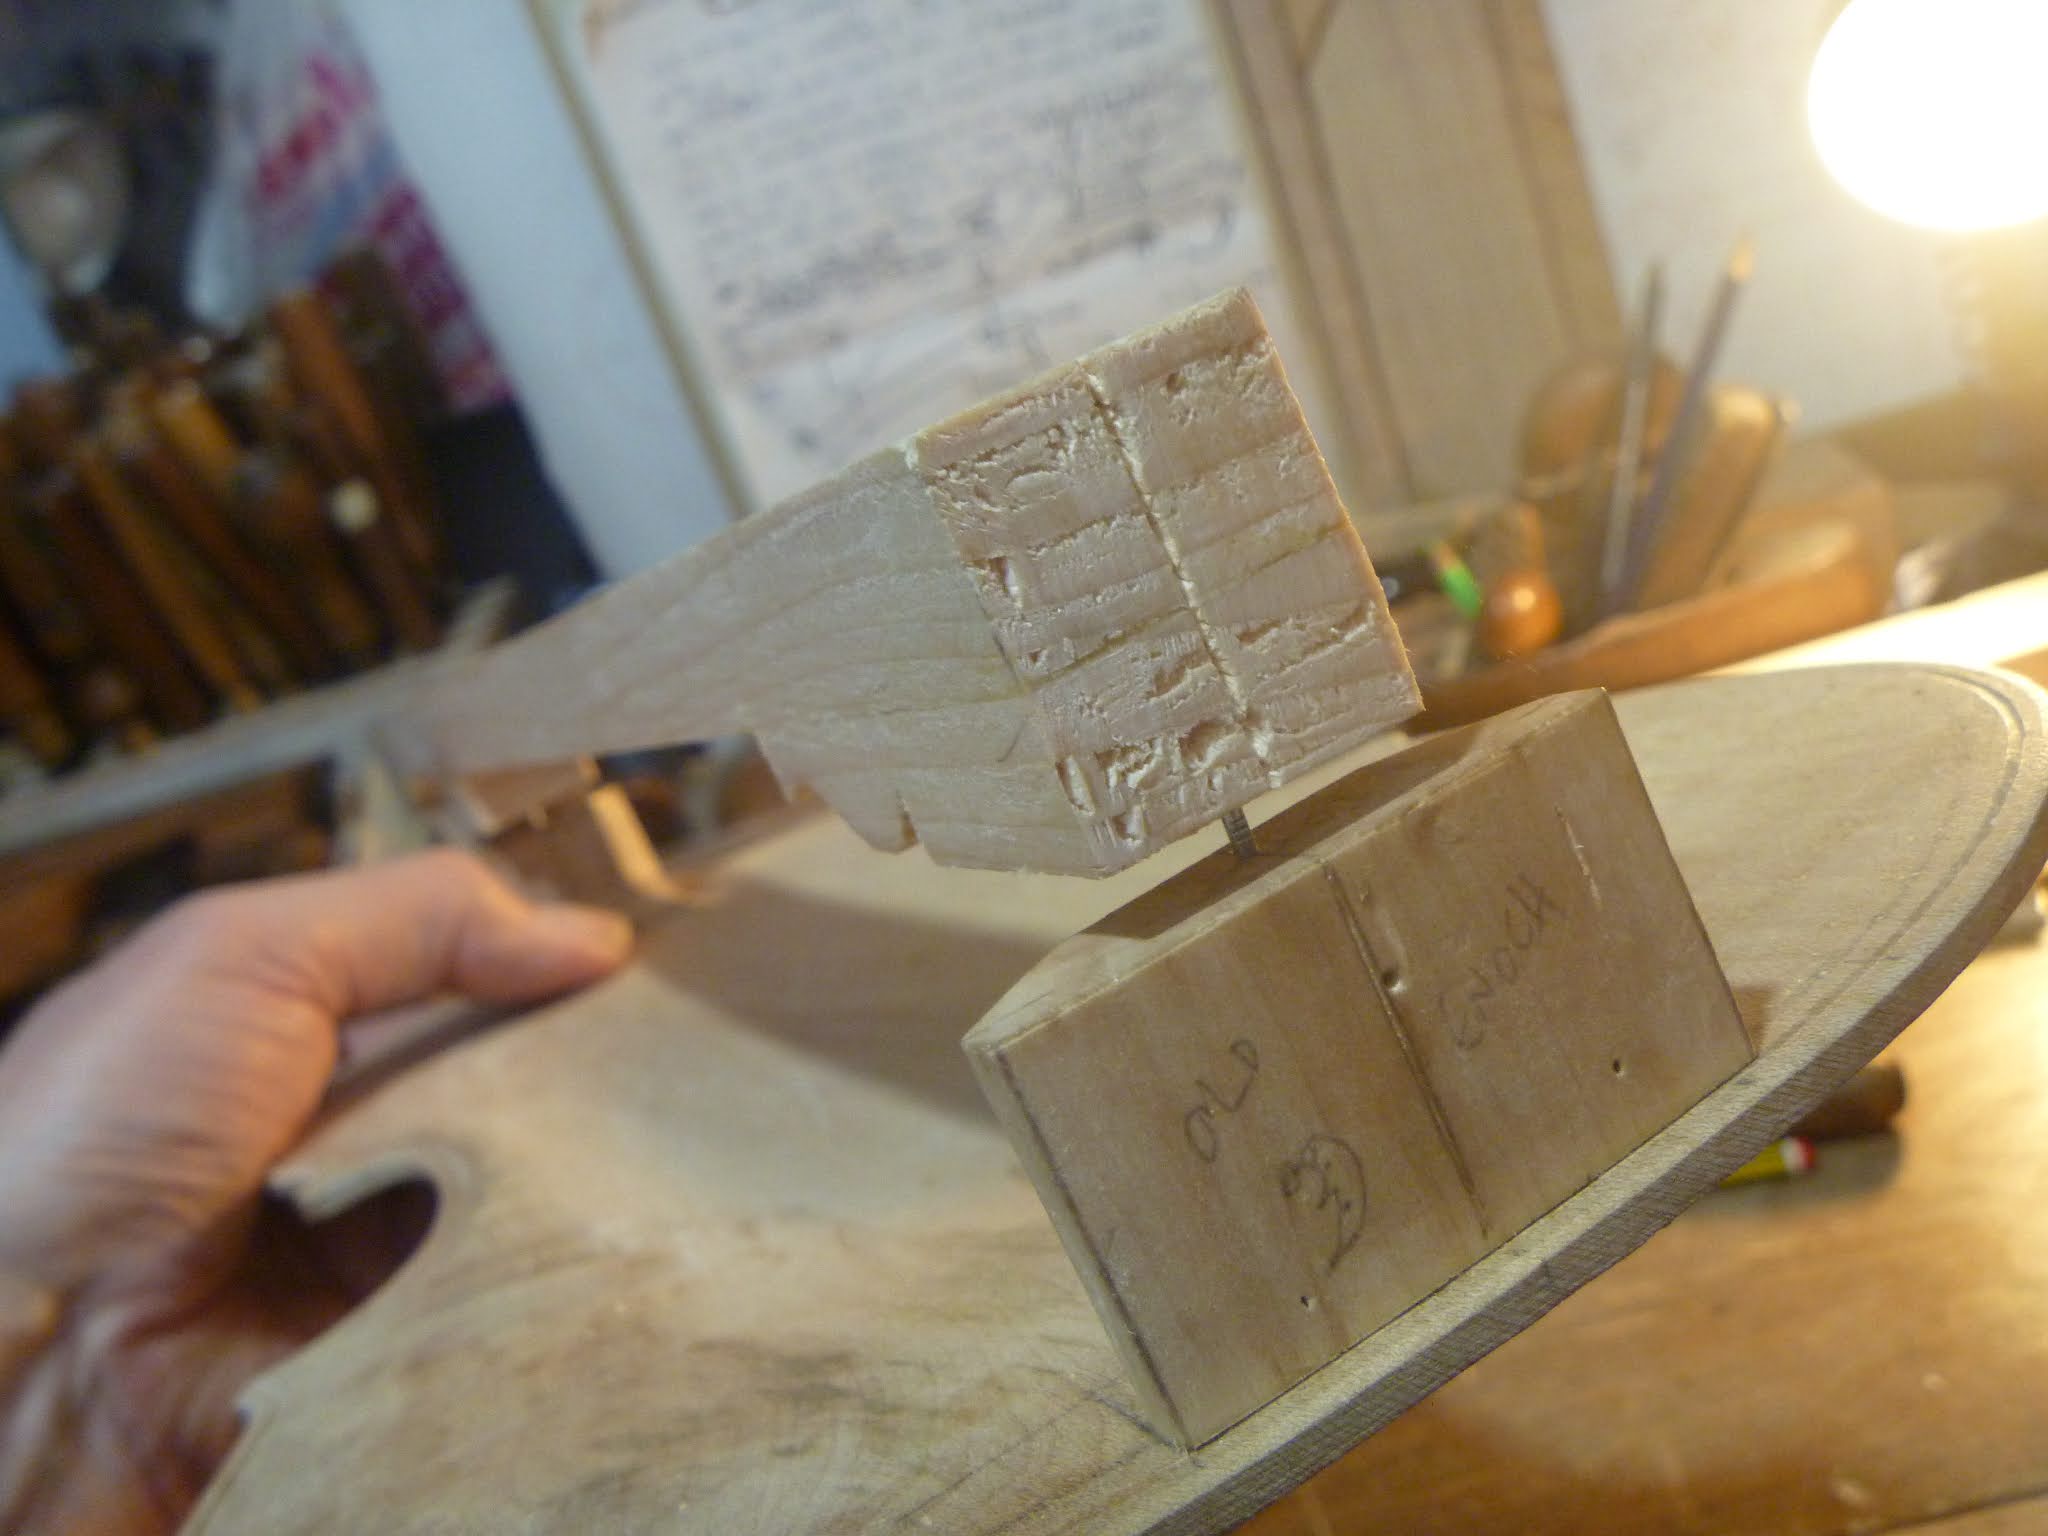
31st of July (After midnight)
I fitted the patch piece the best I could and glued it in place with hide glue, holding the piece in place with finger and thumb pressure for a couple of minutes until the glue took hold a bit
Under view of the repair piece

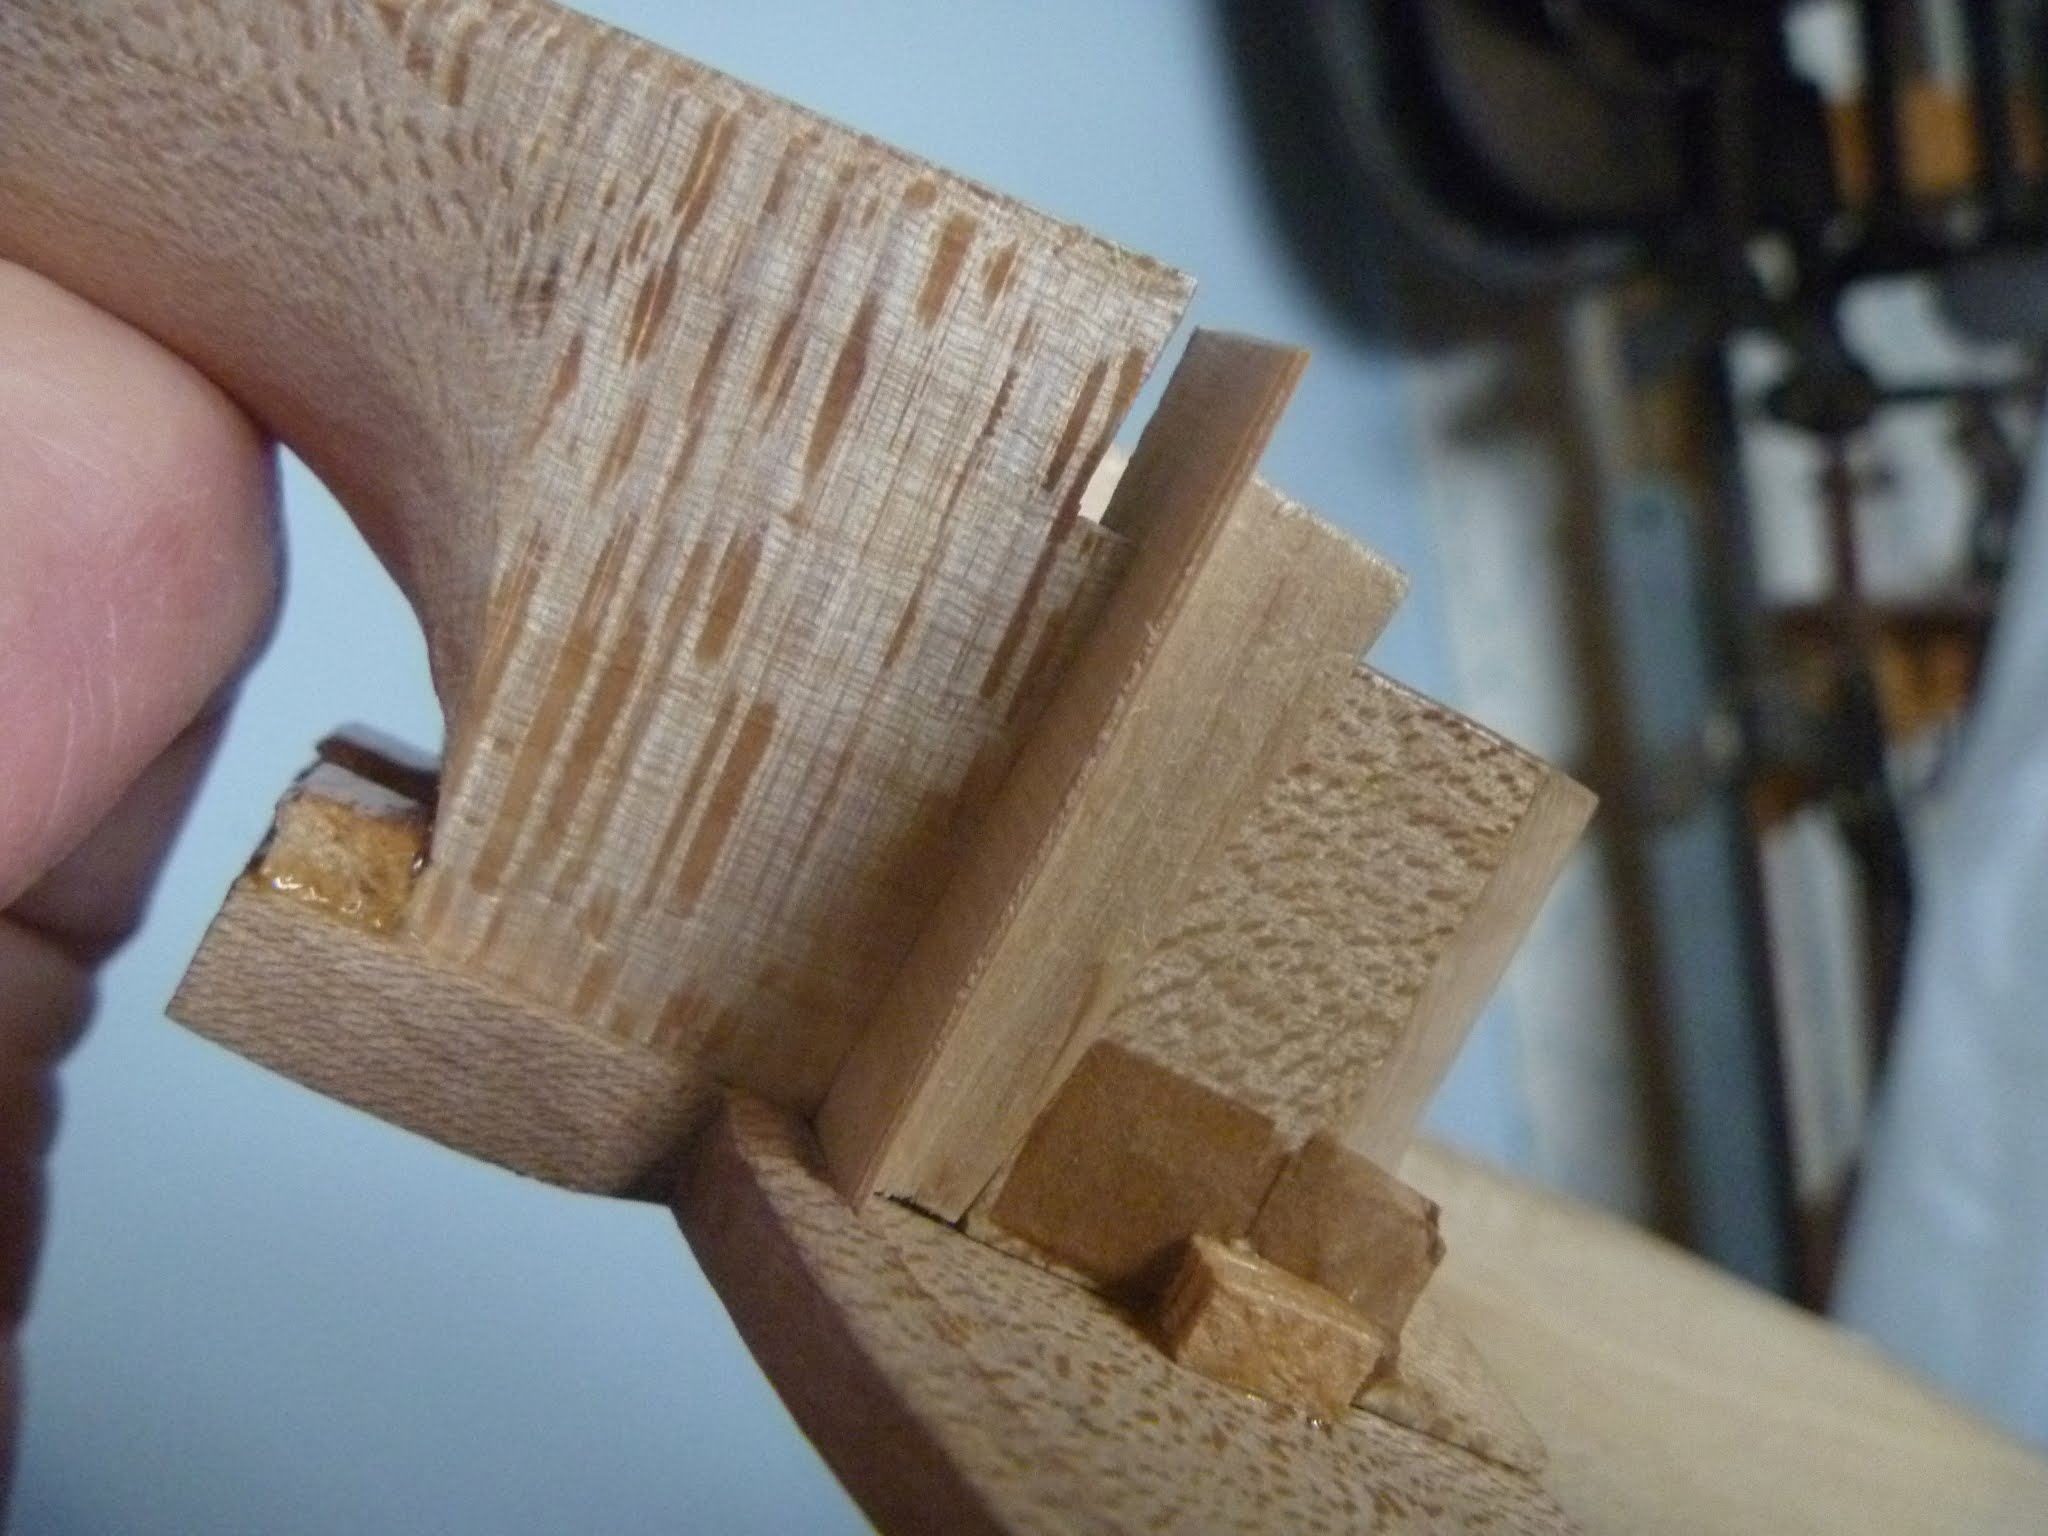
31st of July (Daytime)
The next day I took the violin back and sat in the front doorway and started to pare away the extra wood on the corner repair. Here I have chiselled the wood level with the upper surface
I then used a knife and file to shape the corner outline

The repair is not perfect but it is better than before hopefully it will withstand the cutting of the purfling channel, I'll just have to be careful.

Only a very small amount of the wood I added will remain on the finished violin so hopefully it will not be too noticeable.

Where has all the good stone gone?
A favourite and very useful sharpening slip stone. I don't know what kind of stone it is, old books often praise "Turkey" stones maybe it is one of them? When I was in Istanbul in 1996 I was looking for some in hardware shops and bought some quite soft easily broken stone whick looked a bit like this. I think I recall a man in this or another shop saying that the good stone was all gone now. |
| A 'good' bit of stone? |
3rd of August (Evening)
Designed by wood
I had decided to make a cornet/trumpet mouth piece stand so I chose some offcuts from the violin backs I made in the other post and sawed it up into thinner usuable pieces. I had no idea of the outcome but had written down that wanted something " for 10 or 8" mouthpieces.After shuffling the pieces around a design emerged from the bits and their shapes and sizes

4th of August (After midnight)
The mouthpiece stand taking shape, it will hold nine mouthpieces. The trial and error marking out, drawing around mouthpieces and ruled lines can be seen. I selected an old centre bit that seemed big enough for cornet and trumpet mouthpieces. My dovetails were a not modern cabinet maker standard were ok for me and strong enough for the purpose and they were improving as I cut the last ones.
Centre bit in action, the holes have been bored from one side until the point emerges and here the hole is completed from the other side

The stand glued up and under test, the mouthpieces seem happy with it

5th of August (After midnight)
Back to the violin backs. After repairing the corner I remarked the edge thickness at this place. Here are both backs after I have used a flat gouge to bring the edges down to the marks. I have also carved a bit more of the external arching.
A view showing the edges and the arching

8th of August (After midnight)
Making new purfling cutters
I decided to make a pair of new purfling cutters/markers but still using the blades I made earlier.Here are the blades and some wood to get started with

I made a sketch of the proposed design which was taken from the old book "Violin and 'Cello building and repairing" by Robert Alton. I was going to change the placing of the 'stem' wedge as seen in my sketch but in the end followed the design in the book. I liked the idea of the concave face on the main body being more steady against the work but wondered if this would allow the cutter distance from the edge of the violin to vary much depending upon if it was moving over an external or internal curve on the violin outline

10th of August (Evening)
The biggest tree in Whickham parish?
Here I am making another cornet/trumpet mouthpiece stand making it a little bigger so the mouthpieces have less of a chance of knocking against each other and slightly taller to cater for some slightly longer models of trumpet mouthpieces.I am using a small piece of Beech I got from what used to be the biggest tree in the area. It was a lovely big spreading beech tree, it stood majestically alone in the middle of a field at the top of Dunston Bank. I remember one early morning, at around 4am, I was cycling home and I stopped and watched it swaying against the dark sky as the wind rushed through its huge crown of branches. I felt both exhilarated and anxious at the same time, to be amongst the moving trees as the wind rushed through and buffetted them. It was hard to stop watching, wondering what the next gust would do but I had to go home to bed so got back on my bicycle after a few minutes. The next evening as I cycled to work I was pleased to see the big tree and its smaller neighbours were all still standing. A few years later the big beech was not so lucky, a large branch was blown off by the wind so the owners of the field had the whole tree cut down to protect nearby houses from potential damage. When I heard about it, I asked permission from one of the people keeping horses in the field and he said it would be ok for me to get some of the wood that had been left there but I had to be careful of a young horse that may bite me! I spent most of the day splitting a section of one of the smaller branches - about six feet long and around a foot in diameter - into four pieces. While I was there one of the house owners looked over his garden fence so I aproached and told him what I was doing and he said he had been reliably informed that the tree was around 270 years old. It was quite a struggle carrying the wood home at the end of the day but I was really pleased get some of the old tree and to avoid being bitten by the horse!
Here I am cutting the wood into small pieces of the size needed. Some of the initials carved into the bark of the old tree can be seen

After I had brought them home, I stored the four sections of split beech log near the front of the garage and left them largely undisturbed for over twelve or thirteen years. In this position, during heavy rain, water seeps under the door often reached and soaked the 'feet' of the seasoning log, also the pieces were placed close together with imperfect air circulation. Unfortunately this carelessness has caused the wood to be slightly decayed meaning it is probably not as strong as beech should be but on the positive side the stains caused by fungus or 'spalting' of the wood in usually considered to be rather attractive. Here the black streaks can be seen in the sawn pieces

Here the pieces have been planed and are arranged with grain pattern aligned with the pieces in the position they will be joined when put together to make the stand

11th of August (After midnight)
Cutting dovetails
The pins have been marked from the tails and are then cut

The stand after gluing

Testing the stand it just needs the joint ends trimming and the application of a little bit of shellac and wax to finish it

12th of August (Evening)
Purfling avoidance?
Back to my violins. You may have noticed I seem to be taking my time getting started on the purfling of my violin backs and getting distacted on other little projects. If you look at my "I can't bake so I am going to try to make a violin" post you will see how I struggled with my purfling so this time I am not rushing and am trying to avoid the mistakes I made on the earlier violin!
Here I have planed up two small pieces of maple/sycamore for the bodies of the purfling cutter and a small piece of elder big enough to make two of the small 'arms' in which the blades are wedged

Drilling holes to start the openings in the cutter bodies

Squaring off the openings with an old mortise chisel and mallet

Testing the cutter arm fits

13th of August (After midnight)
Here I am drilling a hole to start the opening for the blades and wedges on the cutter arms.

Testing the openings after chiseling them square

Two wedges have been made and are being tested along with the blades. I didn't cut the two arms separate until after I had made the openings as it was easier to work on and hold one small bit of wood than two even smaller bits

Here the cutter arms are in place in their bodies

13th of August (Evening)
Cutting the slots for the wedgess that fix the arms in position. In the right of the picture you can see I have shaped the blade wedge in a traditionalish manner

Sawing a small piece of maple to make two wedges for the bodies

The design of the purfling cutters has a slightly hollow face which helps keep it steady in use as it provides two points of contact with the violin edge. However this design will, I think, cause the purfling channel to vary in distance from the violin edge depending upon the internal or external nature of the curves. I used a gouge to cut this curved face on the cutter bodies. I will try the finished cutters out on scrap pieces to see how much the distance varies along different curves

The two purfling cutters, having a snooze, resting on violin backs, tired after having just been made.

16th of August (After midnight)
I awoke the snoozing purling cutters and tested them and found the distance variation was too great between external and internal curves so decided to modify the shape of cutter bodies to try to reduce the variation but still keep the steadying effect of having the two contact points. On this test piece the variation can be seen.
17th of August (After midnight)
I decided to see what would happen if I kept the hollowed face but made it a lot narrower
Cutter body after planing reducing the width between the two contact points

I tried the modified bodies against a violin back.
Here on Internal curves

Here on external curves

There is still some variation caused by the shape but a lot less than the original full width design. I think this may be ok?

17th of August (Daytime)
The purfling cutter blades I made were quite wide and I suspected that this had made it harder to push them around curves so I used a coarse stone to grind a sharper narrower point as can be seen on the blade on the right of the picture

20th of August (After midnight)
Danger Sharp Cutters!
I have discovered that sharpened purfling cutter blades are like surgeons lancets and have cut myself several times even just picking the tool up carelessly. I hope they cut sycamore as well as they cut my fingers! (I always have antiseptic cream in the house and sticking plasters.)

At last, finally, "Getting in the groove"
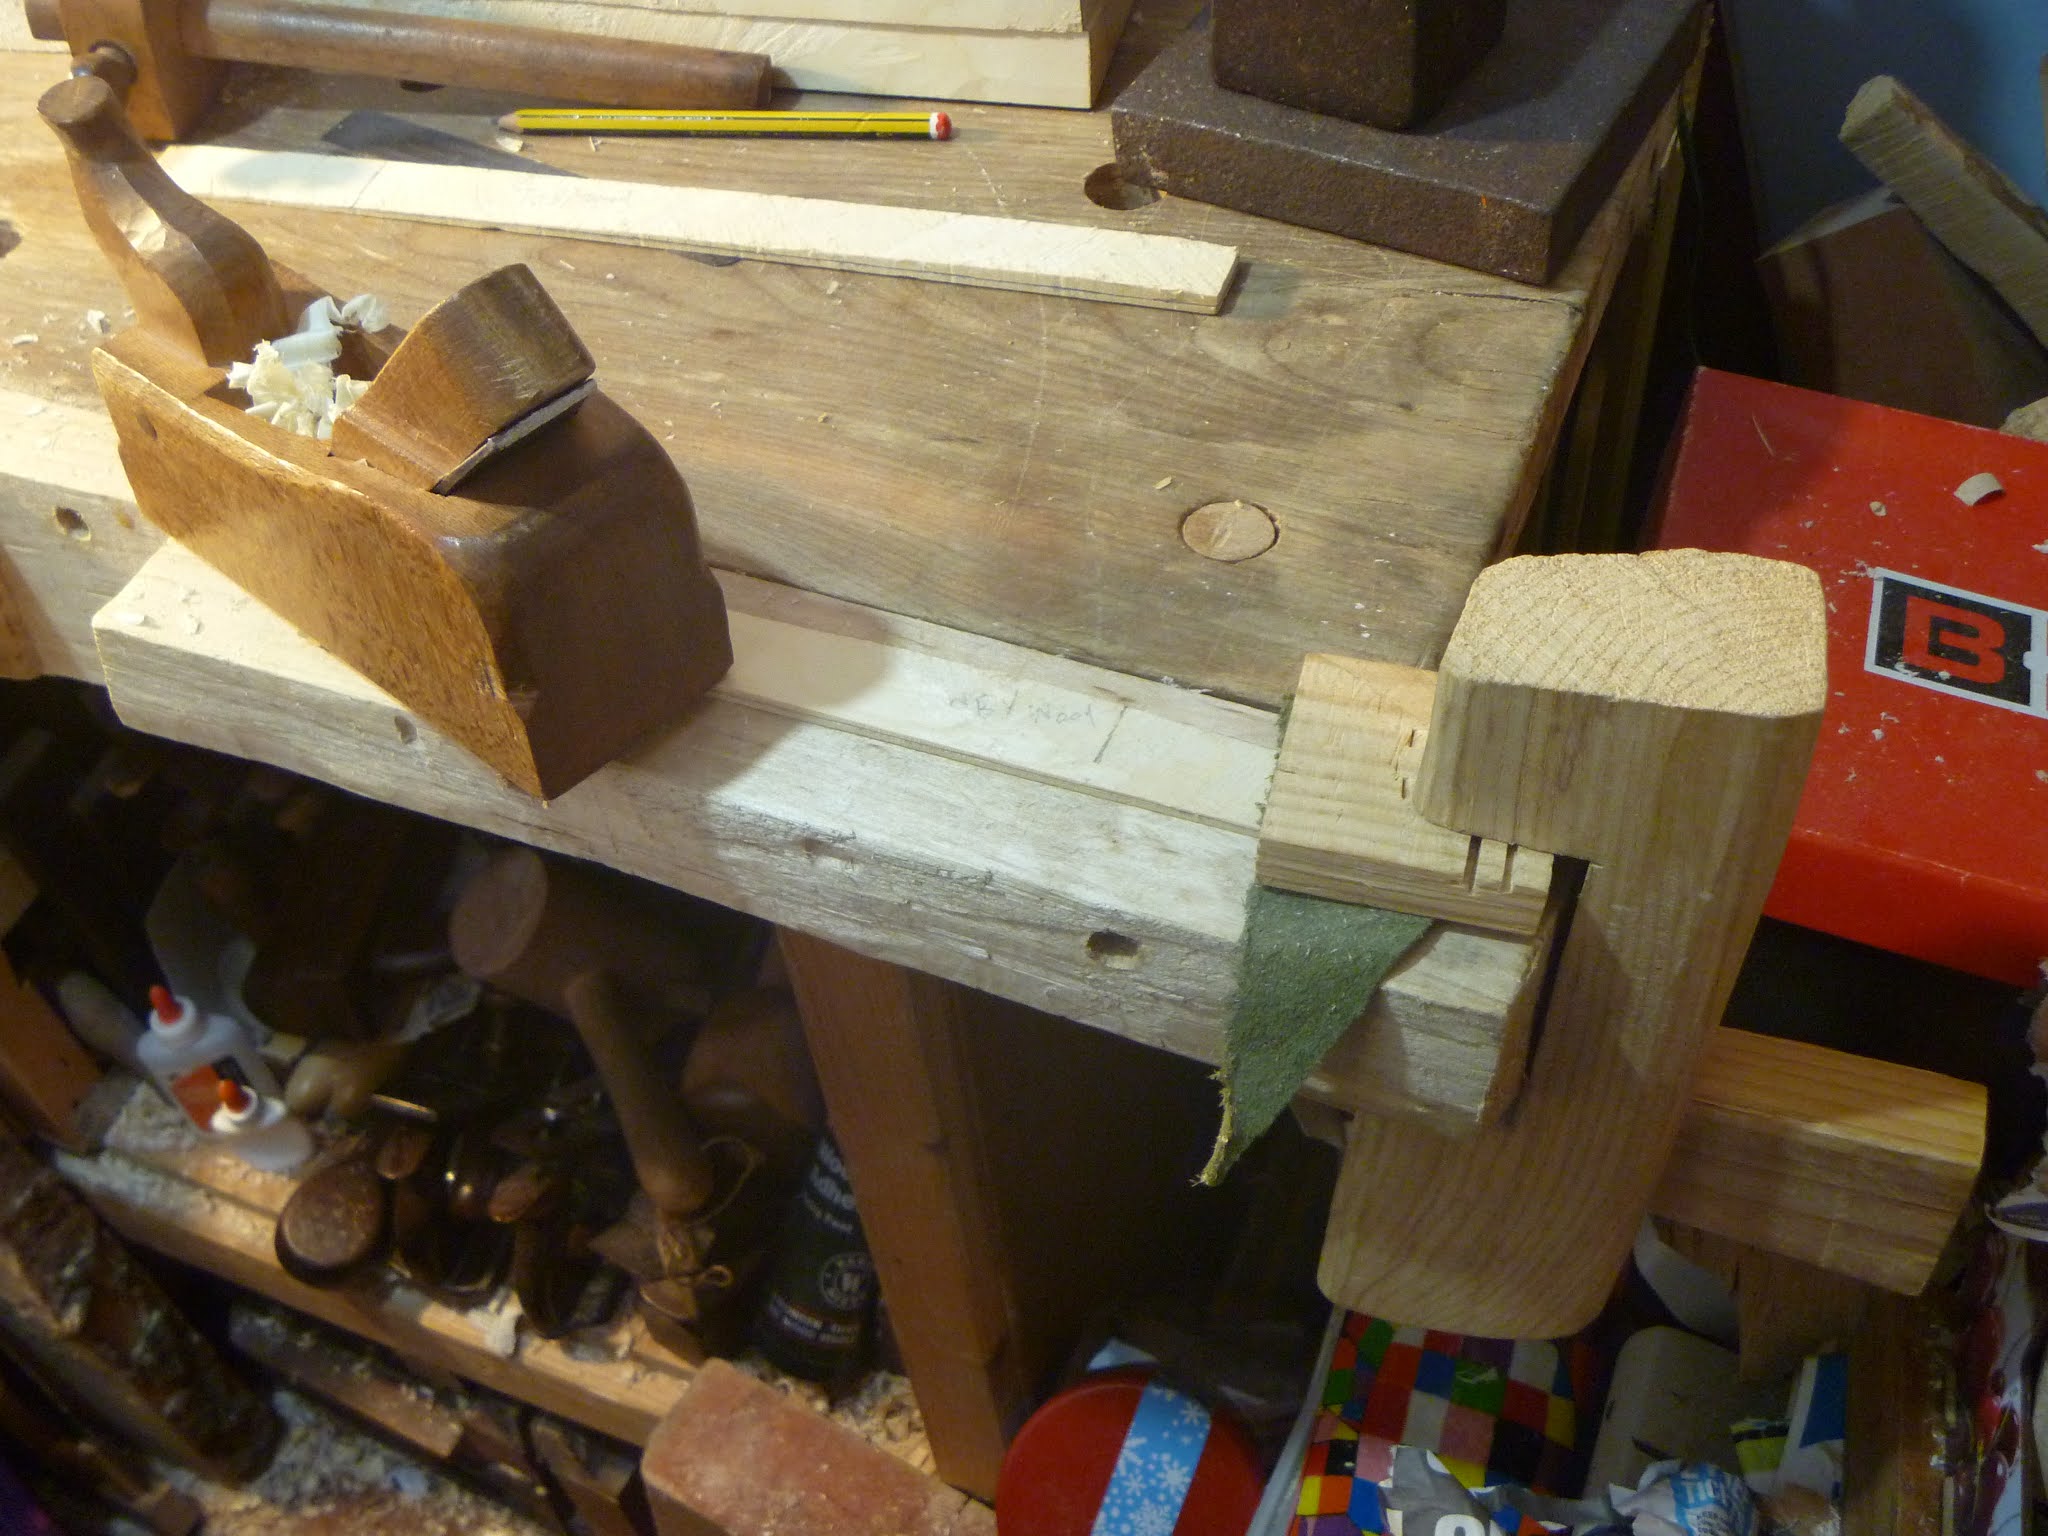
On some old violins the ribs are set into shallow grooves in the back and some makers even set them into the top also. The nature and depth of these grooves varies, from being both in the front front and back to being just shallow 'steps' and just in the corner positons to help postion the ribs etc etc. This method it seems would be of assistance when building a violin on its back without a mould. I have decided to make shallow grooves on the backs of my two violins. This 'groovy' method should help keep the ribs lined up nicely with the back outline and will provide a little structural support if I am not using corner blocks or linings where the ribs meet the backs? I have not fully decided what I am doing but don't intend to inset the ribs into the top as, amongst other things, I understand the soft spruce is weakened too much by the grooving.
Here I have started to test my purfling cutters on the inside of the back I made. and rejected due to purfling mistakes, on my first violin. I have started to cut shallow (About 1 mm) grooves that will take the violin sides/ribs

Here I have inserted a piece of scrap rib into the shallow groove and it seems to work well!

23rd of August
Making my version of the violin makers traditional knife (See my Island of Tools post for more detail on this)

I then sawed and filed what seemed to me a suitable cutting edge. I had decided to make a pair of left and right handed knives

24th of August
Next day I lit my well used biscuit tin charcoal 'forge' to heat treat the blades. Here I am heating the blades ready for hardening. The steel is hardened by quenching the red/orange hot metal in water in the pilchard tin partially visible on the left.

After hardening the blades are cleaned so that the colour can be seen when carefully heating over the same fire to reduce the hardness or temper the steel. I was aiming to quench the metal when it reached a 'straw colour' and was taking care to avoid over heating the points of the blades

25th of August (after midnight)
Violin makers knife blades often have handles made by fitting and gluing together two pieces of wood around the blade so I thought I would have a go at this. I used a piece of scrap sycamore. Here I am marking around the blade before chiseling a recess in one half of the handle

Chiseling out the marked recess to fit the blade

Here the recess has been made just deep enough for blade

Here the handles are being glued around their blades and held with wooden peg type clamps while the glue sets

25th of August (Evening)
The glued up handles before shaping

Here I am carefully planing the handle to shape. I took extra care to avoid slipping and making contact with the sharp point

Trimming a partly finished handle with the other knife. I was a bit worried about my heat treatment but the blades seem to hold an edge well

27th of August (After midnight)
The finished knives. I can alter the angle of the cutting edge as I find out about them during use

Another view, I glued the wood back together along the lines it was sawn. You can see the grain follows fron one handle to the other and the handle on the left has a large facet on it as I skimped on the scrap wood and the facet remained after I had shaped the handle. I am quite pleased with them though and am looking forward to trying them out and getting used to them

28th of August (Late evening)

Filing a point on the blade (after cutting the strip in half to make two blades)

Both blades filed. I didn't file the points too sharp as I wanted to avoid the possiblity of a very thin sharp edge 'burning' during heating of hardening and tempering

29th of August (After midnight)
Here the two cutters have been hardened and then reheated gently to temper them on my much mistreated gas cooker in the kitchen. I was aiming to temper them to a straw colour, moving them about in the flame to try to heat the blade evenly and achieve an evenish colour along the full blade length

Sharpening the new narrow blades

6th of September (After midnight)
After trying my purling cutters a bit more I decided to make the contact face even narrower to reduce the tendency for the cut line to vary in distance from the side. Here the cutter body has been planed narrower

Planing the other one on my bench hook

Narrowed and ready for more testing

6th of September (Evening)
The narrowing of the contact faces of the purling cutters did reduce the variation of the line cut from the edge but I was still having trouble in keeping the cutters to the same line when deepening the groove. I was having difficulty in keeping the cutter bodies vertical. This was partly because I was practising on small pieces of wood which I was holding with my left hand while using the cutter with the other hand so it was difficult for me to keep the tool steady and vertical. I thought I maybe would try my cutters held with the long part of the body upwards more like the usual purfling cutter/marker design and hopefully this would help me keep the tool vertical and the blades on track. Here one cutter is shown with the blade arm being tried in the new 'upside down' version


I hope that this way I will be able to keep the cutters and blades vertical

Here I am testing the fit on the tightest curve of the outline

Ready for use and hopefully no more modifications will be needed!

15th of September
Signs of Autumn

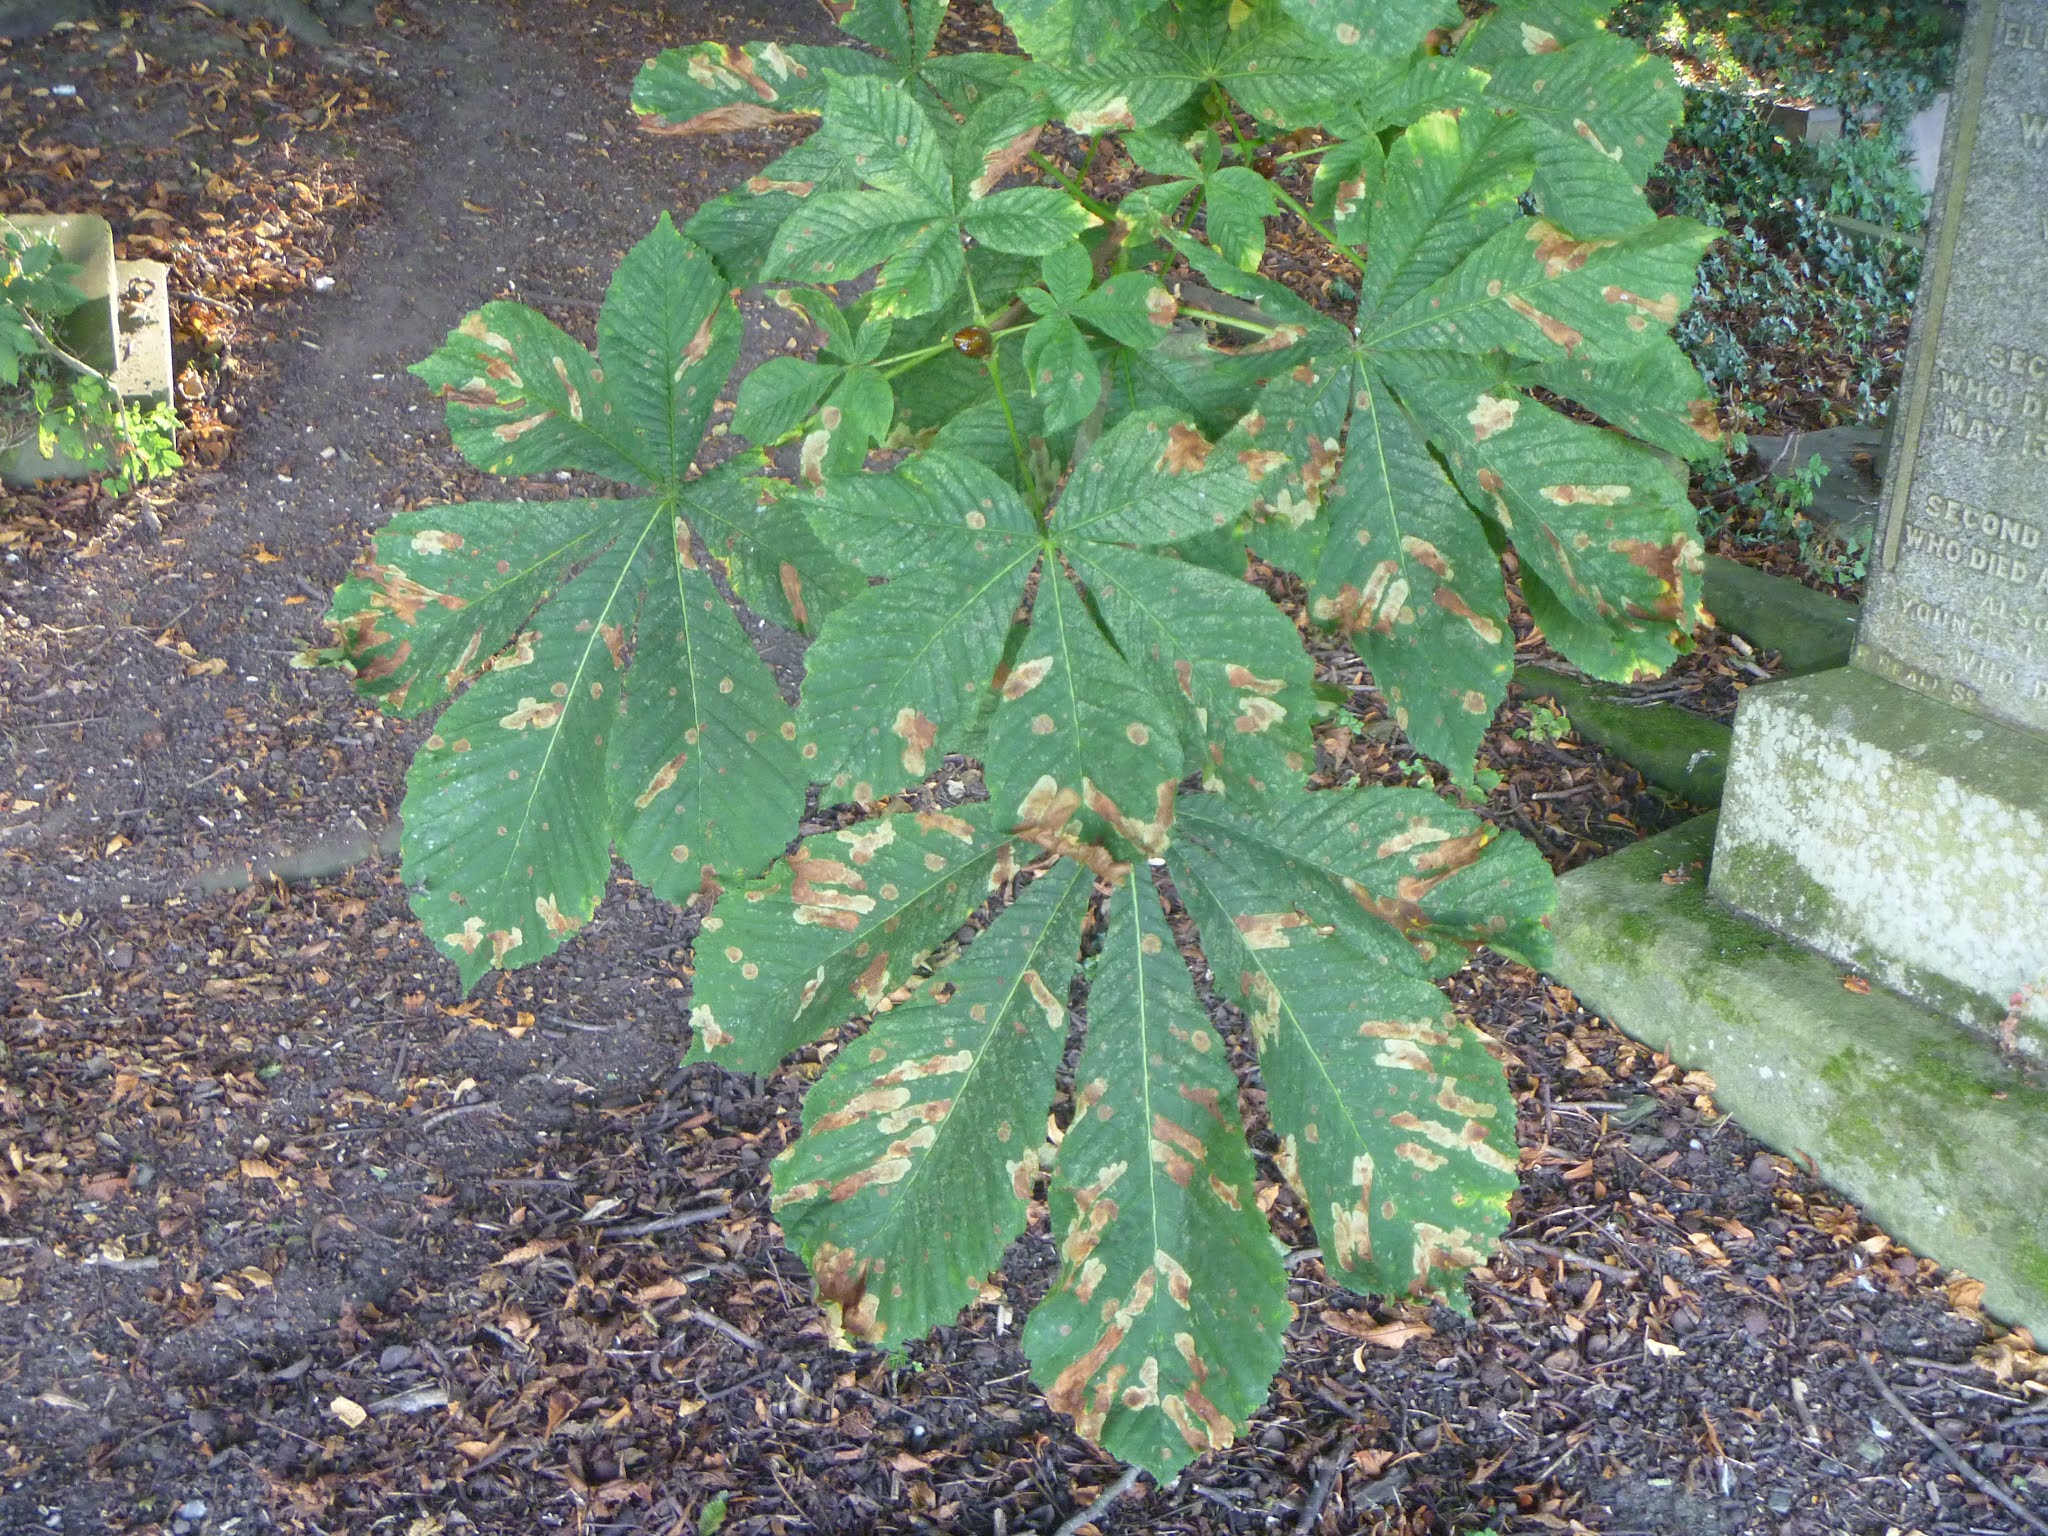
These horse chestnut leaves are looking battered now
The seeds can be seen on the lime tree

Nothing to do with trees or wood but a Victorian post box still in use

18th of September
The first acorn to fall this year from the little oak tree in the pot at my front door

22nd of September
I am not much of a gardener but I do like to grow sweet peas.

24th of September (Early Morning)
I looked out of the bedroom window and noticed a strange line of low cloud following the path of the river Tyne

Further down the river the morning sun had mostly dispersed the mysterious looking cloud river

Back to bed for a few hours!
29th of September
Eye test day today!
I have been experiencing increasing difficulty when trying to see things close-up, after struggling for months with a range non presciption reading glasses of various strengths and other magnifying devices I finally got around to booking an eye test. I asked for some glasses that could help me when working on things that required good close up vision. I was told my new glasses would be ready in a week to ten days, I hope they make things a bit easier for me.
On my way back from the opticians I passed through the churchyard, it was a lovely sunny day. I noticed this little headstone and wondered if my eyes were worse than I had thought!

No, I wasn't seeing double! It looks as if the letter cutter must have had a change of mind on the line spacing? I wonder if the unwanted letters were disguised with some filling material that has disappeared in the last two hundred and forty odd years? I think they must have been working quickly and have lined the letters up with the numbers then looked back and realised they didn't line up with the letters at the start of the line so re did them higher?

First George Harrison now Bob Marley?
In my first post I showed a headstone marked with the name George Harrison today I happened to see this old grave slab having the name "Robert Marley of Dunston" who died in 1773 aged 91

Another picture of the old Lime trees in the churchyard, the early autumn sun shining in

I picked a few pears off my little pear tree to take some of the weight off the branches, as there are a lot on this year. I like to leave them on as long as possible before picking.

My Sweet peas and yew tree with its red berries behind, at my front door

I finally got around to painting my upstairs window frames this year. I like the old original wooden frames but unfortunately I am not that keen on house painting

1st of October
More ripe acorns from my little oak tree, I plan to plant them later in autumn

2nd of october (evening)
New glasses!

6th of October (After midnight)
I made a beech wood handle for a large gouge to test and get used to the new glasses

I made the handle long so it can be pushed with the body as well as my hand. I tried to make the end of the handle wide to spread the force and gently rounded for comfort in use

8th of October (just before midnight)
Precious wood
I bought another big old gouge off e-bay. It had a newish but in my mind inappropriate handle which was easily removed. Looking for a bit of suitable wood for another handle, I found a bit of beech which I got from a large fallen branch many years ago. I had been keeping this bit of wood for something special as it had a nice ripple figure in the grain.
9th of October (After midnight)
Sawing the basic tapered shape of the handle

The handle ready for planing to shape

Burnishing the finished and fitted handle by rubbing it with shavings gives the wood a nice sheen

The ripple not usually seen in beech can be seen here

I put some linseed oil on the plain and rippled beech handles and the figure is, to me, quite pleasing in fact spectacular.
I'm glad I decided to finally use that bit of precious wood after saving it for about thirty years!

10th of october
My Pear Harvest

I chose to pick this pear first because of its distinctive kiwi like appearance

Ready to go in the basket

The basket full and the last pear on the tree. I think I picked at them at the right time as I found four had fallen off already, it has been quite windy. One of the windfalls had been nibbled by something so I left it but kept the other three

Every year I get a bit obsessed with counting the pears picked

The last pear, hiding in the bottom of the basket

It looks like it is asleep!

I counted 54 pears, weighing about twelve and a half pounds. I know I am biased but they do taste better, sweeter, than most Conference pears you get from shops.

11th of October (After midnight)
Back to the Violins at last!

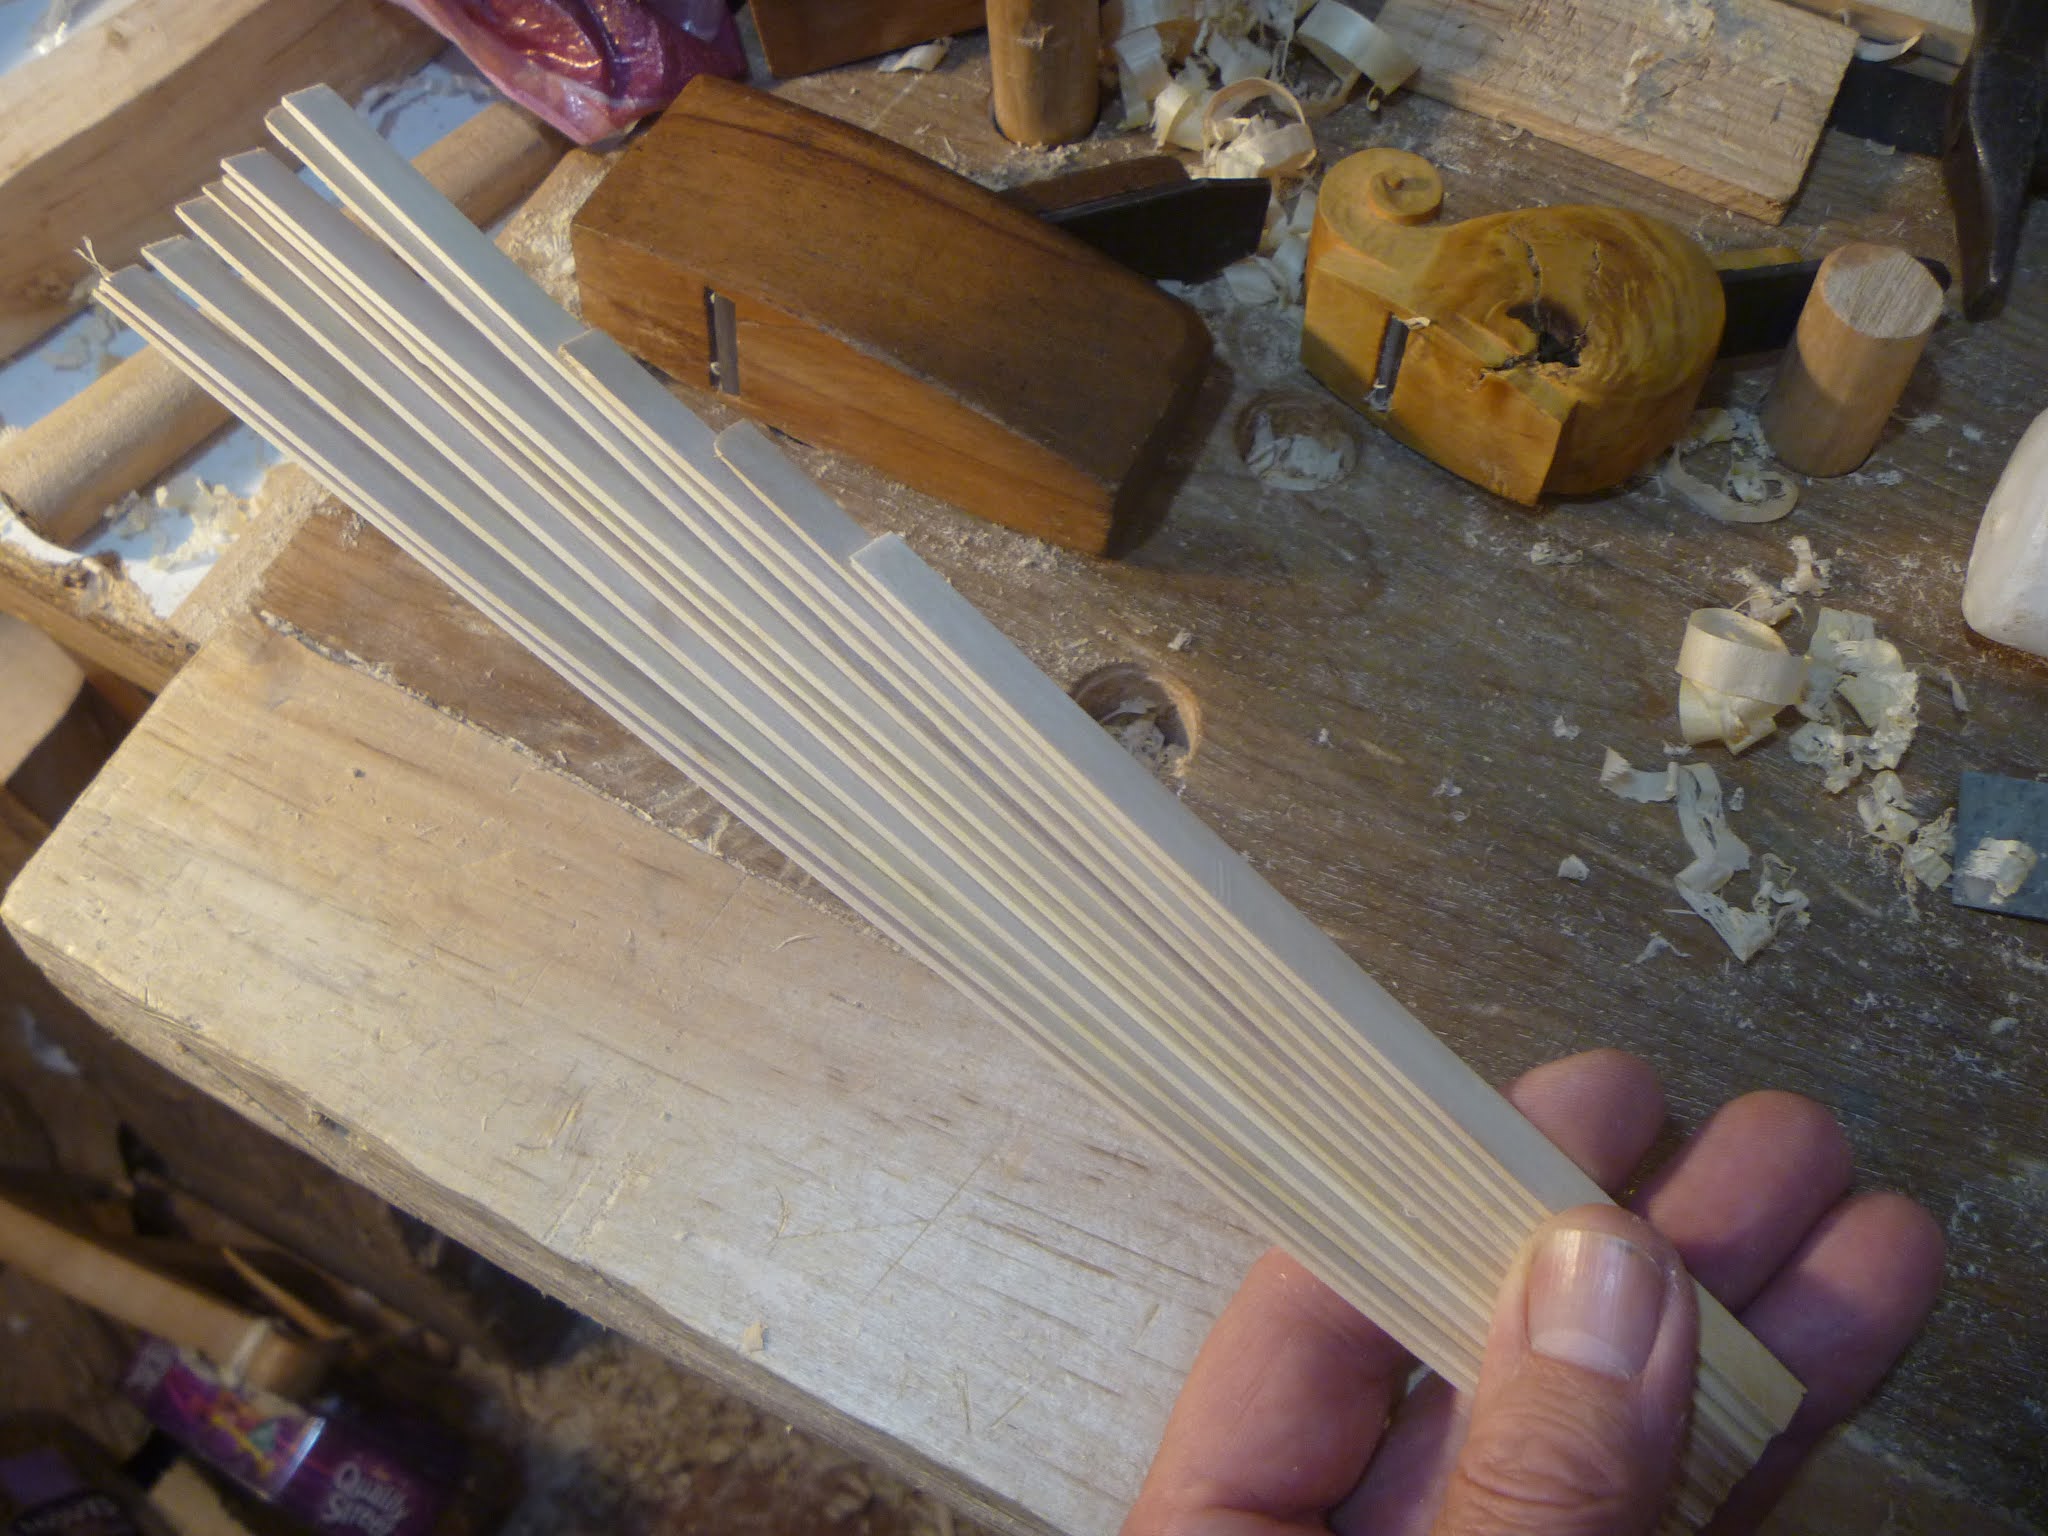
Cutting strips of purfling around 2mm wide

The cut strips lying behind my simple thicknessing scraper arrangement, wedged in the notch on the experimental bench top

The thicknessing scraper consists of an oldish plane blade clamped onto a piece of wood with an opening sawn into it.

A piece of ebony scrap has been glued on the face of the opening
opposite the blade to resist wear as the veneer strips are pulled over
it. I should really have devised some kind of wedge to hold the blade but I have delayed my violin making enough so I used an old small iron g clamp

I tapped the blade with a hammer until the opening looked right - halfway beween one and one and a half millimetres on my rule

The top opening on the scraper is tapered to allow the thickness to be removed in several passes, lowering the strip in the opening, guided by fingers, after each pass, I turned the strip to try to thin the outer black veneers reasonably equally.

I sharpened the blade to have a slight arch. I set the blade so the highest point of the arch was at the desired ninimum measurement, when the strips are down to required thinness they slip past the apex of the blade. I passed each of the strips through a few times, gently guiding them downwards on each pass and finally through the narrowest area of the opening until no more material was removed.

16th of October
Ribs set into the back
I was aware that when old violins have the ribs set into the back there were various ways of doing this (I had heard this discussed at the British Violin Making Association conference: Early Violin Making in Northern Europe, 1560-1725) ranging from a fully formed u shaped groove, to a V shaped channel with the outside line being a vertical cut, to shallow channels or grooves only at the violin corners to help keep them in place. It seems that ribs/sides grooved into both the back and top are less commonly found.
(Late in the evening)
Having done a bit more looking around on the internet it seems that the most common type of rib channel found on old violin backs is the V shaped one. Here are some pictures showing an experiment in making a V shaped crib channel on some scrap wood, first making the outer line with a purfling cutter and using a small chisel to complete the channel

The edges of the rib are gently scraped and bevelled to fit nicely into the V shaped channel. I am trying this on a piece of scrap rib here

The bevelled scrap rib fits quite well in the channel

17th of October (After midnight)
Eccentric Pegs! The shape of things to cam?
One of things contributing to my purfling problems is the puzzle of how to hold a top or back which has been arched internally, the waste that could be screwed or nailed into to fix it to a work surface has been removed! I tried to think of a simple way of holding an arched violin back so I could use both hands to control the purfling cutter and could be used on my existing peg worktop setup. I also need to be able to firmly hold an arched back face down while I was cutting my rib channels. After some thought I thought I would try making some special pegs, for my small work top, which had larger, eccentric, upper parts that could be turned to tighten the workpiece against the notched pegs I already used to hopefully hold things firmly but gently?
I selected some small bits of limewood to make the cam pegs, nice and soft to work and less liable to make marks on the work held. I drew the idea on the wood and got started with a mallet, chisel, saw and knife

The peg taking shape. I trimmed the small diameter to fit firmly into my work board testing the fit in the holes frequently

Finished eccentric/cam peg

Testing

The peg is turned and it presses firmly against the violin back

The back is held firmly when pressed against the grooved pegs. Small scraps of wood can be placed below the area being worked on to resist the downward pressure of the purfling cutter

It seems to hold the work nice and firm!

Trying it out with the back arch uppermost

I found the first one I made, being short, was quite hard to grip with the hand while turning so I made a longer peg which wrked better then an even longer one (the sizes were dictated by the size of the scraps) The longest being easiest to grip. I'll see how well they work when I eventually start on the much dreaded purfling!

17th of October (Just before midnight)
Here I have used my newly made eccentric peg to clamp the Old Enoch/ Wise violin back while cutting the purfling channels.

I have to keep moving the pegs and back around so I can access and work
on the whole outline. It is a bit fiddly but at least now I can use both
hands to control the cutting. Except for here when taking photos!

My new glasses are taking a bit of time to get accustomed to but they also improved matters. The purfling channel is not perfect but definitely better than on the first violin

I have to admit, the problems I am having holding the backs are mainly of my own making because I am trying to adapt the pegs and workboard I already have to several different sizes of violin. Also having done the internal arching first I have removed the waste wood that can be used to take screws (or perhaps more historically nails?) to fasten the plate to a work board and I am also trying to avoid the use of modern screw clamps. I am sure that past makers once they had established model sizes and shapes would have efficient jigs and devices that would have made holding their work quick and easy?
18th of October (After midnight)
Here I have cut the purfling grooves up to the corners. They are not perfect but are better than on my first violin in that this time I managed to keep control the cutter more and keep the groove around the planned width of 1.2 mm to fit my scraped purfling strips

18th of October (Late evening)
Here I am marking the corners of the purfling channel using a small gouge for the tighter curve
then a larger gouge for the other, shallower curve

The left and right bevel knives I made came in handy deepening the marks especially in the corners

19th of October (after midnight)
To help my eccentric pegs hold violins of varying sizes I made some small grooved spacers to go between the pegs and the workpiece

Testing the spacers

These spacers should hopefully allow my workboard to accomodate different sized violins without having to drill more peg holes

20th of October (Just before midnight)
Here I am planing a piece of scrap wood to make a curved template to guide my knife when cutting the purfling groove in the area below the button

Then I refined the curve on the template with a file

Using the template to guide the knife

Carefully deepening the knife cuts

21st of October (After midnight)
Gluing in the purling strip in the lower bout

Scraping a small amount of wood off the bottom of the purfling strip, before bending, to help it slip into the groove during gluing

22nd of October (After midnight)
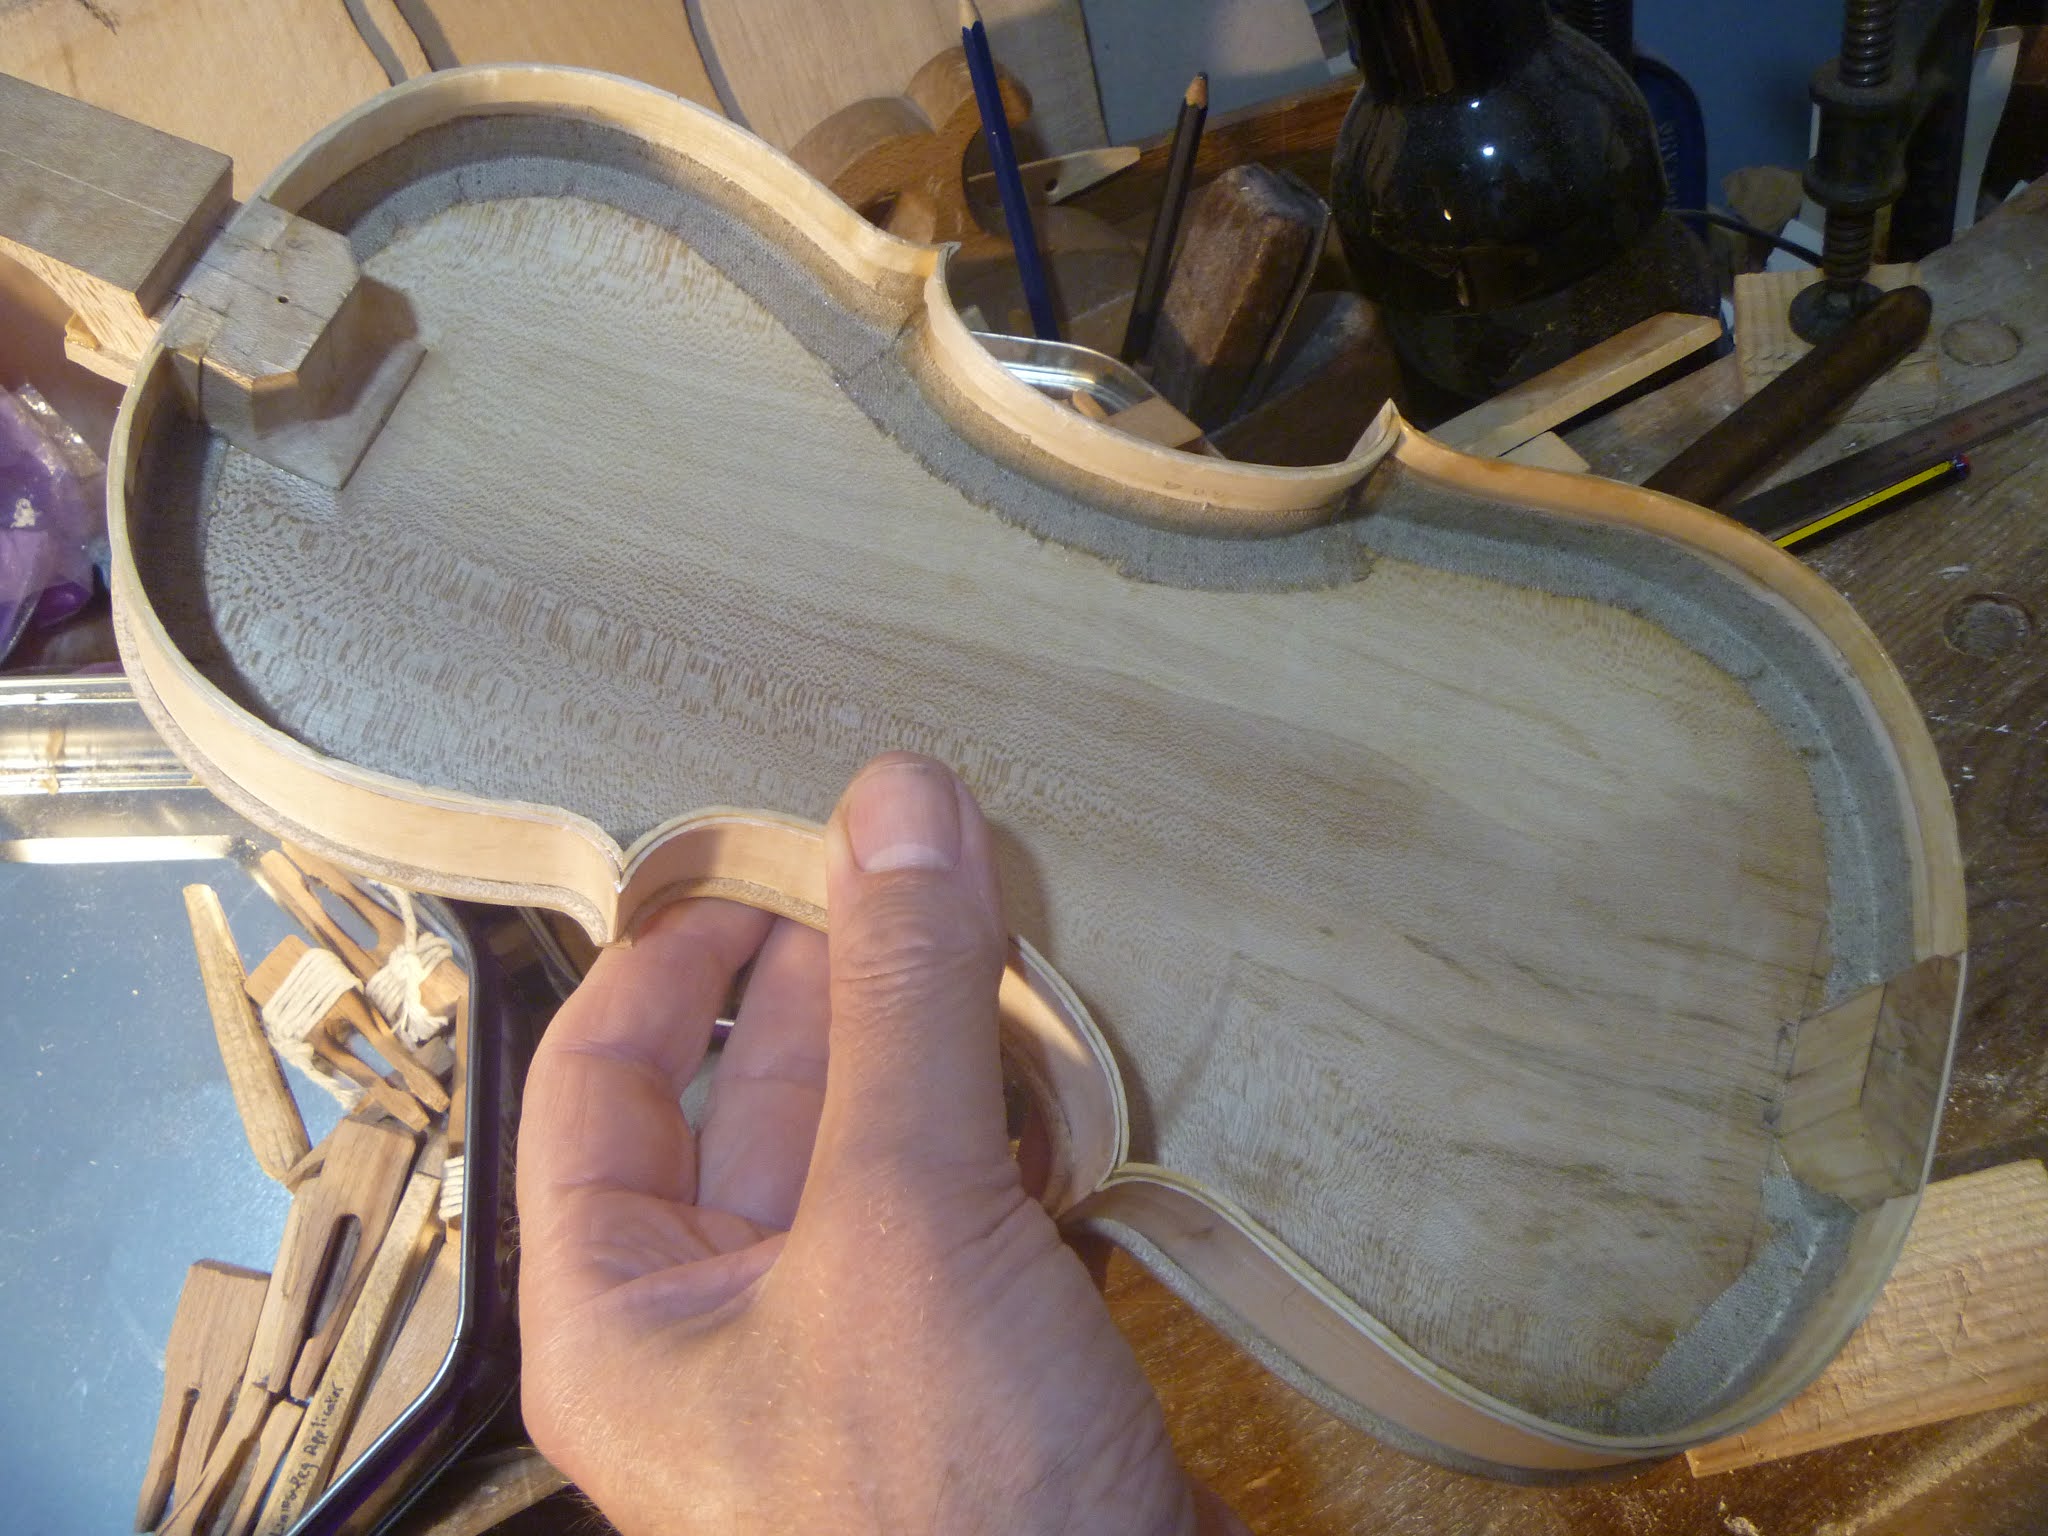
Here all the purfling has been glued in place

Varnish 'cooking'

While it is still hot I used a small metal sieve to remove the large particles of unwanted material

I brushed some of my new varnish on some scrap spuce and sycamore to get an idea of how it might work and the colour looks ok. I didn't really allow it to dry before applying further coats to assess the colour, hence the streaky appearance, but I hope that when it is applied with more care and a nicer brush an acceptable finish will be attained

23rd of October (Late afternoon)
Some autumn colour on a Japanes maple, I think

An autumnal picture of the lime tree in the churchyard

The leaf canopy is of the churchyard is yellowing and thinning

26th of October (Nearly midnight)

I set my purfling cutter to cut a line about half a millimetre nearer the edge than the outside of the purfling groove to reduce the chance of cutting through the edge by accident and to try to retain strength

Here the back is being held, "inside up", on my workboard while the line is cut

I used the purfling cutter right up to the corners thinking the line of the ribs should follow the edges (unlike the purfling corners which are usually marked with gouges in order to improve their appearance and to create 'bee stings' they are made to deviate slightly from the lines of the corners)

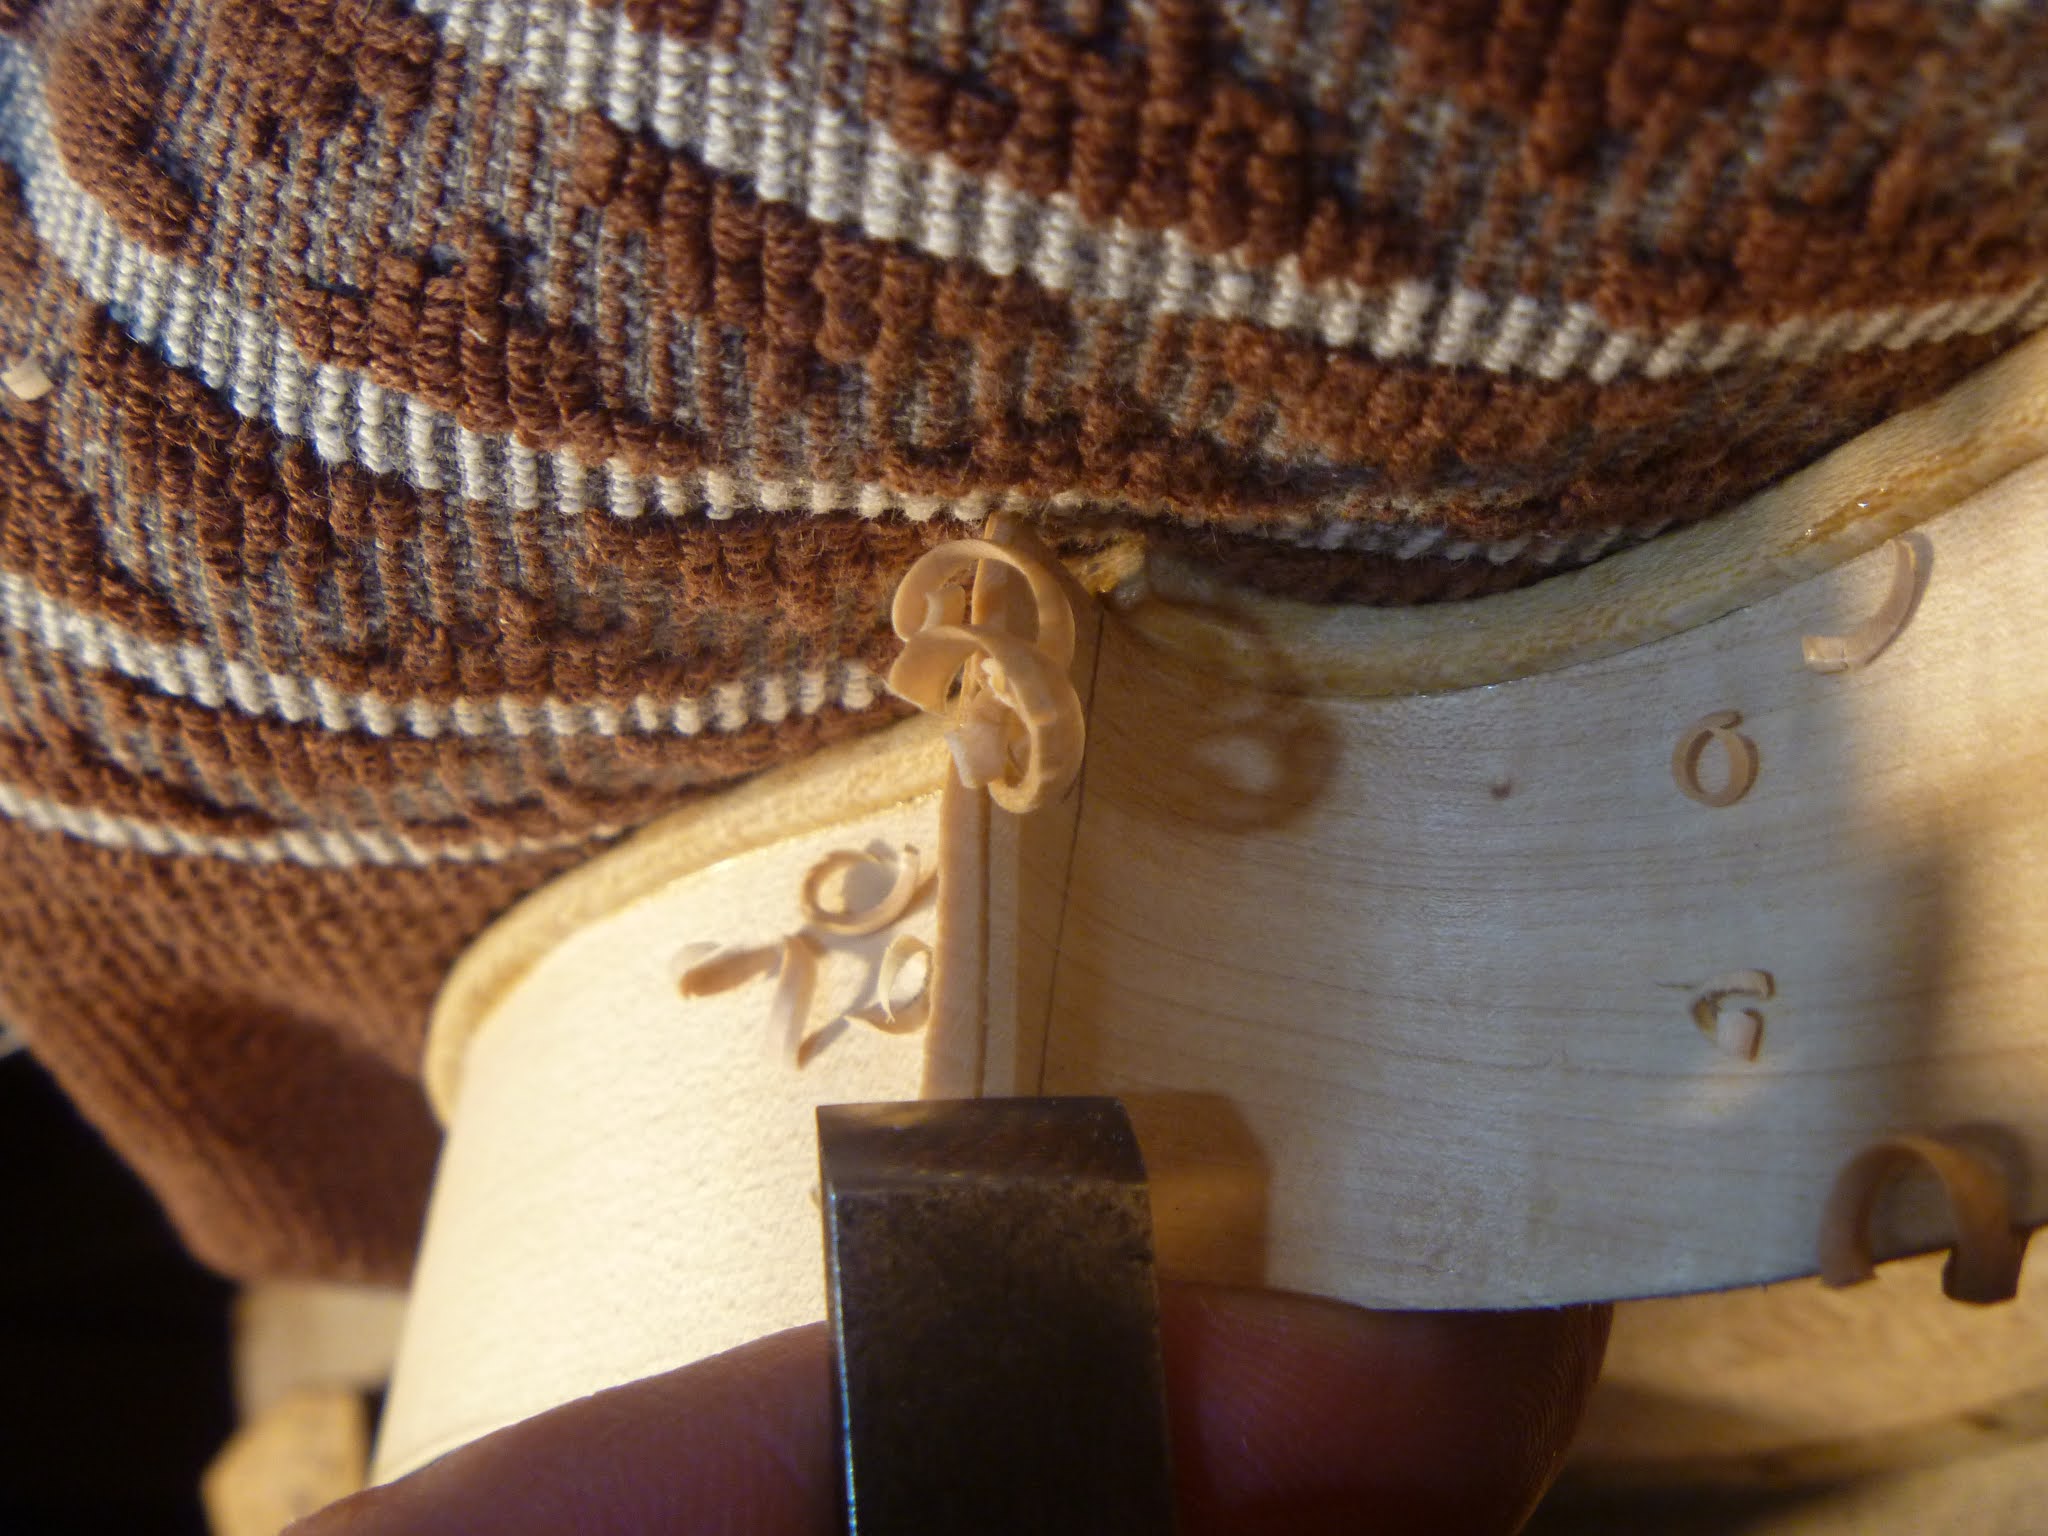
I used my coarse oilstone to grind a curved edge on an old chisel for use when cutting the sloped side of the rib channel

Using a knife and my wooden template to mark the channel in the area below the button. I didn't need to take the line all the way across the button area as the neck will be here

My curved chisel in action cutting a slope down to the line made by the purfling cutter.

One of the last pears from this years harvest. I picked it first and I kept it until last because of its distinctive appearance! They seemed extra tasty this year!
 |
| A penguinish pear or a Kiwi? |
Using a narrow straight chisel to cut the channel slopes in the corners

I used a slightly wider straight chisel on the straighter parts

The curved chisel on the internal curves

The finished rib channel. I estimated the width, aiming for a slope large enough to accomodate a rib thickness

Another view of the rib channels and the platform for the neck

A picture of the components of the small experimental historical bench top I am using (clamped to my full size bench top) for much of the work. A notch at the front, used with a wedge acts as a vice. The pegs are used in the holes as stops to plane or saw against and with wedges for holding work on the top of the bench

21st of November (After midnight)
Horsetailing around!
I bought some Horsetail form an art supplier over 15 years ago now and I am actually getting around to trying it out. I looked on the internet to get some hints on how to use it and found one violin maker used it on a modern adhesive tape backing so I thought I would try to use some gummed paper strip to make a more old fashioned type version. Here the horsetails can be seen in their packaging, next to my big roll of gummed strip. They are egyptian, according to the package.

I used scissors to cut the dry and brittle horsetail to lengths suitable to fit on my paper tape and used a knife to open the 'tube' up on one side

Softening the cut horsetail in warm water for a few minutes so it can be opened up and flattened

The excess water is wiped off and then the flattened horsetail section is applied to the gummed side of the tape

Applying more,

I used an old sock as an absorbent layer on the damp horsetail and tape. (Underneath is a layer of newspaper on top of the bare wood of my shooting board so moisture shouldn't be able to escape)

Then placed a piece of wood and a heavy old plane on top to press things flat during drying

22nd of November (After midnight)
The result, the horsetail stuck on the tape, not very firmly but well enough to try out

Here I am trimming excess paper tape off

I decided to cut the tape into small pieces dictated by the size of the horstail strips

I tried it out on a piece of sycamore and it is a fine abrasive and seems to produce a pleasant silky burnished type of finish. I learned that when using it on my violin I will have to scrape things carefully to get as nice a surface as possible as horsetail doesn't seem to take much material off so any unwanted uneveness will remain but will be burnished?

22nd of November (Evening)
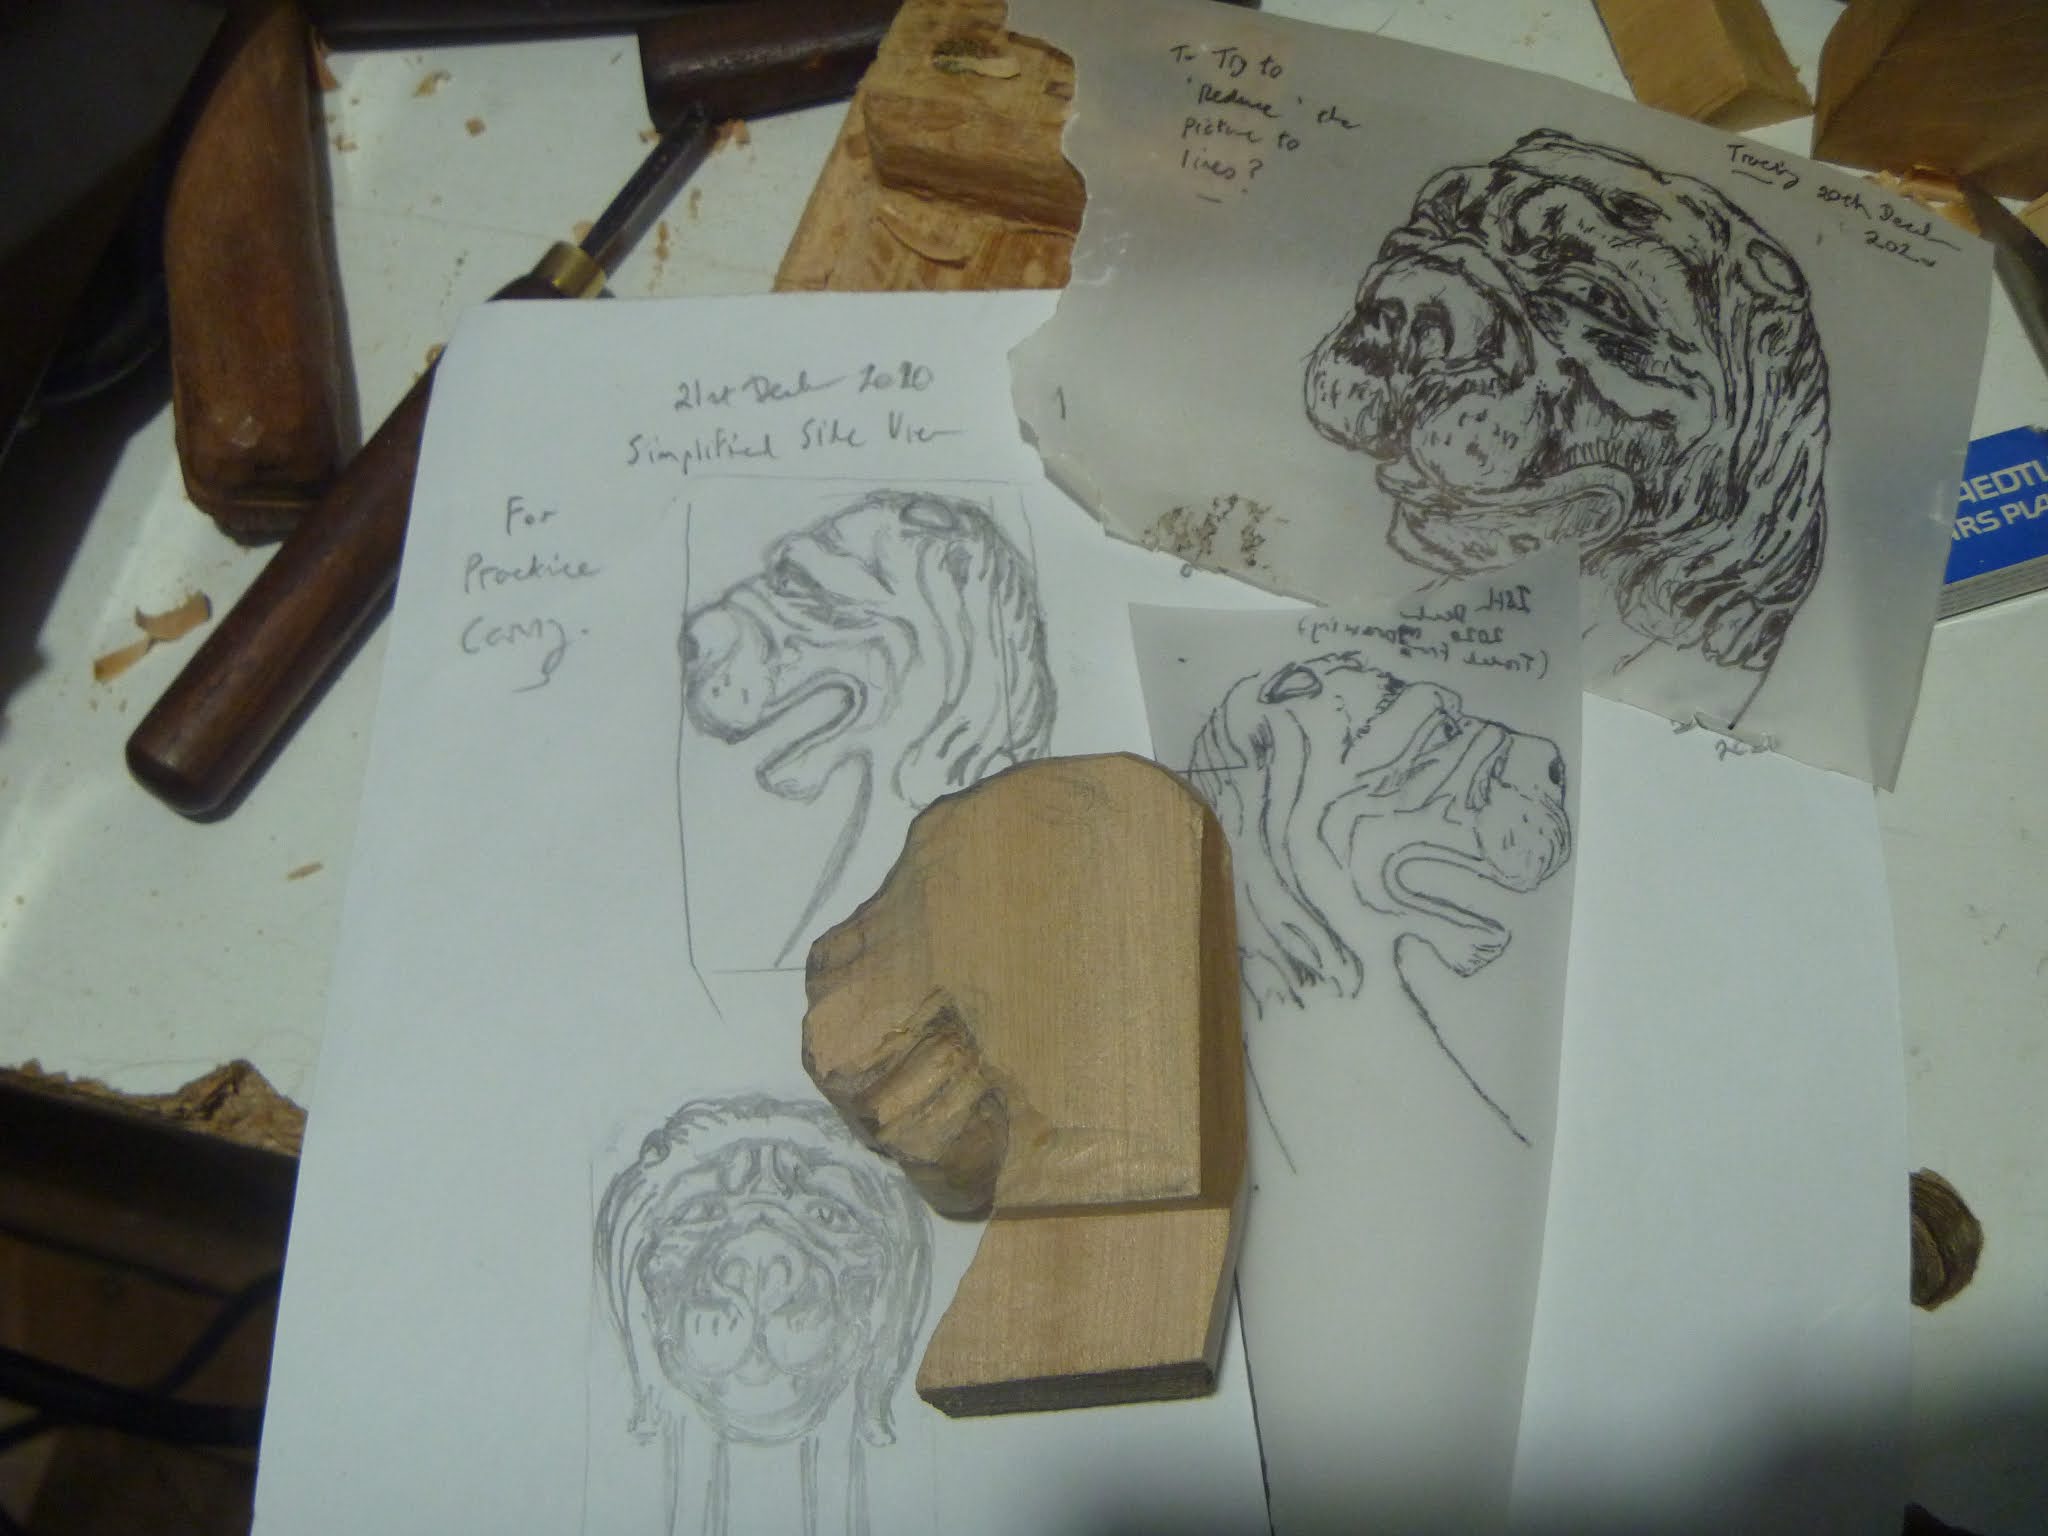
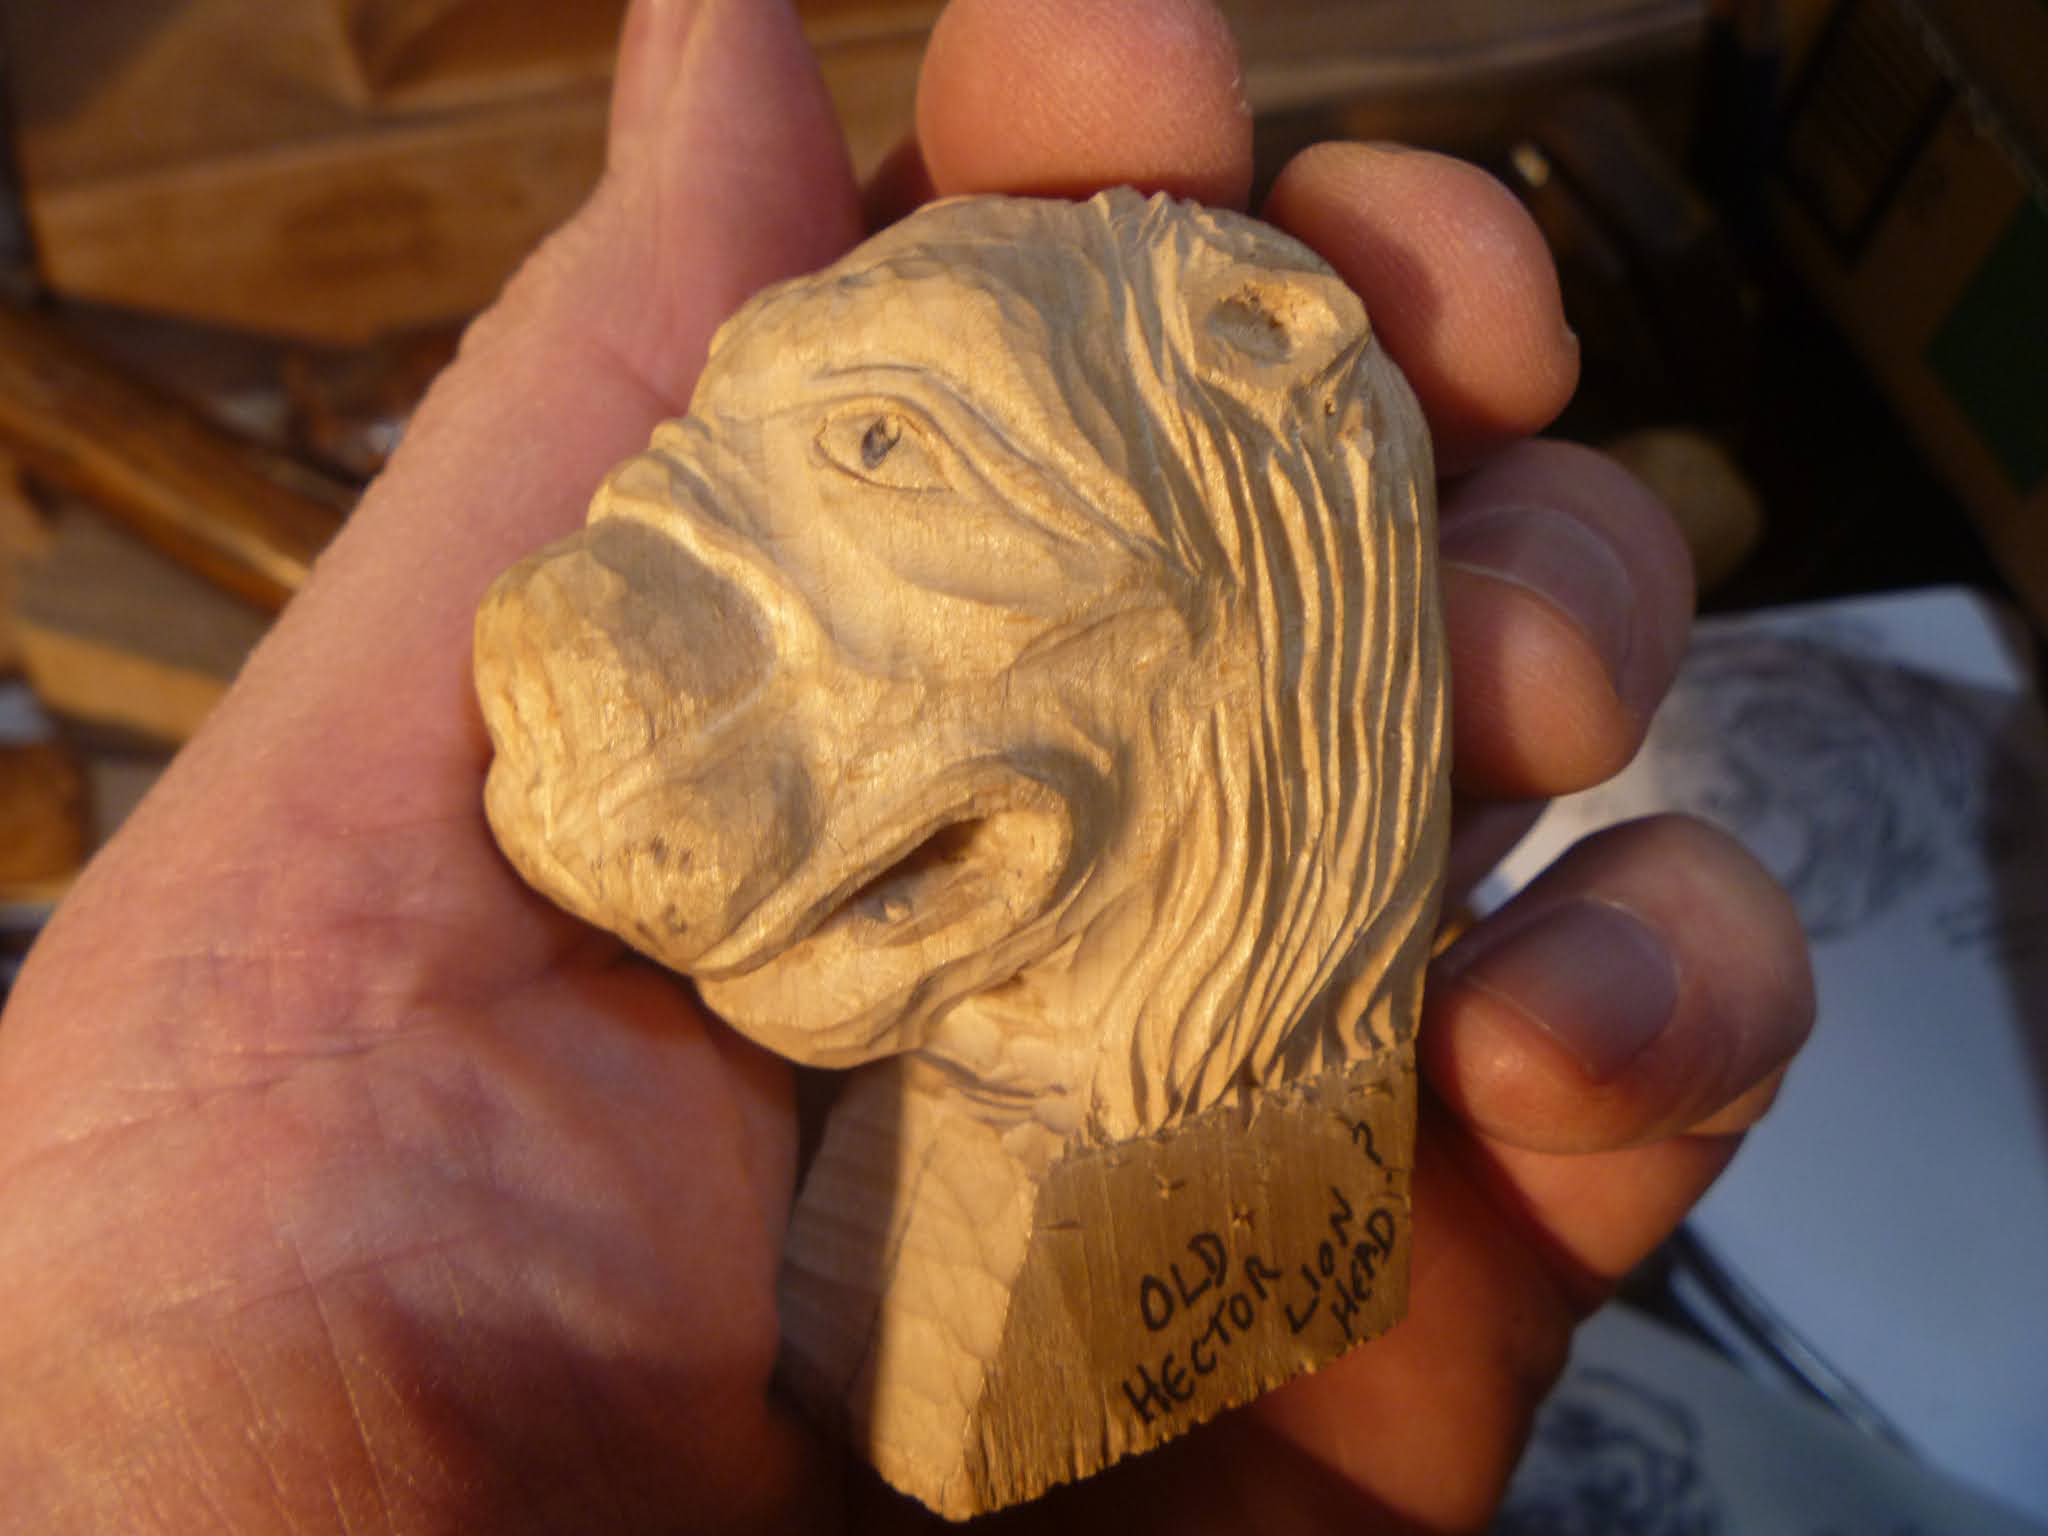
I am toying with the idea of trying to make a lion head on one of these violns so I have made a drawing from a book and here I am experimenting with making a plasticine model. I seemed to have made a bit of a doglike lion - more work to do here!
 |
| "Woof!" said Old Hector |
24th of November
Autumn Leaves
Late autumn in the churchyard, on my route to the shops

The ground under the horse chestnut is carpeted with fallen leaves

The churchyard Lime trees are bare now

A pile of leaves has gathered next to a butress on the old church as if to tempt passing hedghogs?

The leaves have gathered in a narrow passage next to the churchyard. This little path was apparently known as "Fat man squeeze", I remember enjoying going along its narrowness when I was very small and still like it today

I noticed the interesting spelling of daughter on this little old headstone

Horse chestnut leaves, mainly, looking a nice mellow autumn red brown

11th of December (evening)
Another attempt at modlling a violin lion head

21st of December

I made a tracing of the photo of the Lion head in my book (seen here under the wood block) and I then took a small piece of limewood from my scraps (from a tree felled in the north part of the churchyard over 30 years ago) to start to try to carve a practice lion head. I tried work out what the side profile would look like and made a drawing seen next to the block.

Roughly sawing off waste material

The roughly sawn block next to the tracing

I hadn't thought about this but realised the good thing about tracing paper is the image can be reversed just by turning the paper over

On my way to the shops, the last time before Christmas. It was getting dark and a little bit of mist in the air made the little road next to the Churchyard look suitably mysterious

24th of December

28th of December
Having discovered the useful reversibility of tracings I traced the drawing of the side view of the lion I had made so the one drawing could be then be used for both sides of the head
29th of December
I had started to shape the nose and face a bit before establishing the profile this was a bit of a mistake as it made it a bit harder to draw and then cut the profile

Using a brace and small shell bit to drill the mouth

The rear of the mouth drilled

Starting to model the nose and eyes

Animal Dentistry
Here I am drilling out the front of the mouth. I have modelled the face a bit more

Material has been drilled out of the mouth allowing the teeth to be formed, my lion has only two

I find the eyes difficult as the lids are very easily broken. My lion ended up with two quite different eyes

30th of December
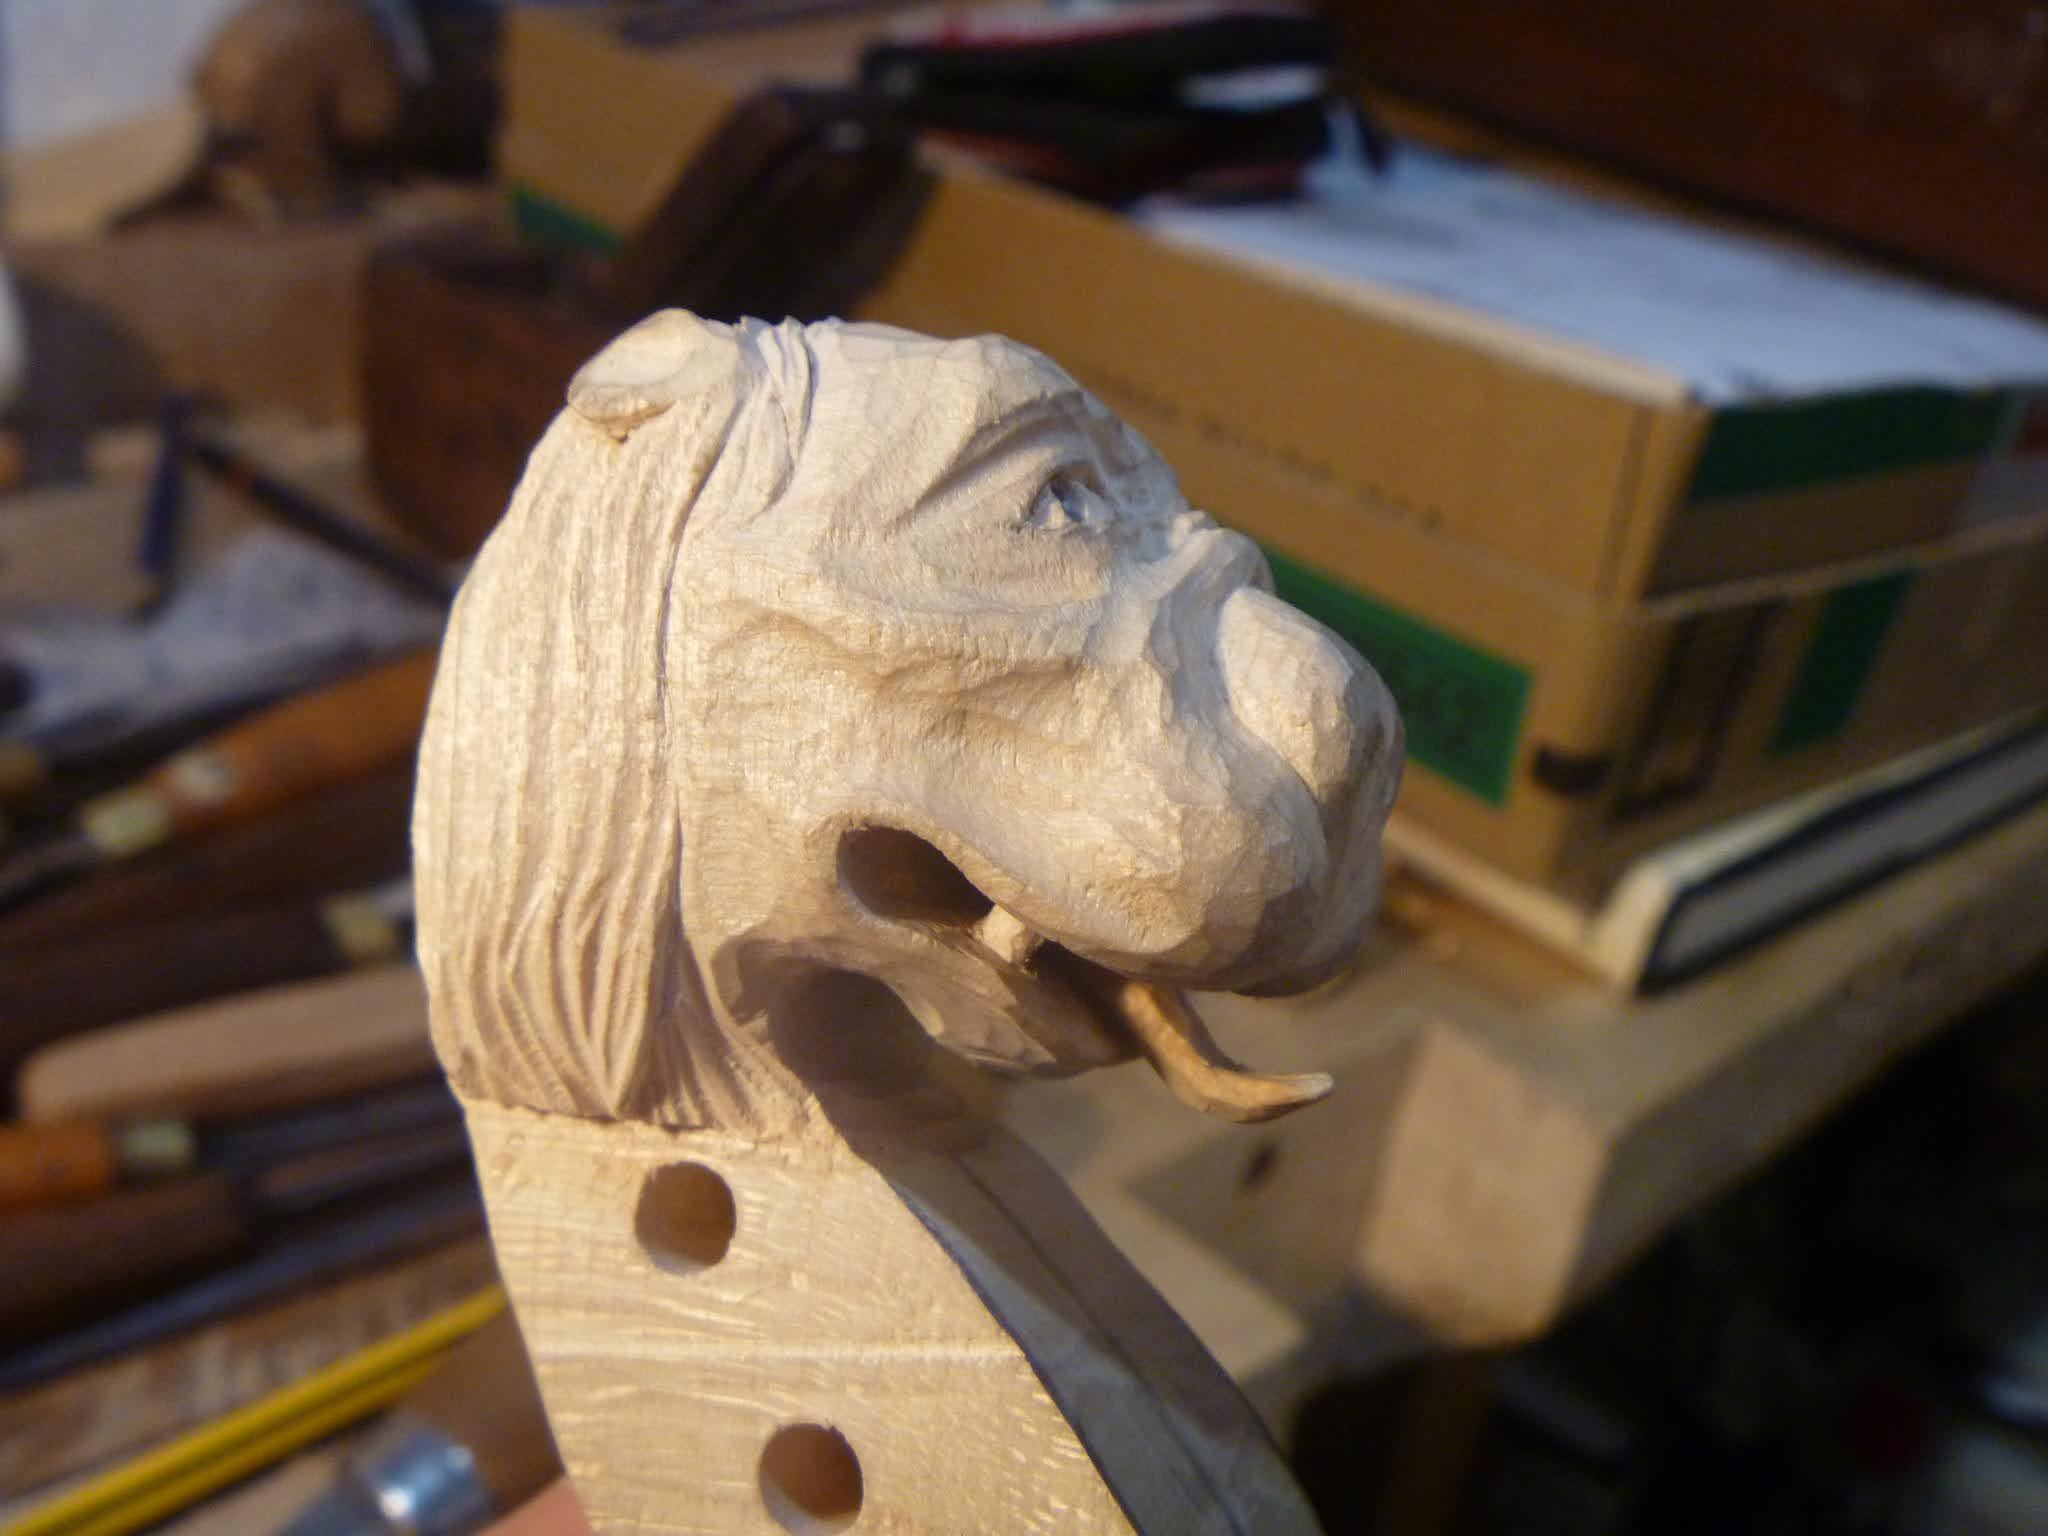
Starting to do the 'mane' and ears

I used a pencil to add some pupils to his eyes and some whisker marks. He is looking quite dog-like. I didn't leave enough wood for his mane but hopefully I can avoid some of these problems on the real violin neck

31st of December
I thought it would be helpful to try to make the mane have a bit of a 'crown' shown here roughly outlined with a v shaped gouge.

Here I have shaped the teeth and mouth a bit more

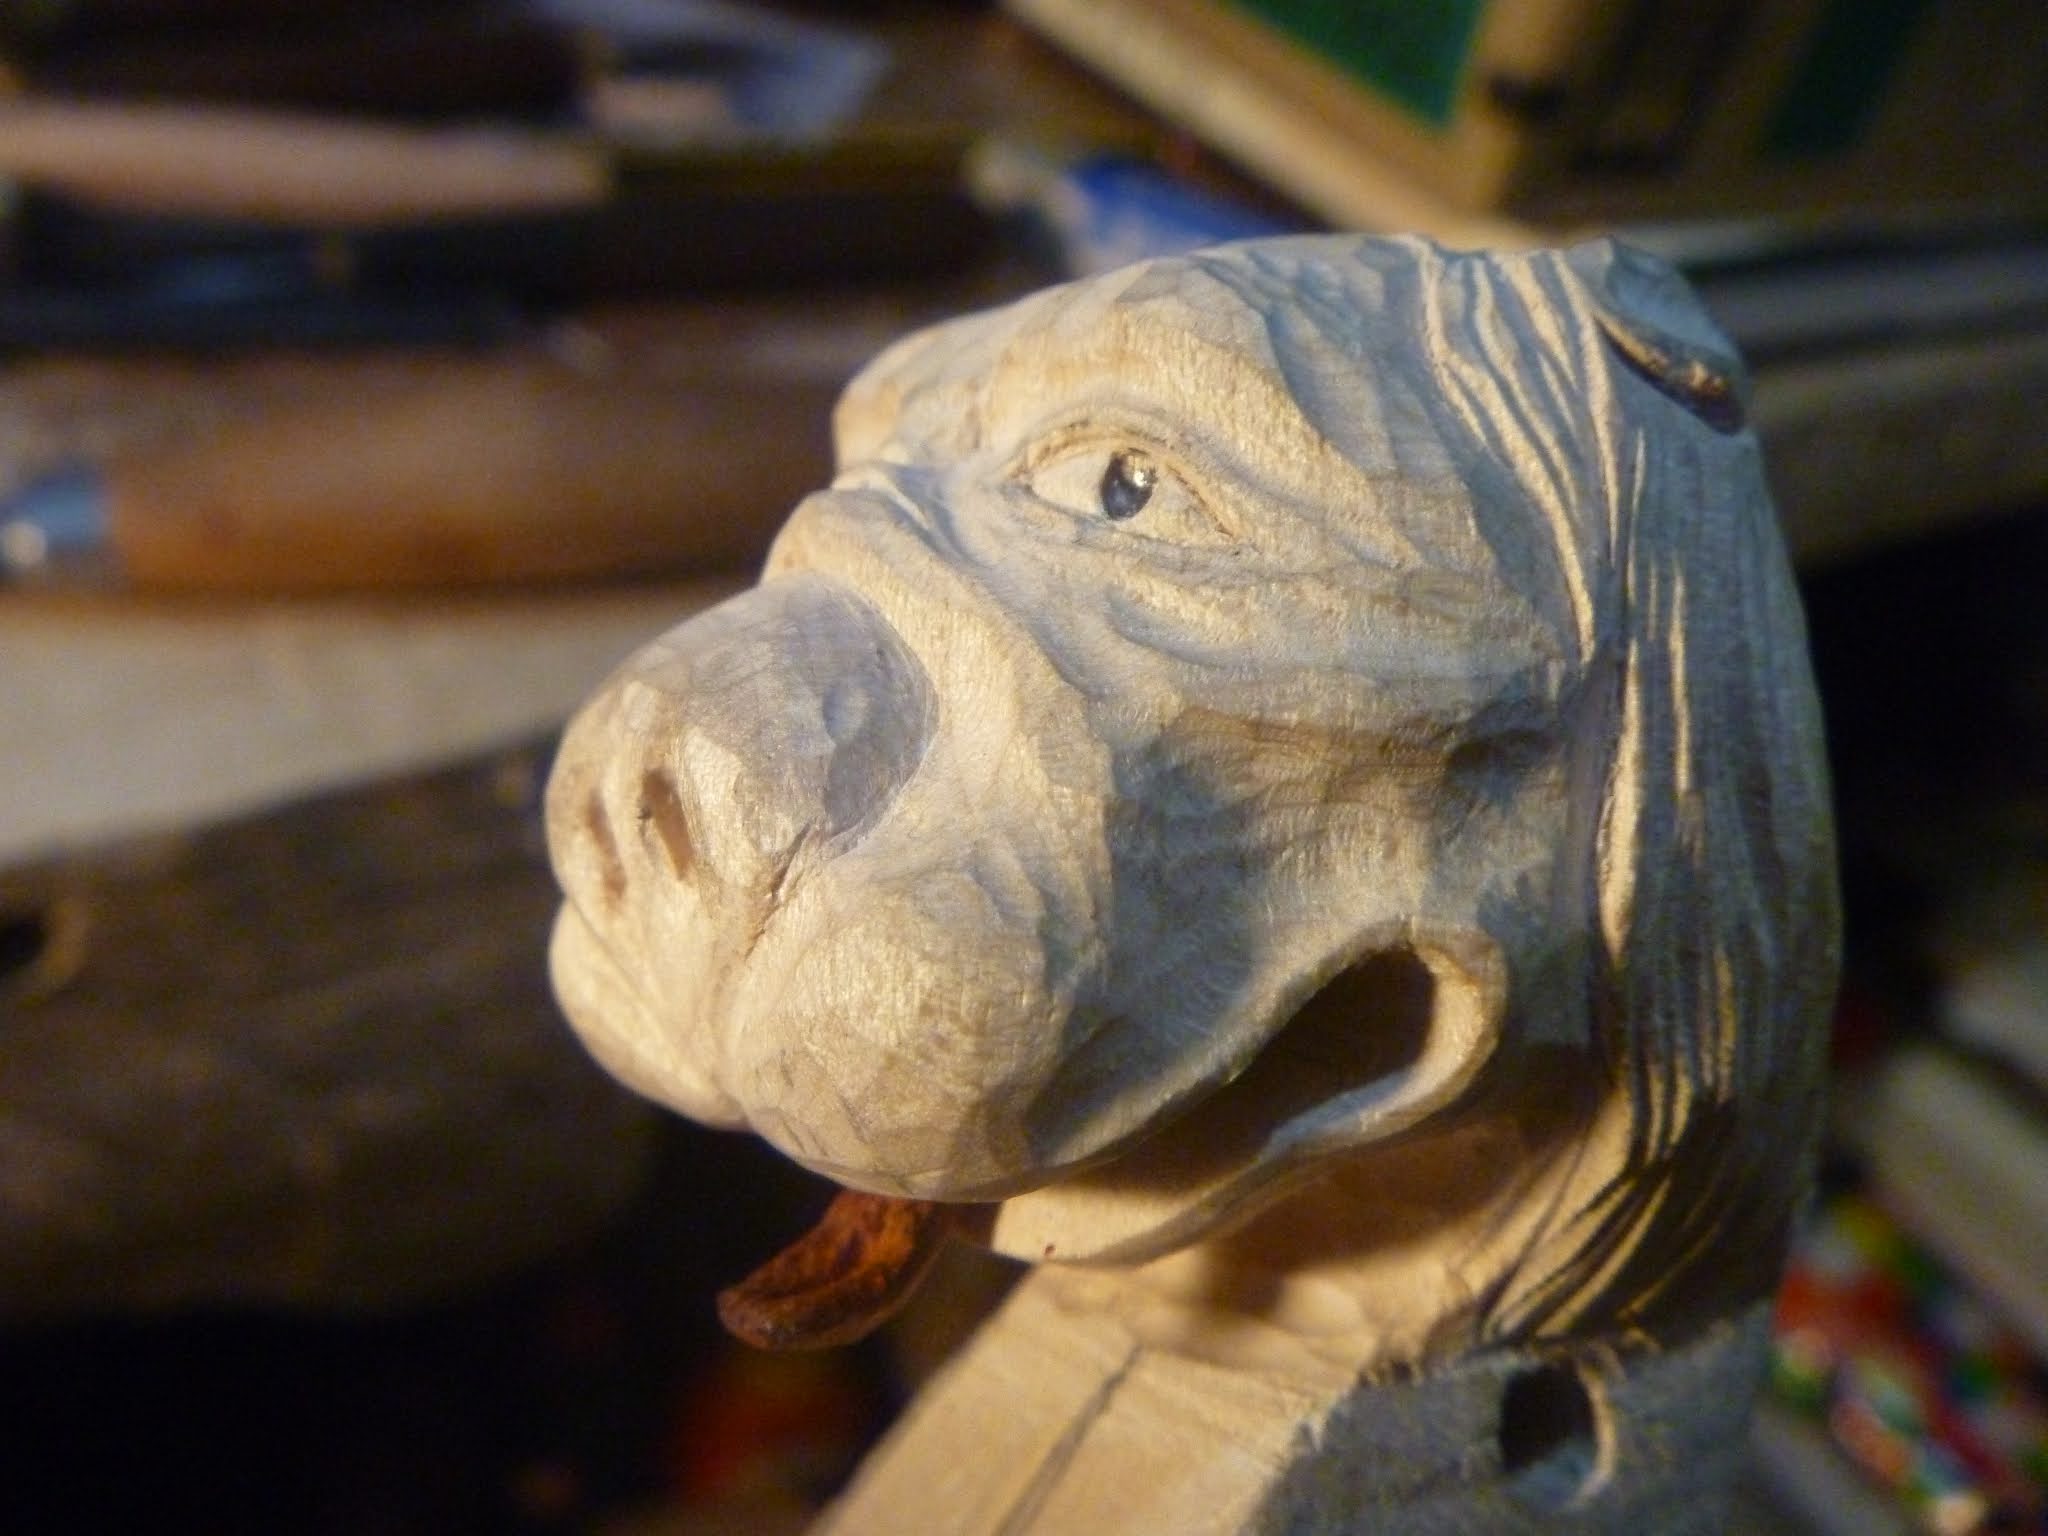
Here I have rather unwisely put some pencil into his eyebrow area and modelled his face a bit more

1st of January 2021
I have worked a bit more on his mane, ears and face and will leave him now

Both sides are different
"Roar-Woof!"

More lionish in this view?

After a coat of shellac

Despite his imperfections I am quite pleased with him

He does look lionish from some views

And he is quite different on each side but making him has been fun and I have learned a few things. I had better keep my gouges and chisels a bit sharper on the next head!

2nd of January 2021


I used a tenon saw to remove some waste and then used a chisel to shape the front of the pegbox

I then roughly shaped the back with a gouge

3rd of January 2021
I then drew the outline on both sides so I could start to work on the profile of the head

I then used my knife to cut a chamfer down to the outline


I also bored holes at the back of the lions mouth and below his chin

I then made some sawcuts down to near the lines marking the outside of the pegbox


6th of January 2021
Here I am sawing down to the holes I made under the chin and at the mouth. Luckily I remembered the lions teeth and stopped sawing too far at the mouth!


7th of January 2021
I find the hair difficult. I decided to try cutting a basic wavy outline of the 'tresses' using a shallowish gouge


8th of January 2021


9th of January 2021


13th of January 2021


14th of January 2021

15th of January 2021


17th of January 2021


19th of January 2021


20th of January 2021

21st of January 2021


22nd of January 2021

28th of January 2021


31st of January 2021


2nd of February 2021


3rd of February 2021


7th of February 2021

8th of February 2021


9th of February 2021


10th of February 2021


11th of February 2021


12th of February 2021

13th of February 2021


14th of February 2021

16th of February 2021


19th of February 2021


20th of February 2021

21st of February 2021


23rd of February 2021


24th of February 2021


25th of February 2021


26th of February 2021

1st of March 2021

3rd of March 2021


5th of March 2021


6th of March 2021


7th of March 2021


8th of March 2021


9th of March 2021


10th of March 2021

11th of March 2021


13th of March 2021
I'll hopefully get around to writing some explanations soon on the past couple of months pictures


14th of March 2021
Here I am seeing how my homemade clamps might work, no glue, as a bit of a dry/trial run


22nd of March 2021


24th of March 2021


28th of March 2021


13th of August 2015


14th August 2015


Late 16th Century in Northern Italy
 |
| Building the ark (detail) Jacopo bassano late 16th C |

1st of April 2021


2nd of April 2021


3rd of April 2021


4th of April 2021

5th of April 2021


9th of April 2021


10th of April 2021


11th of April 2021


12th of April 2021


14th of April 2021


16th of April 2021


17th of April 2021


18th of April 2021


19th of April 2021


20th of April 2021

23rd of April 2021


24th of April 2021

25th of April 2021


26th of April 2021


27th of April 2021


28th of April 2021


30th of April 2021


1st of May 2021


2nd of May 2021

3rd of May 2021


4th of May 2021


9th of May 2021


10th of May 2021


11th of May 2021


12th of May 2021


14th of May 2021


15th of May 2021


16th of May 2021


17th of May 2021


18th of May 2021


31st of May 2021


1st of June 2021

2nd of June 2021

12th of June 2021


12th of June 2021


18th of June 2021

22nd of June 2021


23rd of June 2021


24th of June 2021


29th of June 2021


3rd of July 2021


7th of July 2021


8th of July 2021


10th of July 2021


11th of July 2021


12th of July 2021
13th of July 2021


15th of July 2021


16th of July 2021


23rd of July 2021


29th of July 2021


7th of August 2021


12th of August 2021


18th of August 2021


19th of August 2021


23rd of August 2021


26th of August 2021


27th of August 2021


28th of August 2021


1st of September 2021


2nd of September 2021


3rd of September 2021


7th of September 2021


13th of September 2021

14th of September 2021


15th of September 2021


16th of September 2021 (After midnight)


16th of September 2021 (late Afternoon)

23rd of September 2021


28th of September 2021

29th of September 2021


30th of September 2021


4th of October 2021


of October 2021


6th of October 2021 (After midnight)

7th of October 2021


8th of October 2021


21st of October 2021


22nd of October 2021


26th of October 2021


27th of October 2021


28th of October 2021


2nd of November 2021


3rd of November 2021

4th of November 2021


5th of November 2021


6th of November 2021 (after midnight)


2nd December 2021


3rd December 2021


8th December 2021
8th December 2021

9th December 2021

10th December 2021


15th December 2021


16th December 2021

17th December 2021


18th December 2021

31st December 2021


Hello, I will add to this blog again sometime but in case anyone is interested, I have been putting my violin making experiments and other woodwork stuff here (see below) for a while
Hans Kipferle's bench (Violin Cobbler) - Contemporary Maker's Gallery - Maestronet Forums
Small wooden man patiently awaiting his limbs, a few years ago.

Hello, I will add to this blog again sometime but in case anyone is interested, I have been putting my violin making experiments and other woodwork stuff here (see below) for a while
Hans Kipferle's bench (Violin Cobbler) - Contemporary Maker's Gallery - Maestronet Forums


Off to a good start! Am wondering how you’re going to control things with a curved back-it’ll be a bit unstable for building on, won’t it? Cheers, Rob.
ReplyDeleteOff to a good start! Am wondering how you’re going to control things with a curved back-it’ll be a bit unstable for building on, won’t it? Cheers, Rob.
ReplyDeleteOff to a good start! Am wondering how you’re going to control things with a curved back-it’ll be a bit unstable for building on, won’t it? Cheers, Rob.
ReplyDeleteIs the wood thickness going to be the same as on the ‘corona’ violin?
ReplyDeleteA bit early to class them as basket cases, innit!?
ReplyDeleteIs Old Enoch ‘Amati-esque’ and Uncle Toby ‘Stradivari-esque’? Just gauging by the bout to lengths.
Production line is cranking up!
Sorry, I meant vice-versa. Toby-Amati,Enoch-Strad.
ReplyDeleteI remember that ancient beech tree at the top of Dunston bank. My school bus passed it every morning, turning down the bank on the way to Hebburn. That would be between 1961 and 1966.
ReplyDeleteNice use of the distinctive figure in the wood for your mouthpiece stand.
Ah-back in the saddle! Window frames look good in that photo. The cams look like the solution to the problem I raised in my first comment.
ReplyDeleteHello Rob. I don't really anticipate any greater difficulties builiding on an arched back than I had on the first - built on a mould - violin. The problems I'm having holding the shaped and carved back are the same as they were on that one. I am having difficulties mainly because I am trying to adapt my existing work board for differing sizes of violin. I think I will encounter slightly different undoubtedly head-scratching and finger-numbing problems with the building on the back method but not really because of the arched back. In some ways this method is familiar to me from Spanish guitar - built on the front - making technique. Also, I used this method on the first small violin that I started (still unfinished) which I show in the 3rd, 4th and 5th photos of this posting so am already familiar with some of the aspects of building on the back. There are no books on this method of making, at least none that I have found, this strangely enough I quite like as it means I do not have set instructions to follow and I am free to go along my own fanciful violin cobblery path?
DeleteMy naïveté suggests to me that a large sandbag would be useful somehow but I confess to total ignorance regarding the process. Cutting edge violin construction!
DeleteHope you’re getting used to the new specs. All very interesting. Tally-Ho!
Excellent lion’s head- is the dark brown varnished head from a photograph? It appeared that you were going to graft your lion’s head on to a fiddle neck but it looks like you’re making two ‘conventional’ necks. The plot thickens!
ReplyDeleteWow - nice main!
ReplyDeleteThe bee stings look good and both backs look great. Wonder what you align the necks to?
ReplyDeleteIt’s exciting to watch the progress.
So interesting-two different structures for the violin bodies. Wonder how different they’ll sound?
ReplyDeleteI keep checking the blog and you seem to be making great progress.
Keep it going.
Where did the wood for the ‘tops’ come from?
ReplyDeleteInteresting to see the colour change in the ‘Corona’ violin top and back.